How To Share A Google Sheet
Being able to collaborate through spreadsheets online is a boon to those working at different hours, in different places, but still wanting to contribute to the overall project. You demand an easier way to share a recently created algorithm or data table but don’t know how to go about doing it.
Spreadsheets were created to help the human mind sort and label data in a way that makes sense to our brains so that we may process said data or other calculations at a later time. The process in which to share these particular spreadsheets should not be as difficult on our brains. This is where Google Sheets comes in.
You not only have the option to share your Google Sheets with friends, colleagues, or even total strangers, but also the ability to control exactly what they can and cannot do with them. Easily tackle the task of sharing your Google Sheets by following the steps provided below.
Varying Ways to Share a Google Sheet
There are a few ways in which to share a Google Sheet as well as what platforms you can do it on. I’ve provided a detailed how-to for each of the more prominent platforms that you’re likely to use.
On PC
- Log in to Google Sheets (or Google Drive) and open up the item you wish to share. If you want to share multiple items with the same recipients, hold down the Shift key when making your selection.
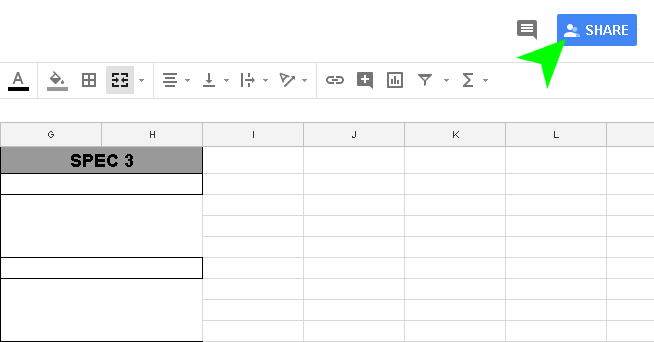
- Click the Share button in the top right corner of the screen.

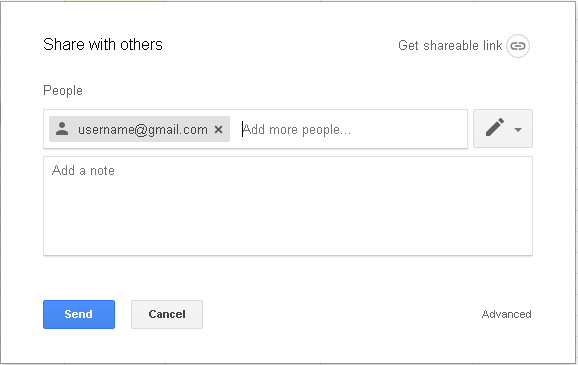
You’ll receive a pop-up box labeled “Share with others”.

- The pop-up provides a few areas of interest. The first being under the “People” section where you’re provided a box in which to type the email address of the recipient(s) of which you’re sharing the Google sheet. You can add multiple email addresses or groups to the recipient list up to a maximum of 200. Users without a registered Google Account will only be able to view the sheet.
- To the right of that box, there is a drop-down arrow that allows you to choose what the recipient is able to do with the Google sheet. The available options are Can Edit (allows the user to edit and add their own words and images to the sheet), Can Comment (allows the user to leave comments and highlights of different sections in the sheet), and Can View (allows the user only to view what is currently on the sheet).
- There is also an “Add a note” section if you’re wanting to convey a bit of information on what the Google sheet contains or anything else you feel pertinent for your reason to share.
- At the top right of the pop-up is the option marked “Get shareable link”. Click the icon to the right and you’re presented with a URL link that you can copy/paste. It also offers the same options as before to Edit, Comment, or View but in a marginally different way. You will have to decide if the link you’ve provided can be accessed by anyone on the internet, only those who have the link, or only those specified previously in step 3.
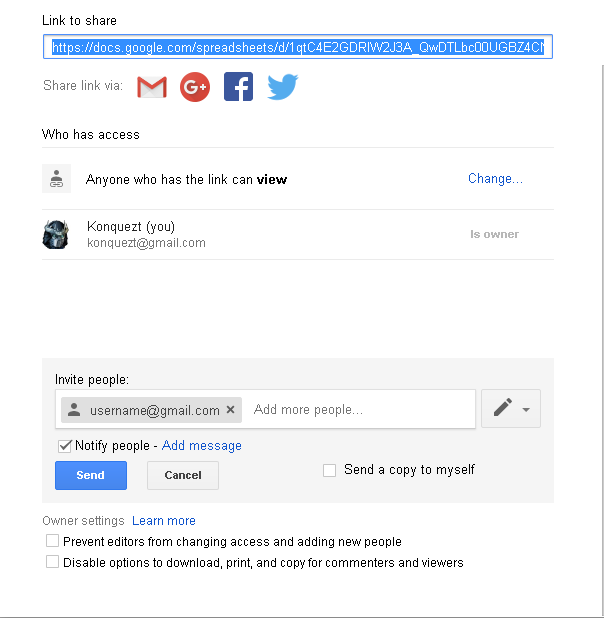
- If you want to take things a step further, at the lower right side of the pop-up, locate and click Advanced. The new screen should look like this:

- You now have access to the same share URL as before though the options are now only swappable through the Change… link to the right. You can now share your link directly to Gmail, Google+, Facebook, and Twitter by clicking the associated logos. A checkbox to “Notify people” is now present which enables you to leave a message – via Add message – to those who receive a copy of the sheet. You can also opt to have a copy sent to yourself by checking off the appropriate box.
- Below all of that will be a new section labeled “Owner settings”. This section offers more security to the Google sheet being sent. You can prevent editors from changing the security you have in place when it comes to adding new people and access to the sheet itself. In addition, you can disable the ability for any commenter or viewer receiving the sheet to download, print, or copy it.
Though more than 100 users can view the item, only a total combination of 100 editors or commentators can be working on the sheet at any one time.
As an Email Attachment
With the file open:
Click “File” at the top left and select Email as attachment… from the drop-down menu.
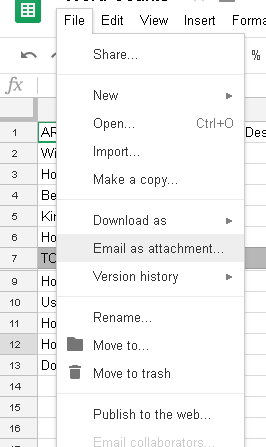
Using this option allows you to send the Google sheet via email as either a PDF or .xlsx file. Simply make your choice in the “Attach as” drop-down.
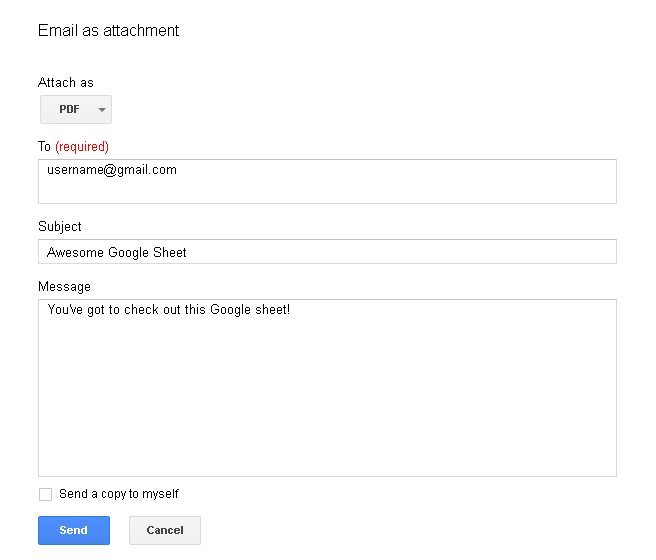
Add the recipient emails in the box provided along with the subject of the email as well as any message you wish to send with the attachment. There is also a checkbox if you want to have the email sent to you as well.
Once everything is in order, click Send.
On iPhone, iPad, and Android Mobile Devices
- Log in to Google Sheets (or open the Google Sheets app) and next to the item you wish to share, tap More

If you want to share multiple items, touch and hold a file you want to share. This will open up the option for multiple selections at which point you can tap each additional file that you wish to share. - Tap Add people. Similar to those on PC, only those with Google Accounts can access the shared file.
- Under the “people” section, add the email address or Google Group of whom you wish to share the file. To avoid sending notifications, tap More> Skip sending notifications.
- When finished, tap Send.
- If you’d prefer to share a link to the file as opposed to the file itself, next to the file’s name, tap More
- Tap Link sharing and then tap Share link . You can then paste the link provided into an email, comment section of a website, your Facebook, or any other place you want the link to be located.
- To unshare this link, next to the name of the file tap
- Morethen Info and select Link sharing off.
- If you want to choose what a viewer can do with the link provided, tap the Down arrow .