How to Convert Rows to Columns in Google Sheets

Struggling with spreadsheet layout? Convert rows to columns in a flash! Is your Google Sheet data giving you a hard time because the rows and columns aren’t cooperating? Does manually rearranging data seem like a drag? Don’t worry, there’s a better way! This quick guide will show you how to effortlessly convert rows to columns in Google Sheets, saving you time and frustration.
Mastering rows-to-columns conversion in Google Sheets isn’t just about changing the look of your data. It’s an essential skill that unlocks valuable data manipulation possibilities, helping improve the spreadsheet’s efficiency and analysis potential.
If you have multiple rows and columns frozen in Google Sheets, make sure to un-freeze them before starting the conversion process.
How to Convert Rows to Columns in Google Sheets
There are multiple ways to convert rows-to-column in Google Sheets.
Multiple Rows to Multiple Columns
The main functionality of the Transpose function is to take an array or a range of cells as an input and return the output where their rows and columns are interchanged.
Here, the function will initially interchange the n-th row to the n-th column and the m-th column to the m-th row for a rectangular dataset (nXm) with n rows and m columns.
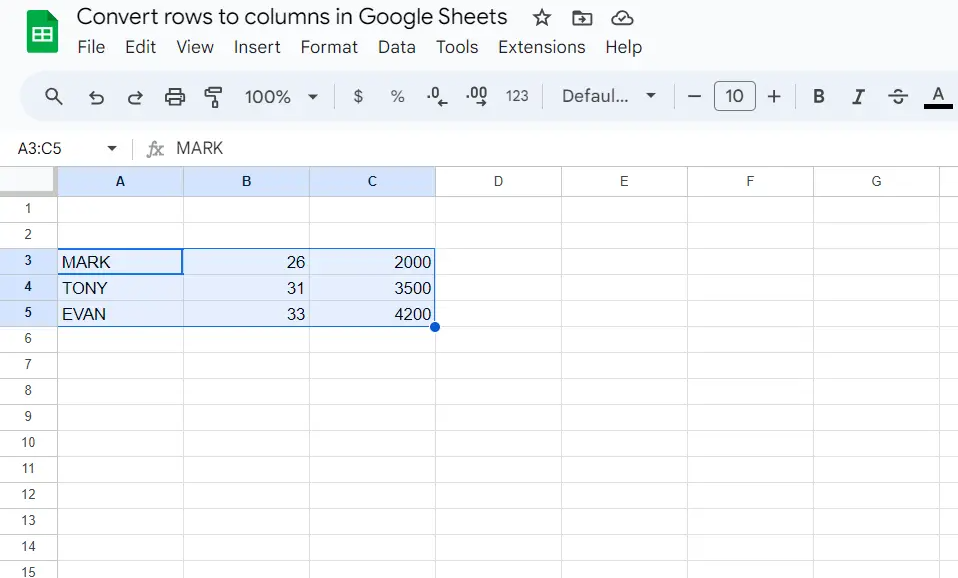
- The following represents the original rectangular dataset with names, ages, and salaries with 3 rows and 3 columns.

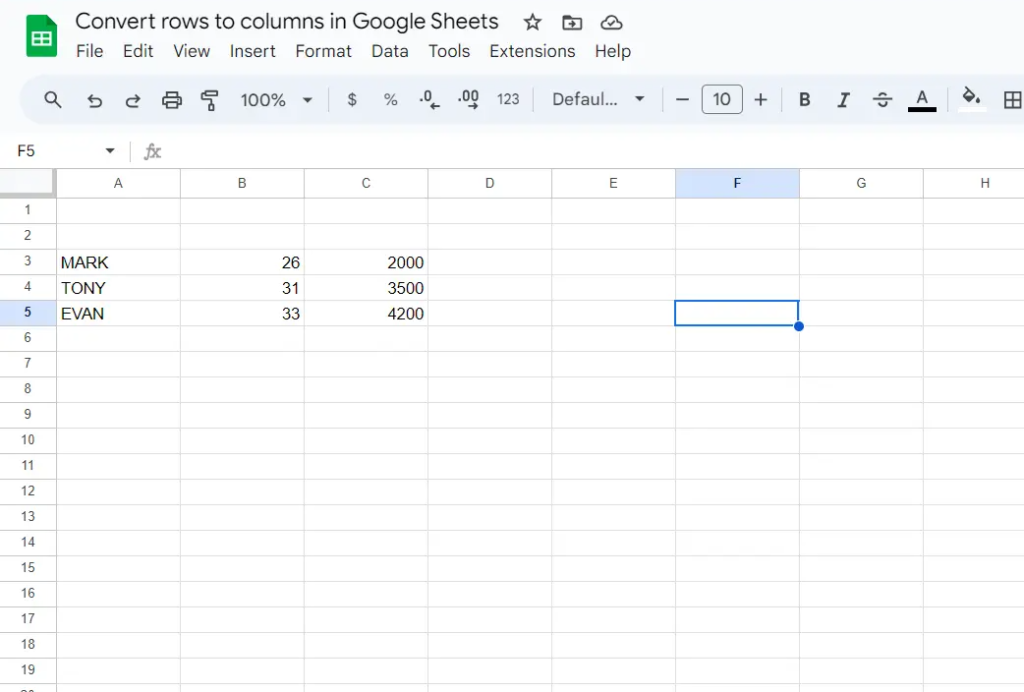
- Click on the destination cell where you wish the Transpose function to occur, let’s say F5.

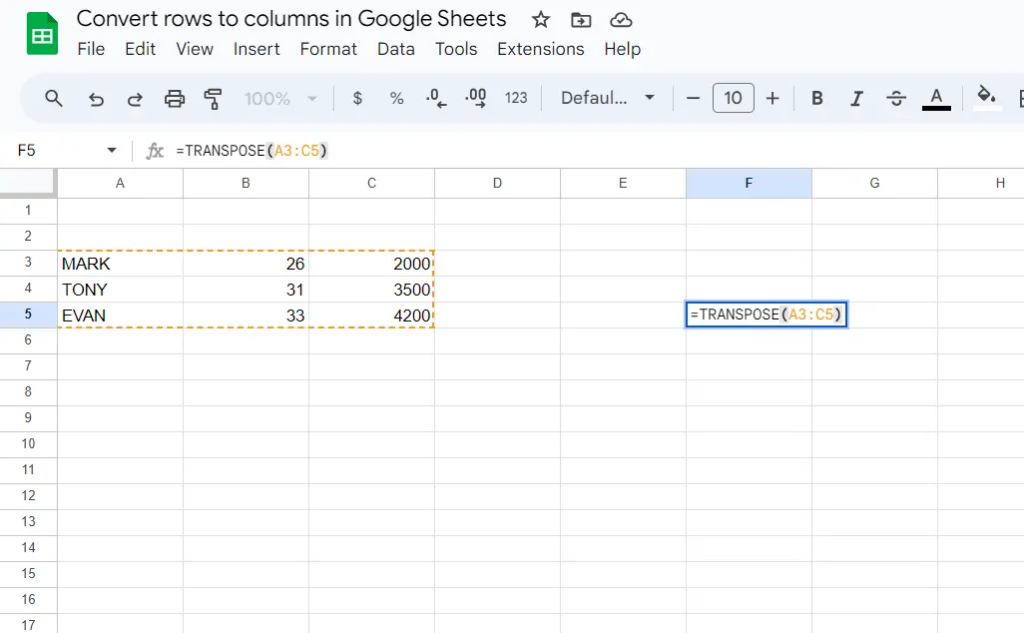
- Type the formula in the text box fx: =TRANSPOSE(range). Here, the range represents the total range of the dataset whose rows you wish to convert into columns. According to our example, it should be: =TRANSPOSE(A3:C5).

- Press Enter on your keyboard, and the formula will transpose the data.
Once done, you can add alternate colors to the columns in Google Sheets for easier understanding of the data.
Transpose Multiple Rows to a Single Column
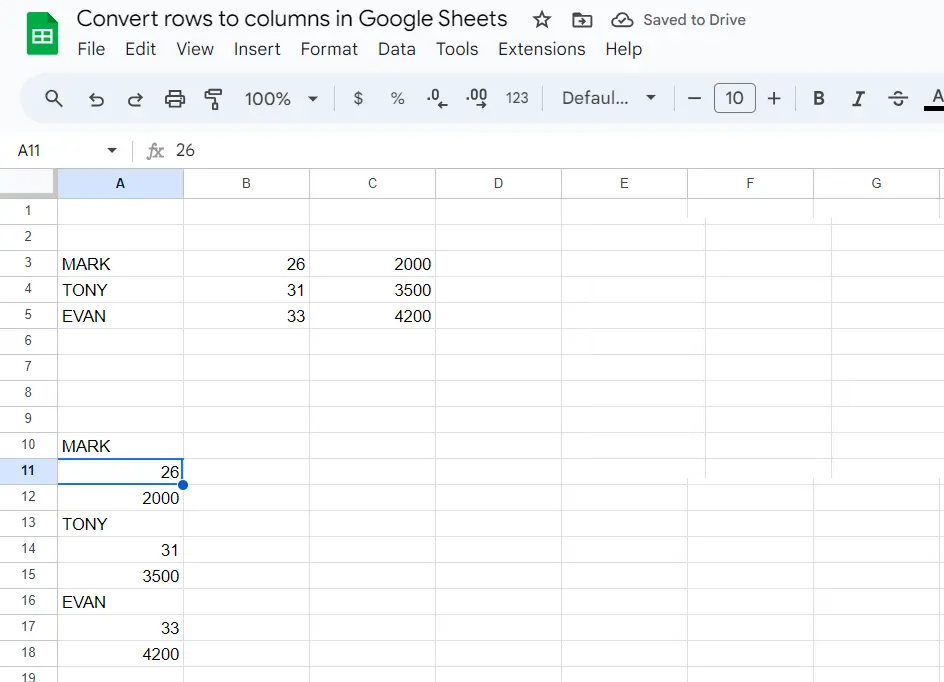
This function will instantly collect data from multiple rows and interchange it into a single column in Google Sheets.
- Select the array whose rows you wish to transpose into a single column in the spreadsheet.
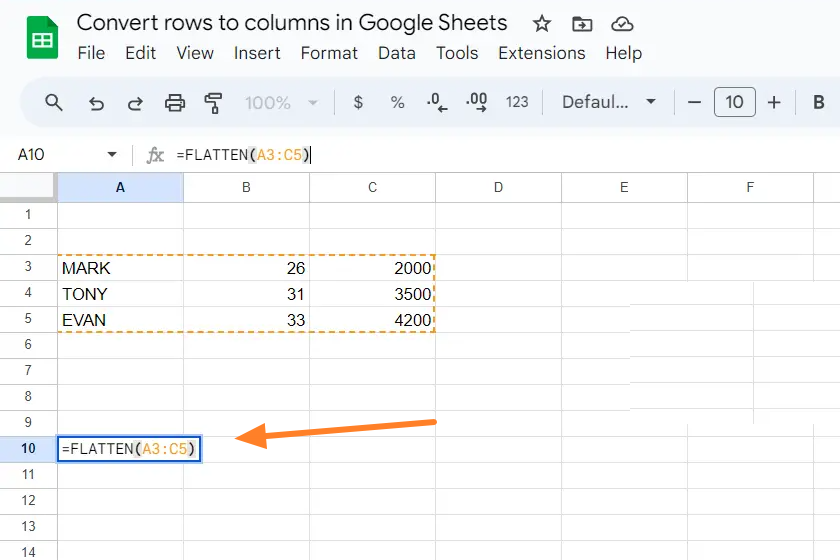
- Click on the destination cell where you want all the data to be organized as a single column. Here it is A10.
- Type =FLATTEN(range) in the fx or formula box. Here, the range represents the total range of the dataset whose rows you wish to convert into a single column. According to our example, it should be: =FLATTEN(A3:C5).

- Once you press Enter on your keyboard, you will get all the data in rows arranged in a single-column layout.

Paste Special Context Menu
This is the manual technique for rows-to-column conversion in Google Sheets. If you are struggling to use formulas, this is a viable alternative.
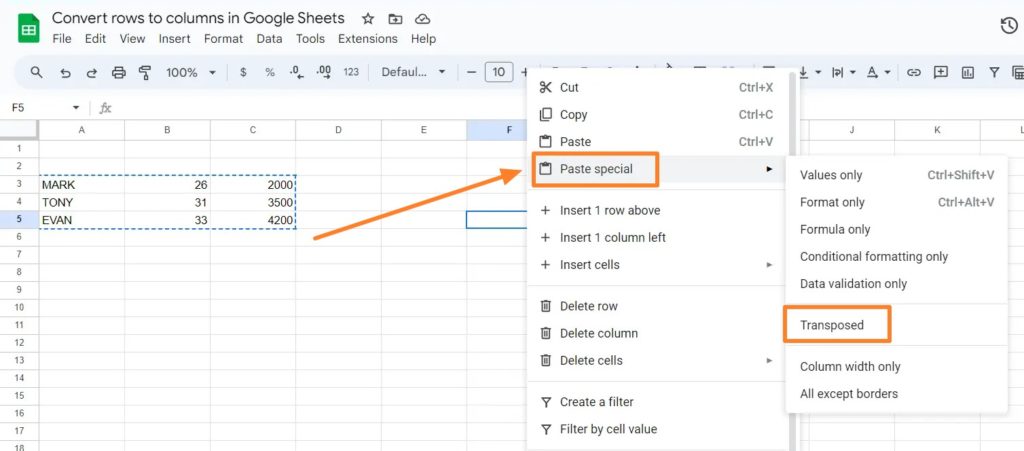
- Use your cursor to select the original rectangular dataset with names, ages, and salaries with 3 rows and 3 columns.
- Now, right-click and choose Copy or use the keyboard shortcut (Ctrl+C for Windows)/(Command+C for MacOS).
- Now click on the destination cell where you wish the Transpose function to occur, let’s say F5.
- Right-click on the destination cell and select Paste Special from the context menu that appears.
- Now, click on Transposed from the secondary menu once you select Paste Special.

- You will find the transposed data in the desired cell. This implies that the data will have its rows and columns interchanged.
Paste Special is also useful when you want to copy-paste data without formatting.
Issues When Converting Rows to Columns in Google Sheets
You might run into some issues when converting rows to columns in Google Sheets. Below are some common problems and their possible solutions.
Merged Cells and Data Validation
When small cells join to make one big cell, data alignment can be messed up if you change the page layout. Data validation rules for data entry also alter when layouts change.
The solution is to either unmerge the joined cells in Google Sheets or swap the layout to stop data from getting distorted. Edit the data validation rules to match the new layout.
Organizing Datasets
Data must be neat and structured for converting rows to columns in Google Sheets. Things like missing info or uneven formatting can complicate the process and give weird outcomes.
So the data should be cleaned up first – no empty cells, consistent formatting, etc. This prevents problems when changing the layout.
To organize and prepare your dataset to facilitate conversion, follow these steps.
- Rectangular arrays: You must organize data in rectangular arrays by removing excess rows or columns and filling or removing excess cells to avoid confusion.
- Clear formatting: Format your dataset with consistent data types in their respective cells.
- Proper headers: Include appropriate headers in the rows and columns to identify the data you will reorient correctly.
Formulas Impacting Data Orientation
Formulas in Google Sheets pose challenges in data orientation as they reference specific cell ranges. To convert rows to columns, formulas referencing row-based data must be updated to reflect a column-based layout.
The solution here is to review and update the referencing cell ranges affected by reorientation. Use relative references wherever possible so that the formulas change dynamically with the data layout.
Use named cell ranges to abstract cell references and ensure formulas in transposed Google Sheets data.
Move That Data
Whether working with data analysis in Google Sheets or using formulas in transposed data, data manipulation competency helps users streamline their workflows and ensure better decision-making. You can choose the Transpose function or the copy and paste method for rows and columns conversion in Google Sheets based on your specific needs and ease of usage.
Next, you might want to learn how to make a graph in Google Sheets.
FAQs
A: If you wish to merge rows in Google Sheets, you can use a range of formulas. Amongst the easiest ones, you can use =Concat(range), where range signifies the first and final headers of the rows you wish to merge. Alternatively, you can use =A1&” “&B1&” “&C1 etc.
A: After selecting the range of cells with the data, click on the Data menu and select Slicer. From the window that appears, please select the Column, and its respective data will show. Tick/untick the data that you wish to split.