


How To Alter Skin Color in Photoshop
Changing the skin color in a photo is a fairly common manipulation. It should be in your repertoire whether you’re a professional or a hobbyist. Sometimes, you’ll want to slightly adjust the skin tone of the model in your portrait while the other times you may want to entirely alter a photo for something like a fantasy setting.
As with most procedures in Photoshop, there are many ways to approach changing skin color. In this article, we will go over a couple of them and you can choose the one that suits you best. The skills you’ll learn here will be applicable to many other projects as well.
Changing Skin Color with an Adjustment Layer
Most experts would recommend this method for a simple color change that doesn’t have extremely stringent quality standards. It is quick and easy, and only uses a few basic tools. This technique should be used once your image is ready, except for the color change. Once you load up your image, follow the instructions below.
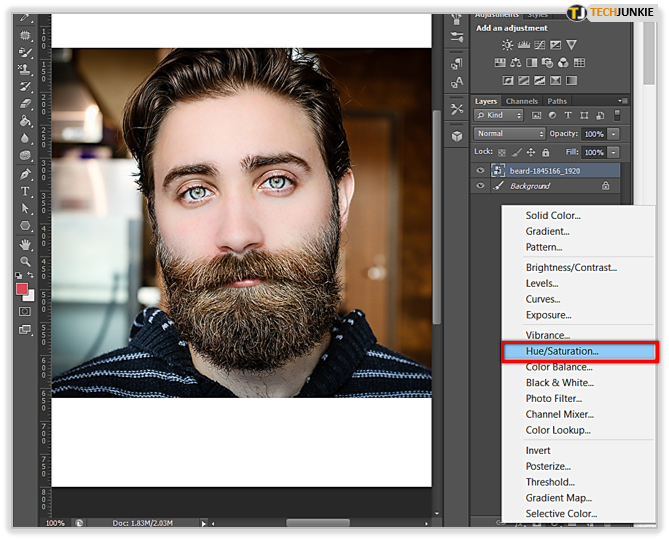
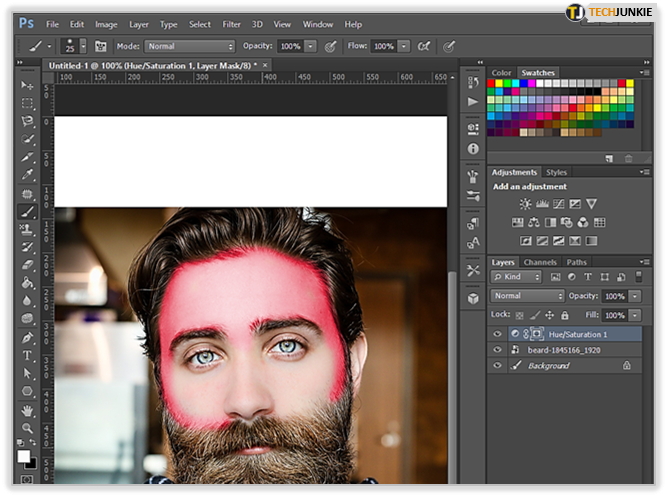
- Create an adjustment layer and select Hue/Saturation.

- Check on the Colorize box in the properties window that shows up.

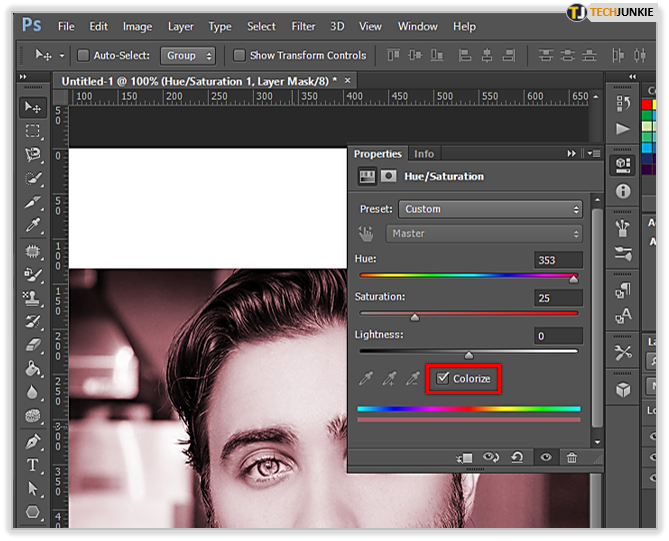
- Increase the saturation axis arbitrarily to about 75 or so.

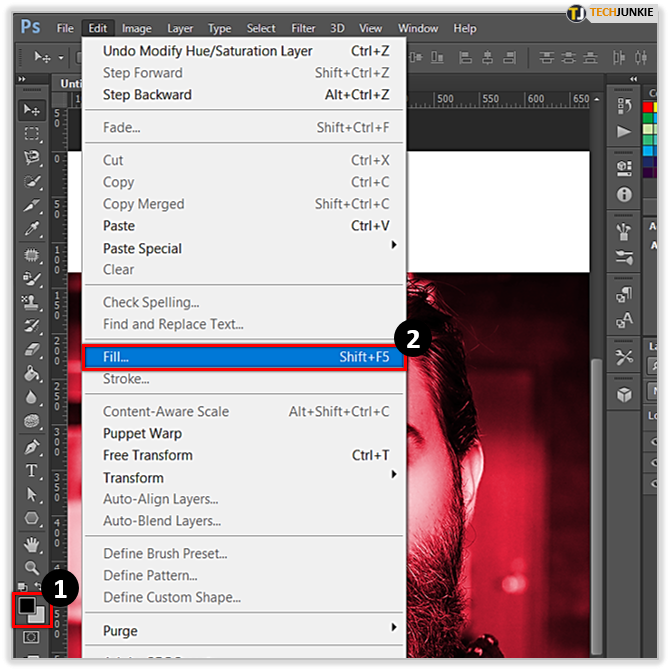
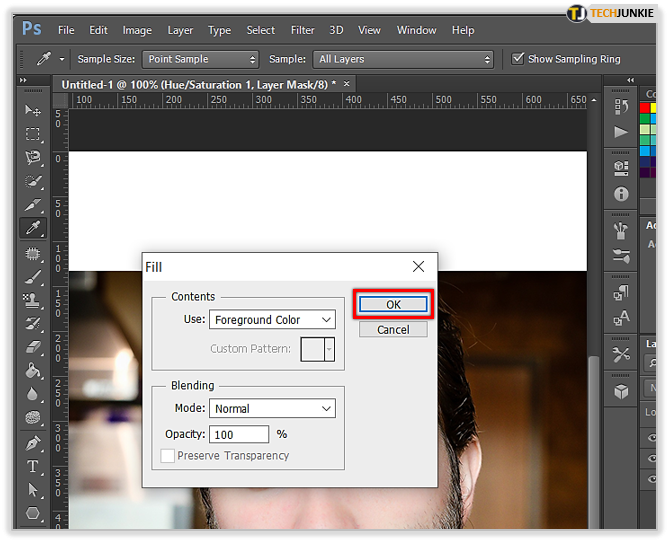
You can change the color as well, but it doesn’t matter too much right now, as you can change it later. Your goal is to select a color that will be readily visible when you start using the mask. When the layer is ready, continue with the following steps. - Switch your Foreground Color to Black and select the Fill tool.

- Verify that the mask is selected and click OK to fill it.

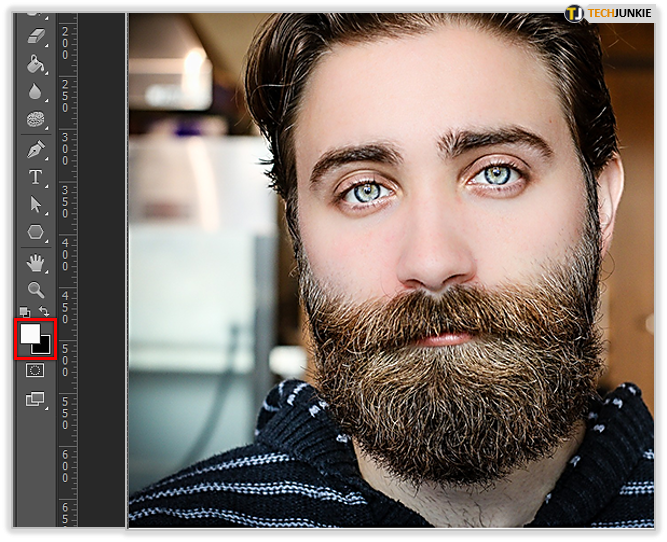
- Swap your Foreground/Background colors to White/Black.

- Select the Brush tool and pick out a soft brush with a lot of feathering, then start painting the parts of the skin you want to color.

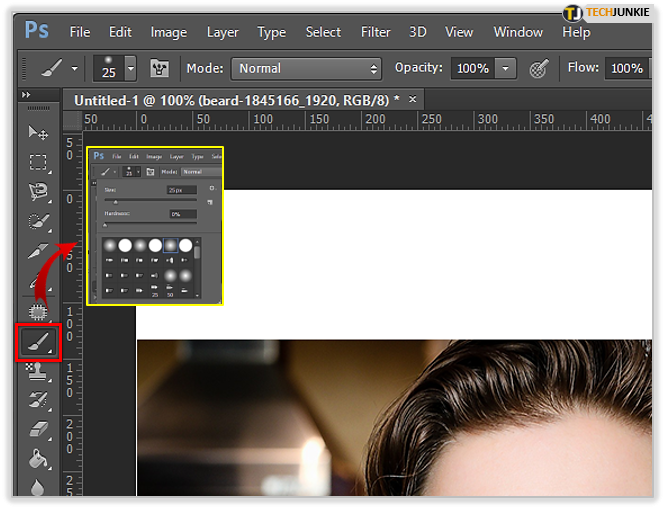
Now comes the tedious part. Continue painting until you’ve covered all the exposed skin that you need to recolor. You can paint over very dark areas such as hair without worrying too much because they won’t take the color. However, you’ll have to be more careful around the eyes, mouth, and such. Play around with the brush settings to make it softer or larger as you need it. The bracket keys – “[“ and “]” – can be used as hotkeys to increase and decrease the size of the brush.
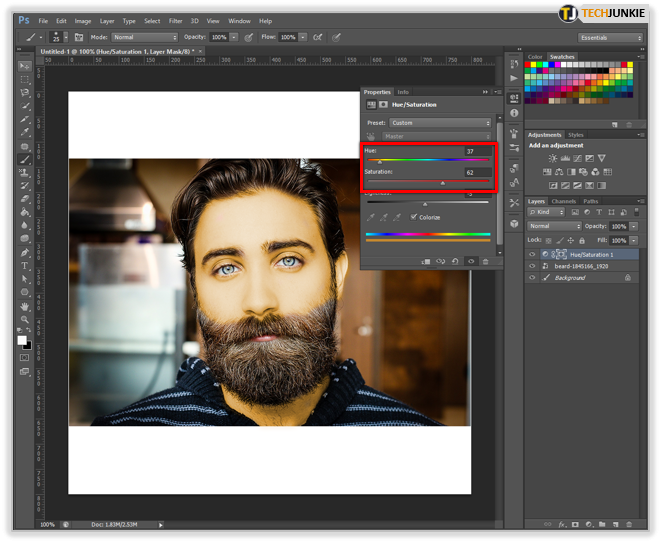
This part will take a little while to get right, but when you’re finished you will have a mask over the skin that you can modify as you wish. Now you’re ready to blend in the adjustment layer and choose your color. Just go back to the properties and change the hue and saturation to achieve the color you want and have it blend in nicely with the photo.
Brushing on a New Color
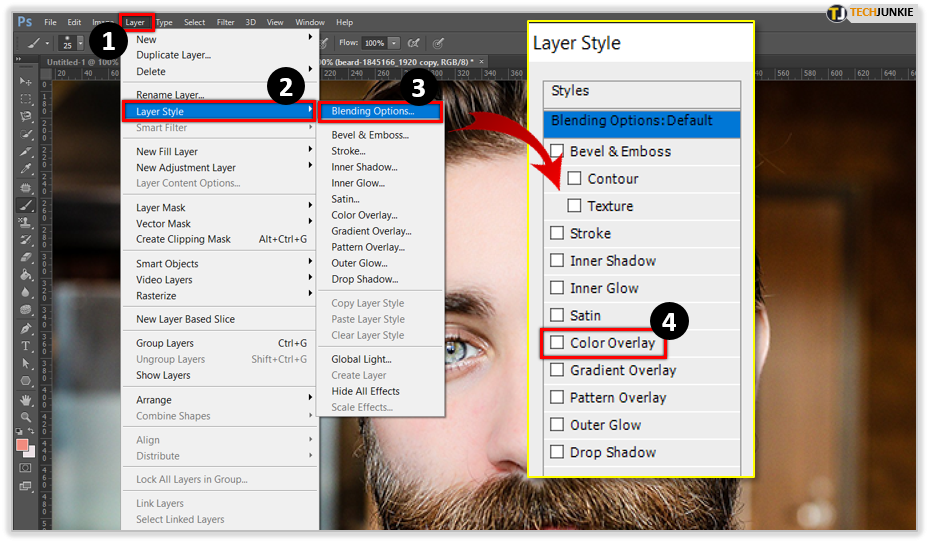
Another method you can use is to simply paint on the color you want. To do this, load your image into PS and create a Duplicate Layer. Choose the color you want and switch the layer style to Color Overlay in the Blending Options. Uncheck the Color Overlay box if it is checked by default. At that point, paint over the area of skin you want to change. Again, pick a soft brush and work slowly until you’ve covered the entire skin.
This should be thought of as the “quick and dirty” method because it gives you fewer options than the previous one and it’s easier to mess up. You will also find fewer uses in your future work for this approach. Using an adjustment layer is best practice but if you have a simple job that needs to be finished quickly, this works well enough.
In the same vein, you can create a duplicate layer, change the Layer Style to Color Overlay, and then play with the Adjustments in the Image menu. You can increase or decrease the brightness, hue, saturation, and other settings. This will change the color of the whole image, though. You will almost never have an image where this is wanted, but you can use it to test out different colors on the skin before you commit to the more time-consuming method.
Get a Summer Tan Without Any Sun
These procedures are a great starting point if you’re learning how to change skin color in photos. Once you get the hang of it, start experimenting with multiple adjustment layers for different areas of skin.
You can also create adjustment layers that select for areas of the skin but that’s a more advanced tutorial. If you just want to make quick adjustments for personal use, use a color overlay layer. It’s not very fancy, but it gets the job done.
What other applications can you think of for adjustment layers? How would you apply different skin tones to multiple models in the same photo? Let us know in the comments if these techniques worked for you.


