How To Build a Route in the Strava App

Strava is more than just an app that measures the distance you run. It also connects you to athletes all around the world. The data you acquire from other Strava users is especially useful if you want to plan new running routes.
It can be exciting to change your running or cycling route, but sometimes it’s difficult to find a new one. Some streets are dead-ends, and there may be upward slopes that could slow your progress.
With Strava, you can find the most popular routes in new areas. You’ll also see information about the distance, elevation, calculated time, and so on. This article will explain how to build a Strava route and how to use this tool to its full potential.
How to Create a Strava Route
Creating a Strava route is simple. You can make one from scratch, or you can use popular existing routes. Additionally, you can create a specific route that minimizes elevation.
To create a new Strava Route, you need to log in to your Strava profile. Then, you can follow these steps:
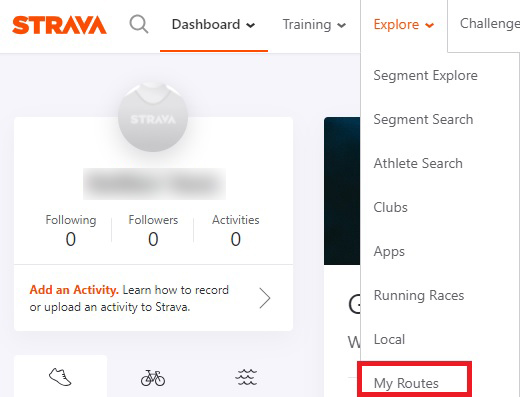
1. In the top left menu, hover over ‘Explore’. It should open a dropdown menu.
2. Click on ‘My Routes’ and a routes page will open.
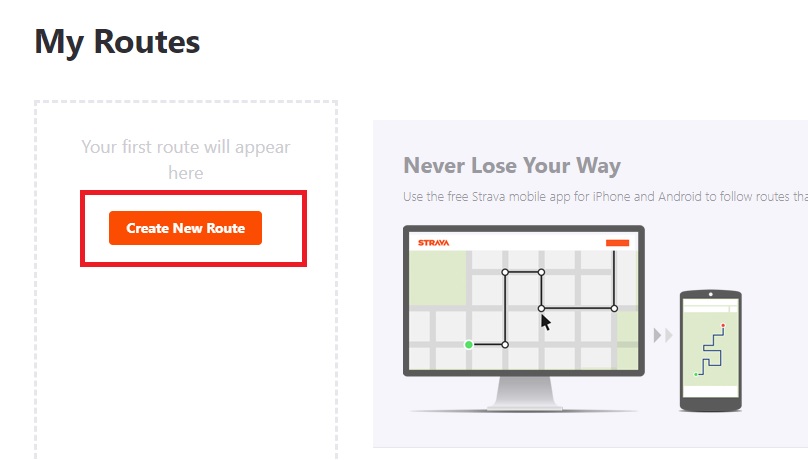
3. Select ‘Create New Route’. This should start the Strava Route tool.
When the Route map opens, you will see various options on the top and left side of the map.
4. On the top left in the search bar, you can type the location of the area where you want to start a route. It doesn’t have to be your current location.
5. To move the map around, hover above the map and wait for your cursor to turn into a hand. Then, you can click and drag the map around. The cursor will turn to a hand only on cycling and running roads.
6. Double-click on your starting location to make your starting checkpoint.
7. Double-click on any other place in the map. This can be either your finishing point or the first checkpoint.
8. You can make as many checkpoints as you like. The app will draw a line accordingly. You can make U-turns and overlaps, too.
The program will draw a route for you based on all the available data. On the bottom left of the screen, you will see all the necessary information – distance, elevation and estimated moving time. The app will calculate your estimated moving time by measuring your average speed during 4 weeks of activity.
9. Select ‘Save’ on the right side of the screen.

You can make your route private or public. If you make it private, you are the only one that can view it. But if you make it public, other users can also see it and use its data when creating their own routes.
Features in My Routes
Strava collects data from all the users of their app who make their information public. This means that all the popular routes and global heatmaps come from first-hand information from other runners and cyclists.
You can find the use of this data in different places on the page.
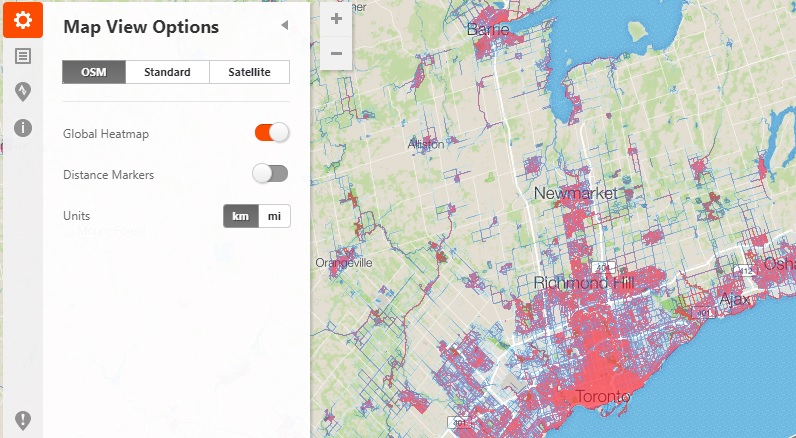
- Global heatmap – You can toggle a Global heatmap on the left side of the screen in ‘Map View Options’ (gear icon). This will show you the areas where users of the app move the most. Red is high frequency, and blue is low frequency.

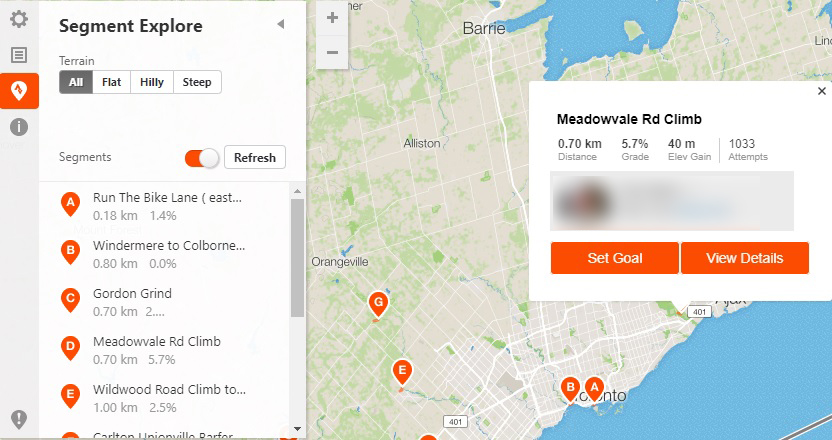
- Segment explore – Segments are portions of the roads or trails that you can use to compare times. You can find public segments in your area and see the leaderboard. Do this by clicking on the ‘Segment explore’ icon on the left side of the screen (location mark). Click ‘refresh’ and you will see all segments in an area.

- Use popularity – The best way to make sure you will not run into any obstacles or dead-ends is to use this feature. It will draw you a line following the most popular route, based on data from other users. You can toggle it at the top of the screen.
- Min elevation – Next to ‘Use popularity’, you can toggle ‘Minimal elevation’. In this case, the app will show you the flattest available route.
Use Built Routes on Multiple Devices
Once you finish building a route and saving it, you can always access it via the ‘My Routes’ menu. You can create as many routes as you want, and load them from your computer or your smartphone.
Using a smartphone is a convenient way to track a route. When you load a route via an Android or iOS device, you will see two lines. The orange line shows the route you drew, and the blue one shows your current location. There is no way you can get lost, so relax and enjoy your track.