How to Disable Messages on Mac

It’s great that you get to pair iMessages to your Mac and respond quickly using your keyboard. However, sometimes this can be distracting. Of course, you are using an iPhone and a Mac, plus it wouldn’t be a long stretch to assume there is an iPad lying around nearby.
By default, iMessages are enabled on all devices and they all ding when a new text arrives. Interestingly, there even might be a slight delay in the notifications. It can become really annoying if you’ve also enabled the 2-minute reminder chime. This is why you might want to consider disabling this service on your Mac.
Bye, Bye Chimes
Before you proceed, it’s worth noting that the methods have been tested on macOS Mojave. On the other hand, these settings change very little so the following steps should apply to older versions as well.
Step 1
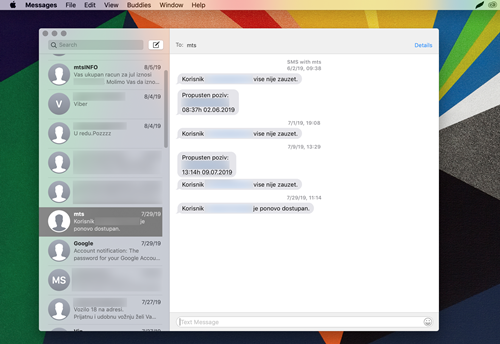
On a Mac, everything is done via the Messages app. Hit Cmd + Space on your keyboard, type “mess” and hit Enter. You can also navigate to Messages via Launchpad or just click or tap on the app if it’s in your Dock.
Step 2
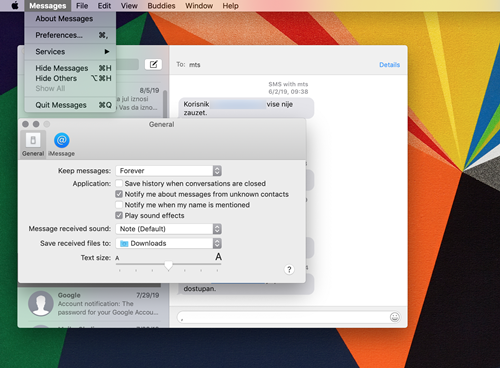
Click or tap on Messages in the menu bar on the top left and select Preferences from the drop-down window. You can also do it by pressing Cmd + , – just make sure that the Messages window is selected if there are multiple windows on your desktop.
Step 3
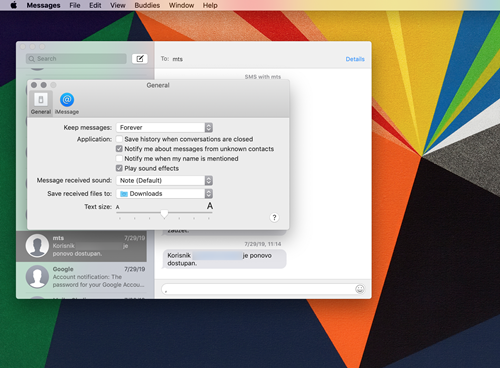
Now, click on the iMessage tab in the Preferences window and uncheck the box in front of your phone number. In some cases, your email address needs to stay checked or the system won’t allow you to disable messages.
This out of the way, you can now uncheck the box in front of “Enable this account” and you are good to go.
General Messages Settings
Similar to your iPhone, you can customize some of the Messages settings on your Mac too. You get to change the sound settings, choose a different chime, or adjust the text size.
The drop-down menu next to “Keep messages” allows you to change the preferences for saving messages. However, it’s advisable to keep this the same as on your iPhone/iPad to avoid losing some of the older texts.
The most useful option is the “Save received files to.” Click or tap on Other in the drop-down menu and save the files you receive via iMessages to a specific folder.
Turning off Notifications
After all, you might not need to disable iMessages completely. If the notifications are the only thing that’s bothering you, why not turn them off? Here’s what you need to do.
Step 1
Hit Cmd + Space on your keyboard, type “notifications”, and press Enter. You can also reach the notifications settings by clicking on System Preferences, then the Notifications icon.
Step 2
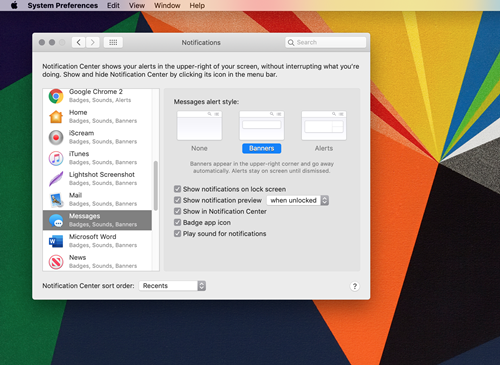
Scroll down the menu on the left and select Messages. Now, there are two ways to customize notifications – disable them altogether or uncheck the boxes in front of all the options.
Select None if you want to stop receiving iMessage notifications or you can keep it at Banners and uncheck all the boxes except the “Badge app icon.” This way you will ditch all the previews, sounds, and pop-ups but still get a tiny reminder that there is a new message in your inbox.
Tip: The Alerts option keeps the notification on your screen until you dismiss it. In general, this type of notification is the most annoying of all so you might not want to consider it at all.
Disabling Messages on iPad
Assuming you’d like to receive the texts on your iPhone only, it pays to take a look at how to disable them on your iPad. Launch the Settings app, navigate to Messages, and tap on the button next to iMessage to toggle it off. And if you wish to do it on the iPhone, the same method applies.
Tip: The Messages menu features the “Send as SMS” option. It’s advisable to keep this option on to ensure the text reaches the recipient even if he or she is not connected to Wi-Fi or cellular network. This applies to iPhones and iPads with cellular – the ones with a SIM card slot.
Troubleshooting iMessages
One of the reasons to disable Messages on your Mac is because they are not working as intended. This might sound a bit counter-intuitive, but it works like the turn-it-off-and-on-again trick.
So the first line of defense is to disable Messages, then enable them after a few seconds. Don’t forget to check if the iMessages phone number on your Mac is the same as on your iPhone. Besides the phone number, you also need to use the email address that’s associated with your Apple ID which you use to sign in on your iPhone.
If you are still not getting any texts, sign out of the Messages app and sign in. Of course, you can restart both the iPhone and the Mac after you make the changes.
You Haven’t Got a Text
Whichever way you look at it, disabling messages on Mac is a piece of cake. The method can be used for troubleshooting the app and it helps you get rid of the pesky notifications. But if the notifications are your only problem, it would be better to turn them off instead of the entire iMessages service.
What kind of iMessages do you send most often? Are they plain texts, images, or maybe videos? Feel free to comment about your preferences in the section below.