How to Customize the Windows 10 Action Panel With Your Own Buttons
Of the many improvements made to Windows 10 out the mistakes Microsoft learned from the debacle that was 8.1, some are more noticeable, while others are a bit more subtle.
One of the biggest pains in the average user’s side in Windows 8.1 was the messy, disorganized Notification Center that had no way to customize either the alerts you received or the buttons that were included each time you swiped to the right side of your screen to check what was new. Now however, the “Action Panel” gives you control over a whole new range of extended features that wouldn’t otherwise fit on the taskbar, making it quick and simple to hotlink yourself to anywhere in the system with the press of a button.
Here’s our guide on how to customize the Windows 10 Action Panel to suit your personal needs best.
Open the Action Center
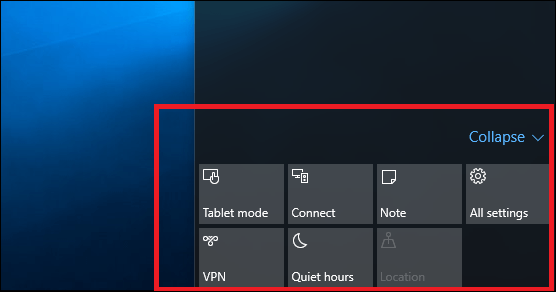
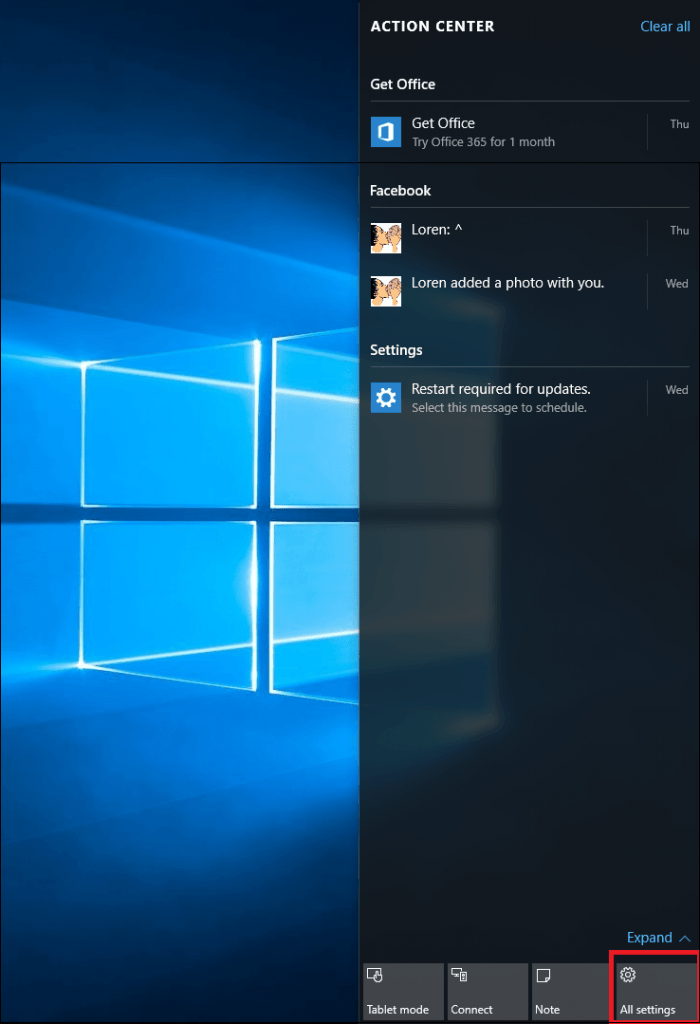
To start, it helps to know what the Action Panel actually is. From a bare desktop, begin by opening up the Notification Center by clicking the button at the bottom right-hand side of the taskbar, highlighted here:
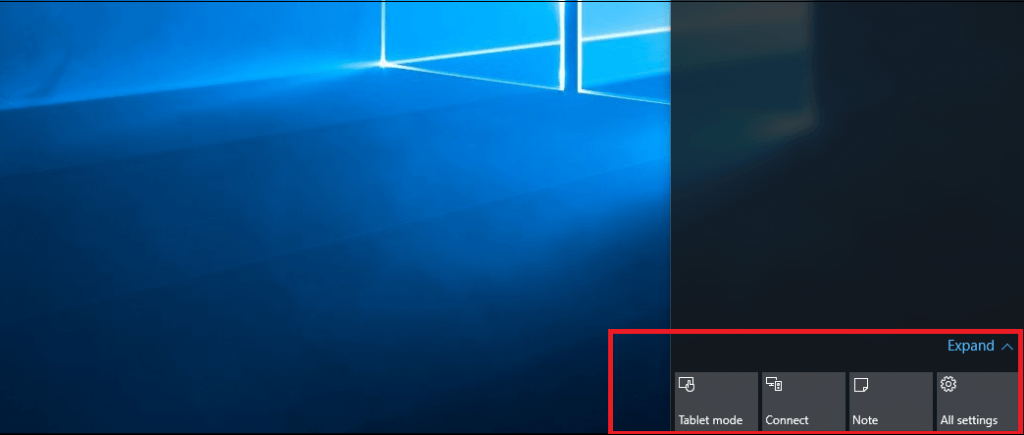
Next, scroll to the very bottom, where you’ll find four buttons that each serve a different function. For this example we’ve kept things at their default configuration, which on a clean Windows 10 installation are a button to launch the Notes app, to switch into Tablet Mode (only useful on mobile touchscreen devices), enable “Quiet Hours” for your Notification Center, and to open the Settings app.
Configure Your Layout in Settings
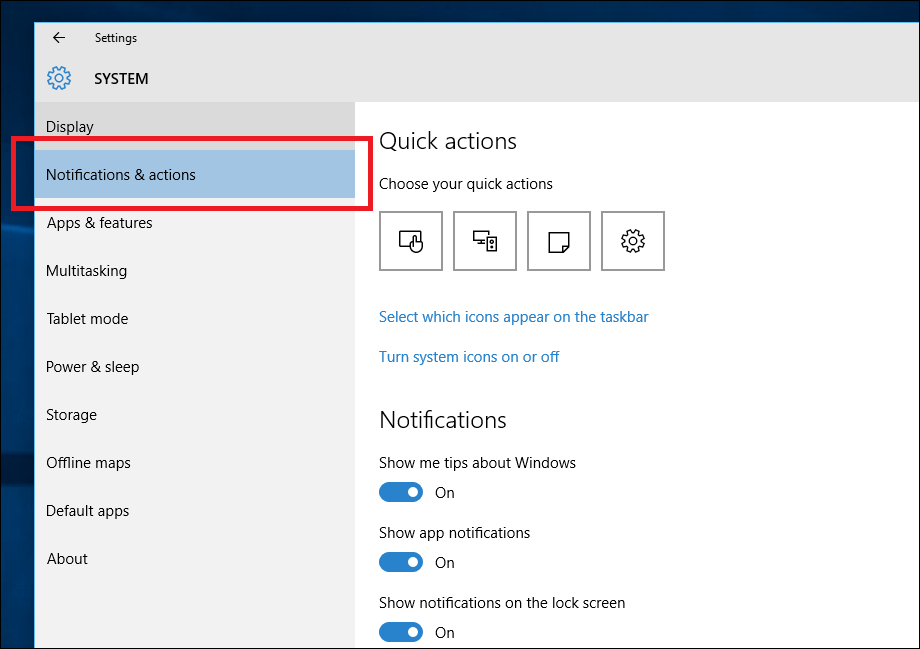
Choose the button to open the Settings app, and then navigate to the Notifications and Actions tab.
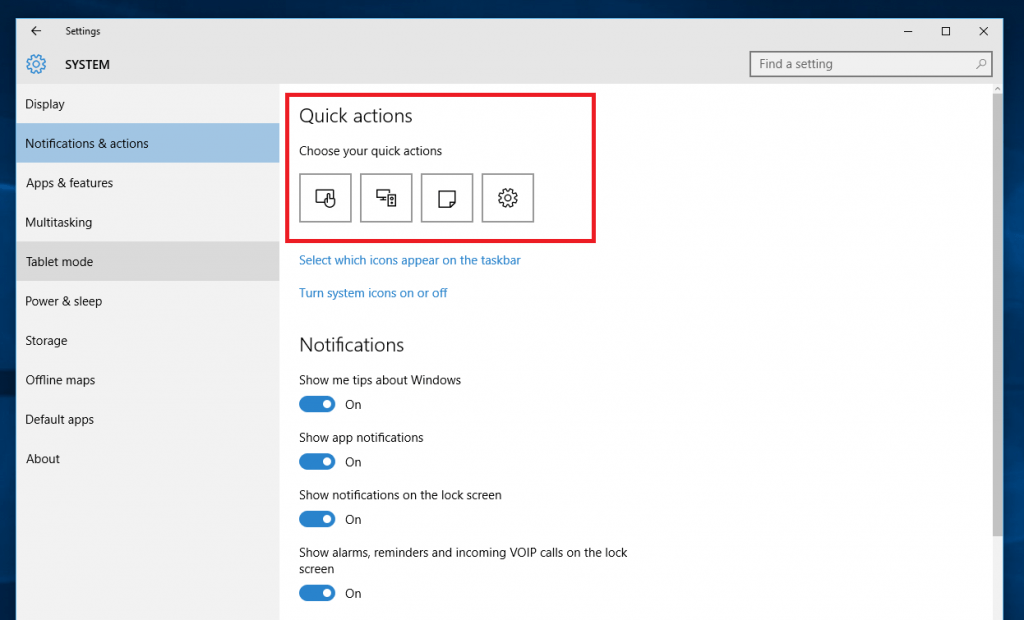
Once here, you’ll see the four buttons that are currently locked to your Action Center.
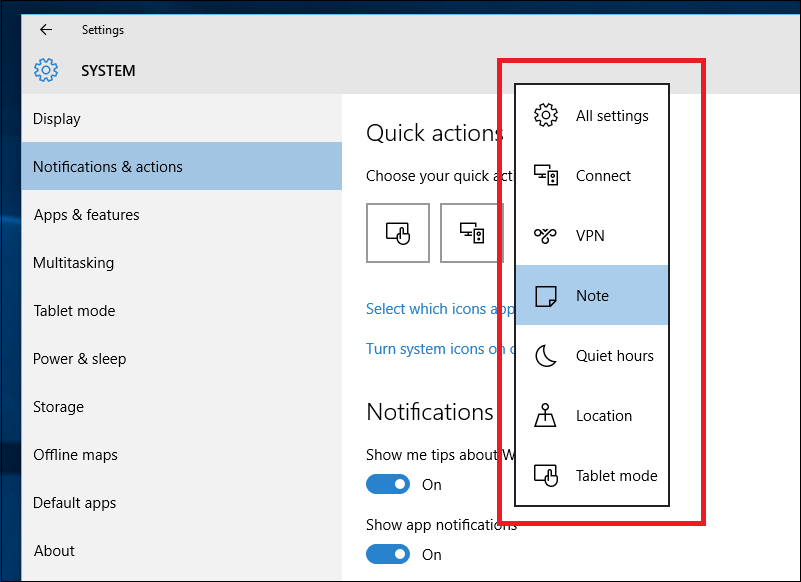
As you click each of these, a menu will pop up that includes all the other options for the tasks you can attach to your Action Panel. These include finding your location (helpful for tablets), quickly setting up a new VPN connection through the Windows 10 VPN client, as well as connecting the PC to an external media device.
Once you’ve decided on the configuration you want, simply choose the button you want to lock-in, and you’re done! Quit out of the Settings app, and your changes will be applied to the Action Panel as soon as you’re finished.