How to Add and Manage Cities in the macOS Weather Widget

Notification Center in macOS Sierra provides quick access to a number of important data sources, including your calendar, reminders, stock prices, and even world clocks. However, one of the most universally handy Notification Center widgets is Weather, allowing you to see the current temperature and near-term forecast for all of your favorite cities.
By default, and if you enabled Location Services while setting up your Mac, the Weather widget in Notification Center displays the weather at your current location. Apple also provides weather for big cities like New York and Los Angeles, as well as for the company’s headquarters in Cupertino, out of the box. But you can customize the Weather widget to remove these default locations and monitor the climate in virtually any city in the world. Here’s how it works.
Add a City to the Weather Widget in Notification Center
To add a city to your Weather widget in macOS Sierra’s Notification Center, first activate Notification Center by swiping in from the right side of your trackpad or by clicking the Notification Center icon at the far right of your Menu Bar. Hover your mouse cursor over the Weather widget and you’ll see a small encircled “i” appear at the top-right.
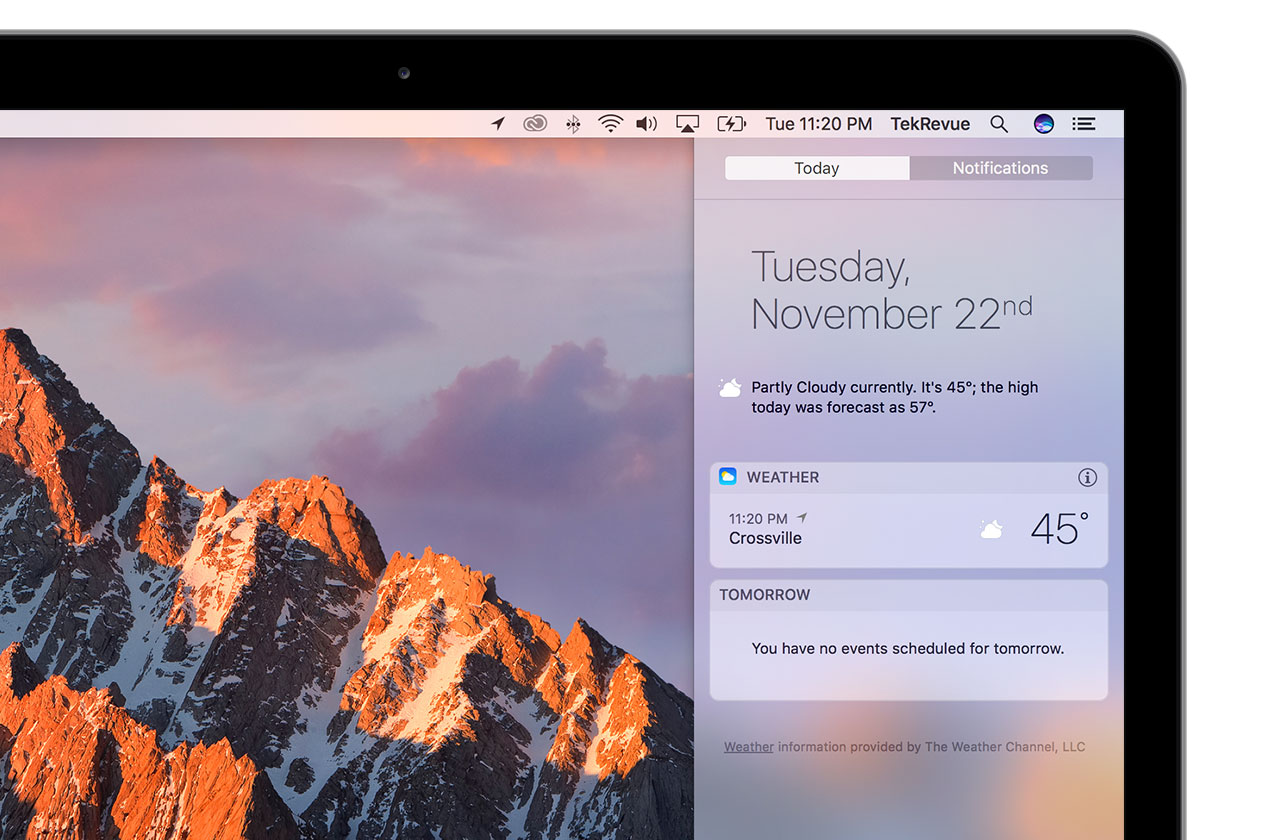
Click the “i” and you’ll see an option to Add a city appear at the bottom of your widget.
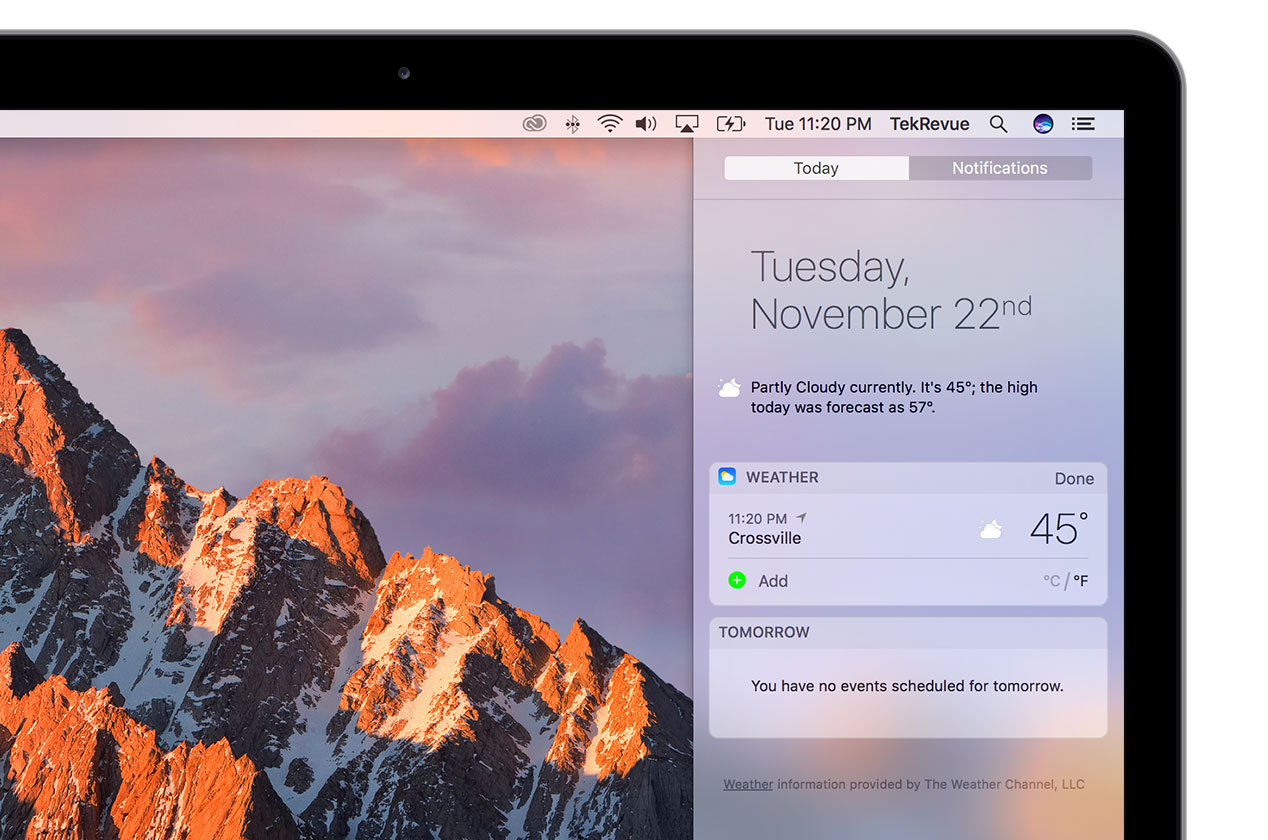
Click the green plus icon next to Add to reveal a search box. You can search for a city by name, zip code, or airport code.
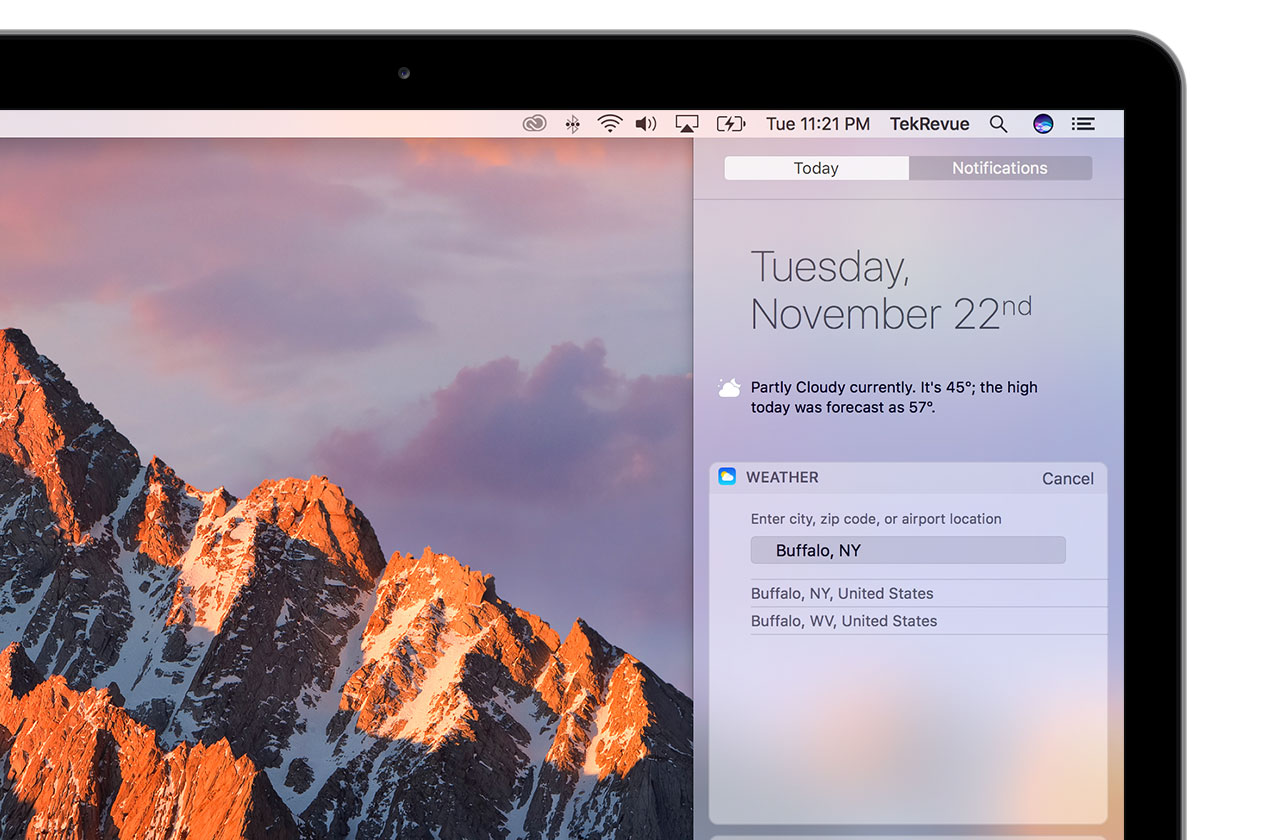
Type the relevant information to locate your desired city and click on its entry in the search results. This will add the city to the bottom of your Weather widget.
Remove and Manage Cities in the Weather Widget
Once you’ve added one or more cities to your Mac’s Weather widget, you can remove cities or change their order in the list. To remove a city, once again bring up Notification Center, hover your cursor over the Weather widget, and click the “i” that appears in the upper-right.

A red minus icon will appear next to any manually added cities (note, you cannot remove the weather entry for your current location via this method, so no red minus icon will appear next to that entry). Click the minus icon to remove any cities.
To re-order your list of cities, click and grab the three horizontal lines on the far right of each entry and then drag and drop the city in your desired location in the list. Note again that the weather entry for your current location will always be at the top, so the highest you can place a manually-created city is second on the list.
Weather & iCloud Syncing
For those Mac owners with iDevices and an iCloud subscription, you can also change your list of cities in the macOS Weather widget via iCloud syncing. By default, and if the same iCloud account is logged in on both the Mac and an iPhone, the list of cities in the iOS Weather app will be synced to the macOS Weather widget, and vice versa.

Therefore, if you set up a new Mac and log in with your iCloud account, you may not need to make any changes at all to your Notification Center Weather widget, as all of your favorite cities will be ready and waiting for you.