


All About VPNs: How to setup or connect to a Virtual Private Network (Part 2)

We’ve already showed you what a VPN is and how they’re used. Now, we’re going to show you how you can setup a Virtual Private Network using a couple of different third-party services as well as in Windows 10 itself. By using one of the methods below, you’ll set yourself up on a VPN, giving you that extra layer of encryption you’ve been missing out on.
VPN Services
Many people will actually go ahead and use a VPN service. Generally, many of these services will cost you money, but most will offer a limited free service for you to try out and see if it’s a good fit for your needs. One of the three recommended VPN providers below should get you up and running in a jiffy.
Tunnelbear
Tunnelbear is one of the easiest VPN services you’ll ever use. Even with its extreme simplicity, Tunnelbear will keep your connection as secure as any other VPN provider. They offer a “Little” tier, which allots you 500MB of data per month to use with the VPN for free. There are two other tiers, which give you Unlimited data at a pretty cheap cost, especially if you pay by the year.
A huge benefit to Tunnelbear is that it’s not only available on Windows, but also on Mac, iOS and Android, too.
TorVPN
TorVPN is another great option that’s free. It’s goal is to introduce a large audience to online privacy protection, thus offering it for free. However, there are still VPN packages you can purchase to improve your quality of service exponentially. With TorVPN, you’ll be able to browse the Internet securely, removing yourself from Internet censorship, giving yourself the ability to hide your IP, hide torrent traffic from your ISP and even access geo-blocked websites.
[TorVPN]
TorGuard
TorGuard is one of our favorite options because they put privacy first. TorGuard actually purges their logs on a daily basis and will only keep payment and registration info. In other words, they’re not watching what sites you access or reporting information to anyone else. They won’t even log information regarding login or logout times. TorGuard is truly the go-to VPN provider for those that want to be anonymous on the ‘net.
That said, TorGuard does cost a bit of monthly. You can choose monthly or yearly tiers — going with the yearly bundle will usually save you some money in the long-run. The VPN itself is all 100% anonymous and supports Windows, Mac, Linux, Android, iOS and other operating systems.
[TorGuard]
Connecting to a Virtual Private Network in Windows 10
In some cases, some of the services above and others (e.g. ExpressVPN) will actually require you to manually setup a VPN connection within Windows 10. We’re going to show you how to do just that below. This information is also useful for connecting to a VPN server through, say, the credentials your place of work gave you. Either way, this is how you do it:

Step 1. Open the Start menu and click on the Settings “gear” icon.
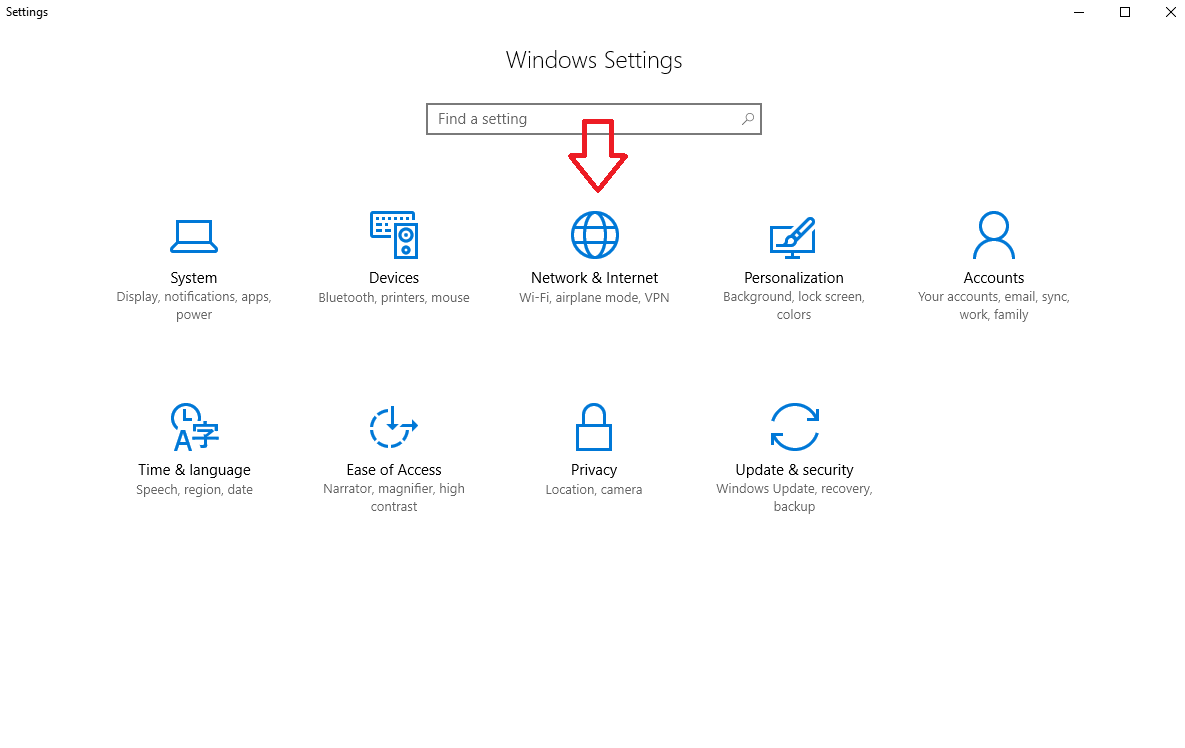
Step 2. Click on Network & Internet
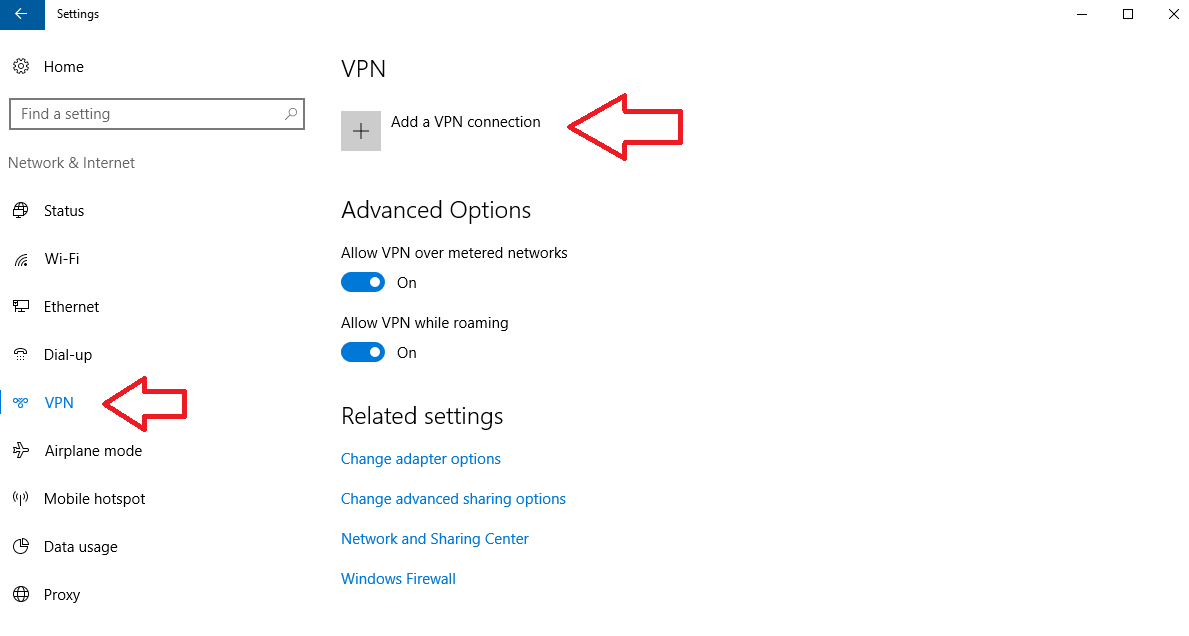
Step 3. Select the VPN tab and click on Add a VPN Connection
Once you do that, a window with the following information should appear:
- VPN provider
- Connection name
- Server name or address
- VPN type
- Type of sign-in info
- User name
- Password
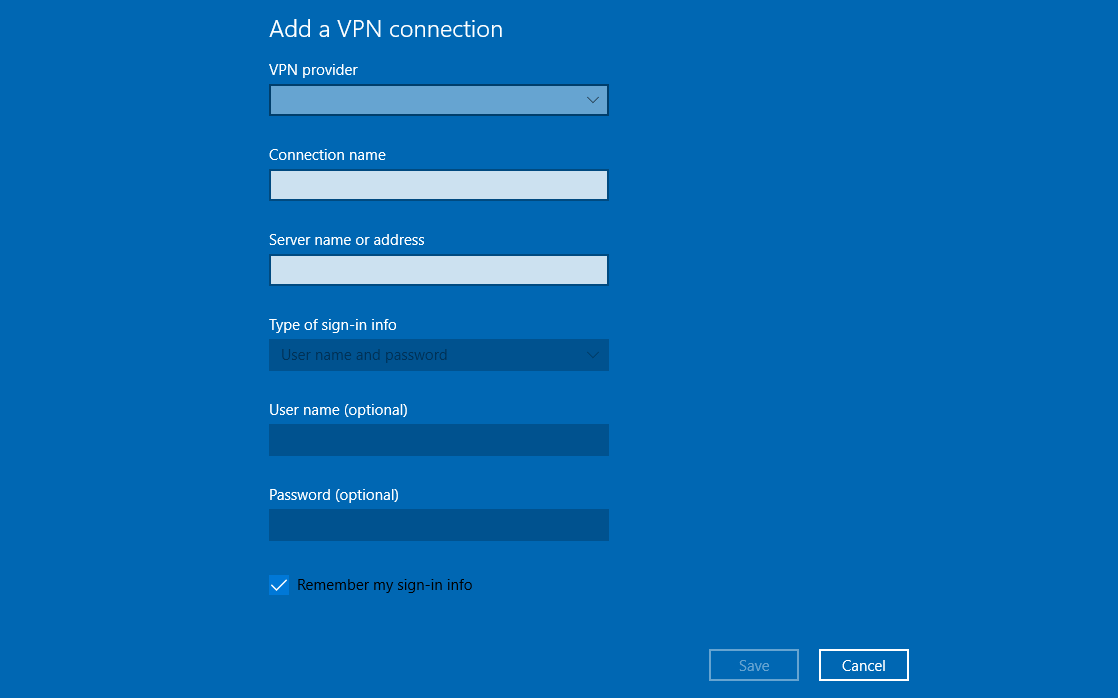
Under VPN Provider, generally you’ll just want to go with “Windows (Built-in).” Under Connection Name, you’ll just want to name your connection. It could be anything, really. Then, under Server name or address, you’ll need the IP address given to you from your VPN service provider (or credentials from work and etc). Type of sign-in info will generally just be User name and password. Finally, under User name and Password, you’ll just need to enter the login credentials the VPN service or work gave you.
Once you’re all done there, click Remember my sign-in info (if you’re on a private computer) and click on the Save button.
Now, to connect to the VPN, you’ll just need to head into Settings > Network & Internet > VPN. Click on the VPN you just created and press the Connect button.
Closing
Congratulations! You’ve successfully connected to a VPN. Like we already mentioned, this information is extremely useful for not only using a VPN provider, but connecting to a VPN at work, too.
Previous: What is a VPN?
Next: How to create your own VPN with OpenVPN


