


How to Customize Toolbars in Your Mac Apps
A lot of Mac programs—Finder, Mail, Safari, and Pages, for example—will let you edit their default toolbars, so you can add buttons for quick access to the features you use the most. This means that you don’t have to go traipsing through menus to find the commands you’re looking for, so let’s learn how to customize toolbars on the Mac!
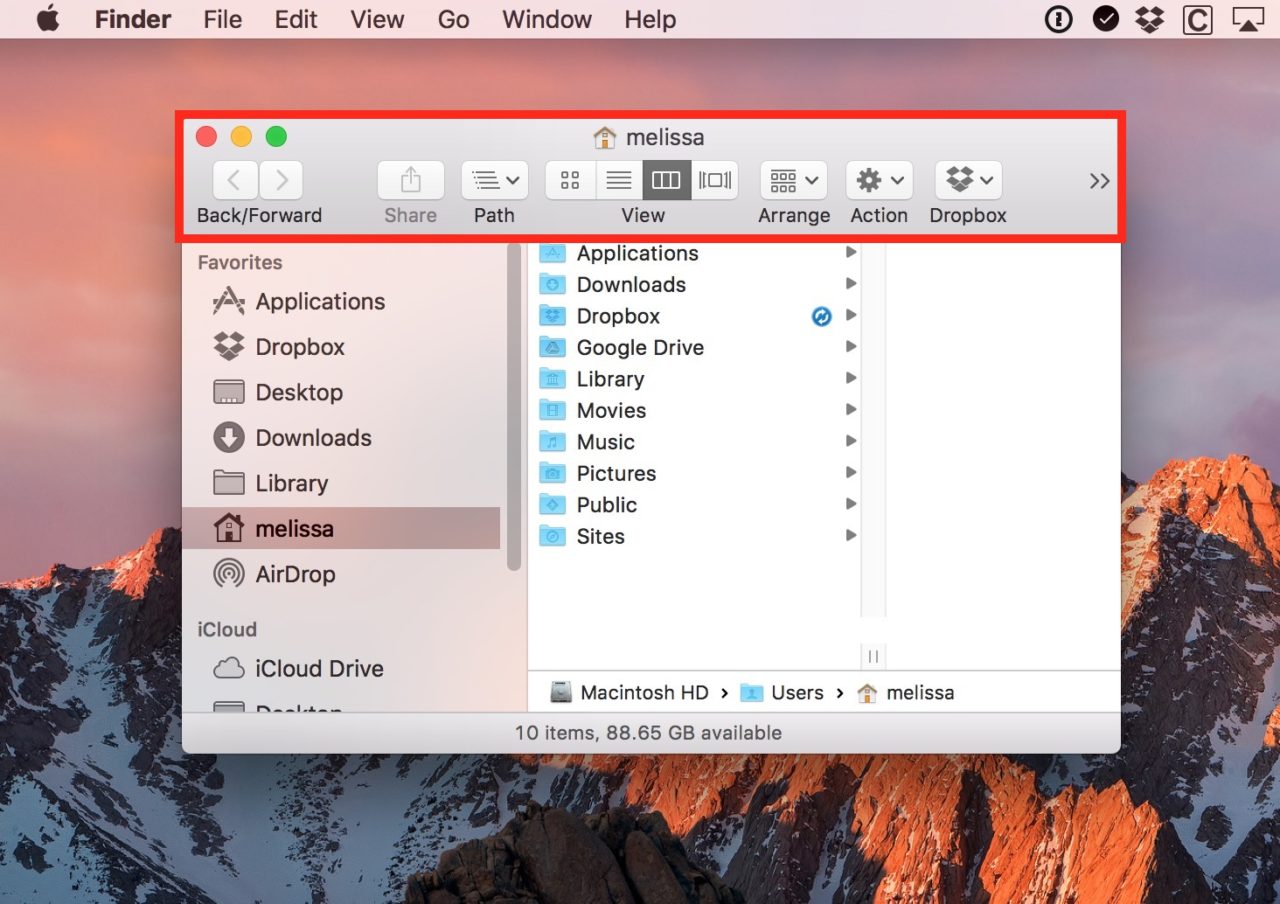
First, let’s be clear about what I mean I say “toolbar.” An app’s toolbar is the often-grey area that appears at the top of the app’s window. For example, I’ve highlighted Finder’s toolbar with a red box in the screenshot below:
Editing the Toolbar in Various Mac Apps
To access the mode that will let you edit that toolbar, you can either look under the View menu for an option called Customize Toolbar…
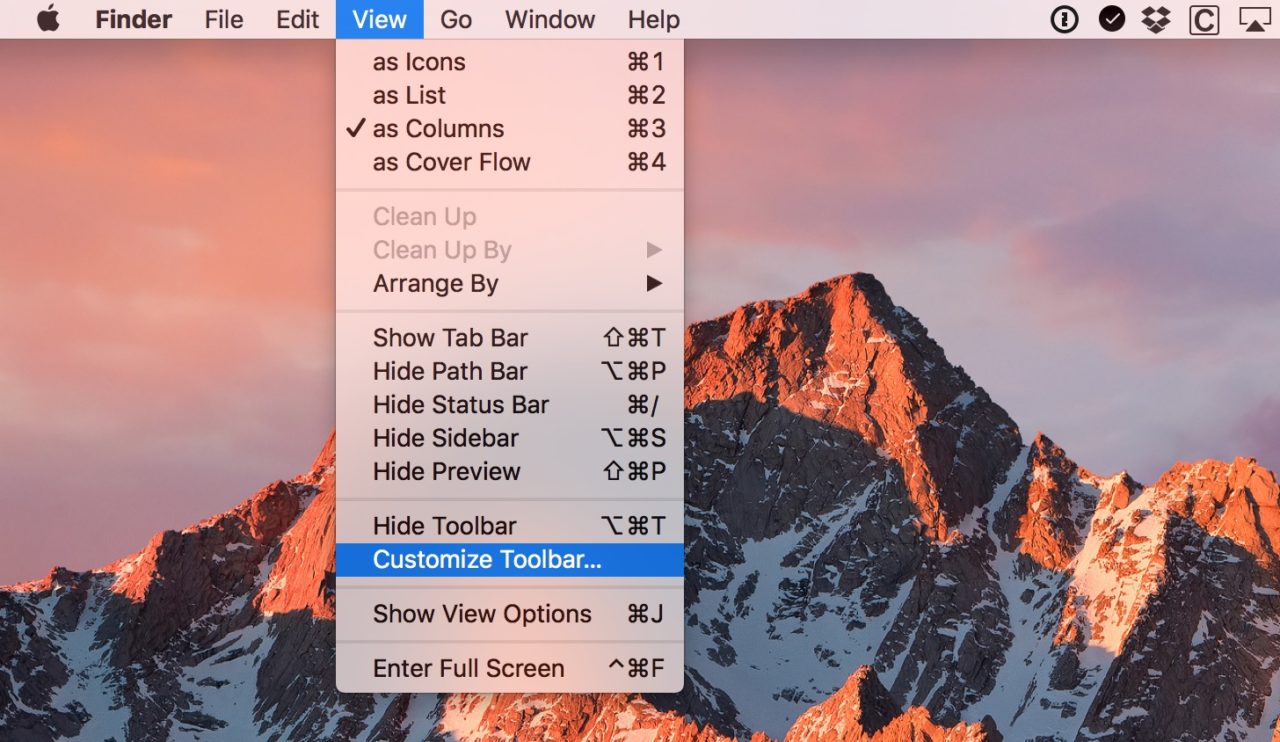
…or you can right– or Control-click on the toolbar itself to find the same option:
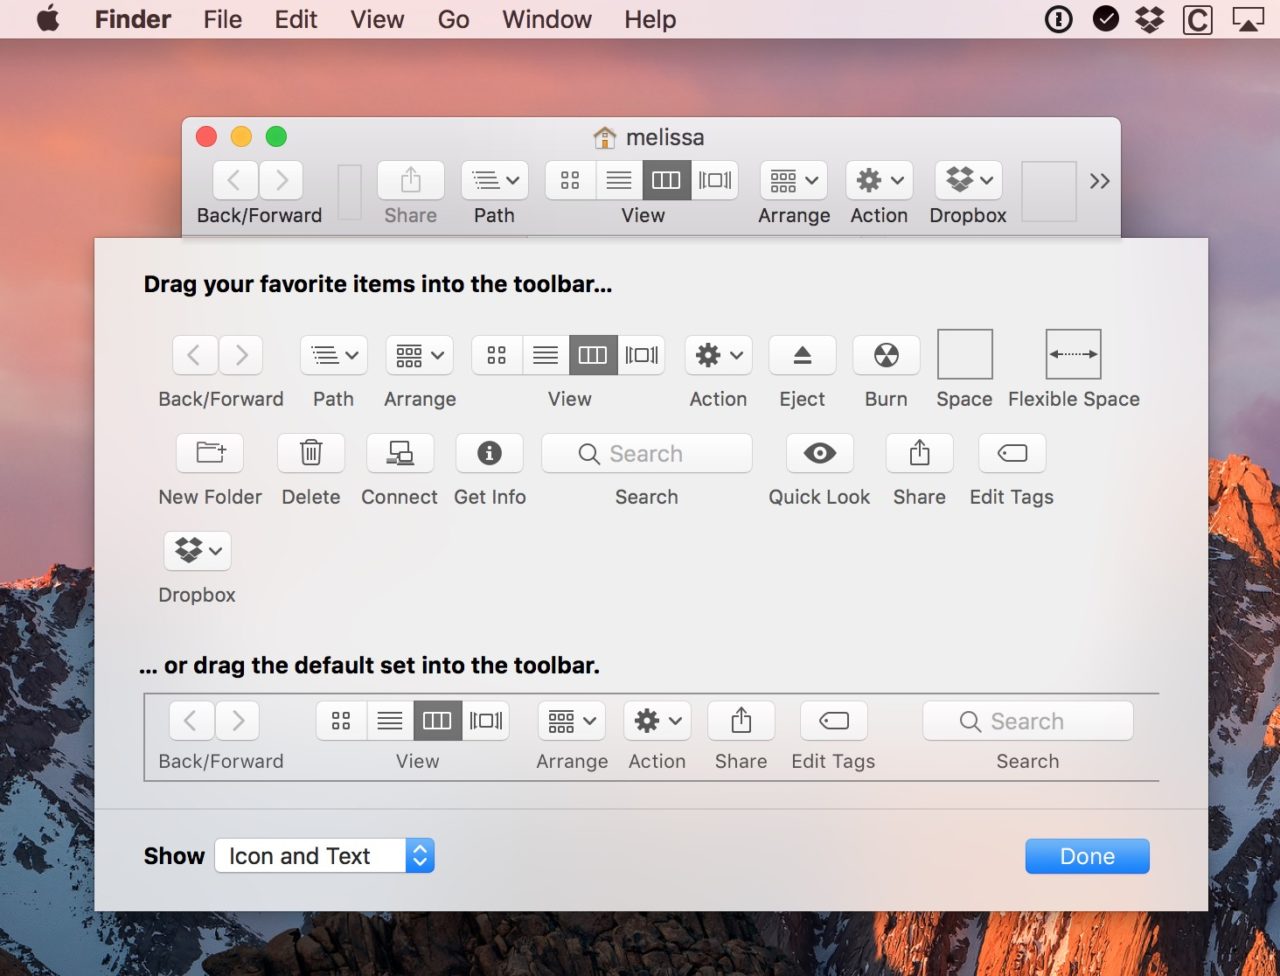
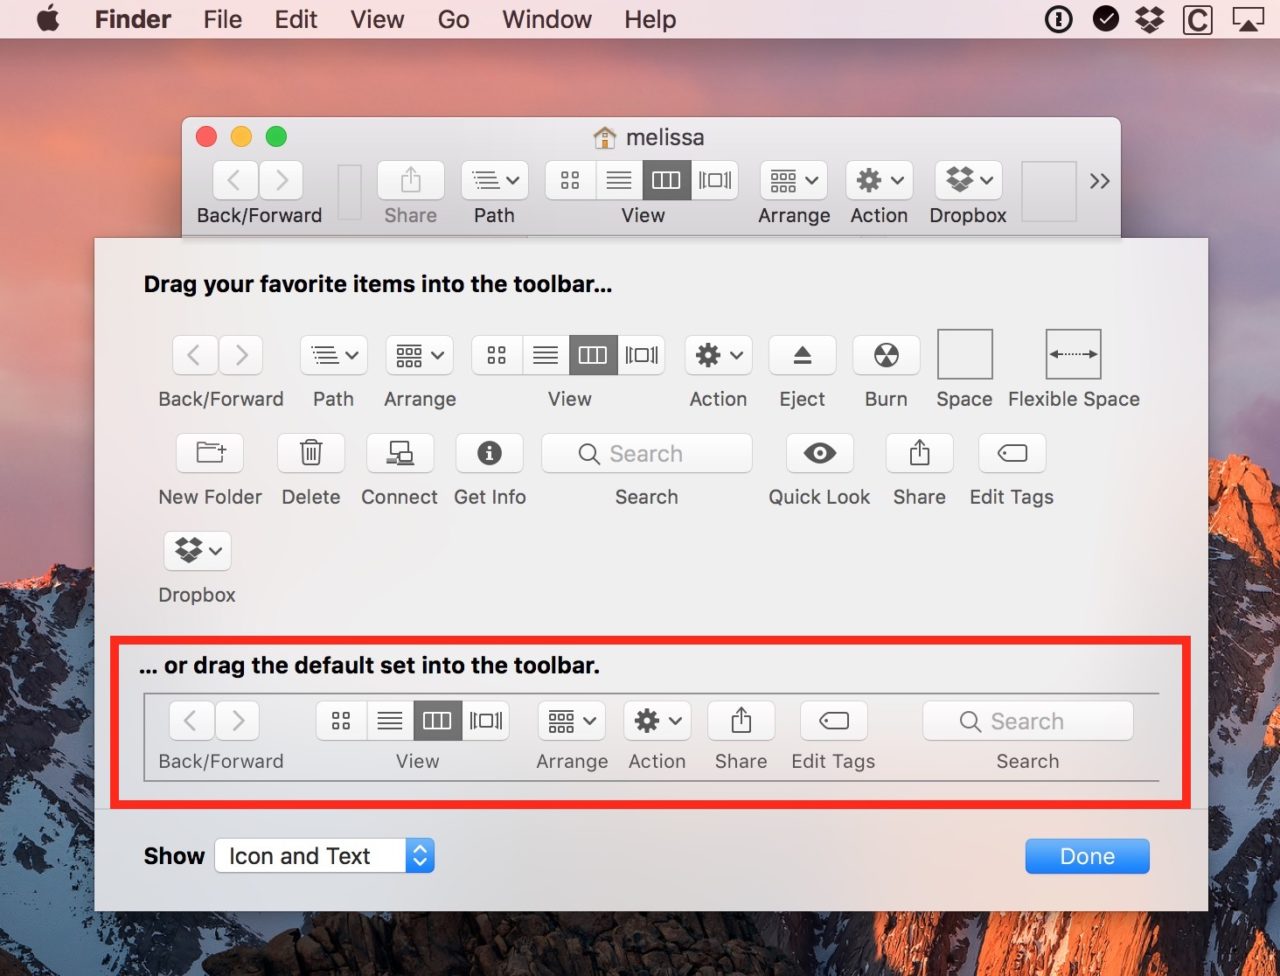
Once the Customize Toolbar box pops up, you’ll see every button available for the application you’re in. These will vary between apps, but here are the choices for Finder:
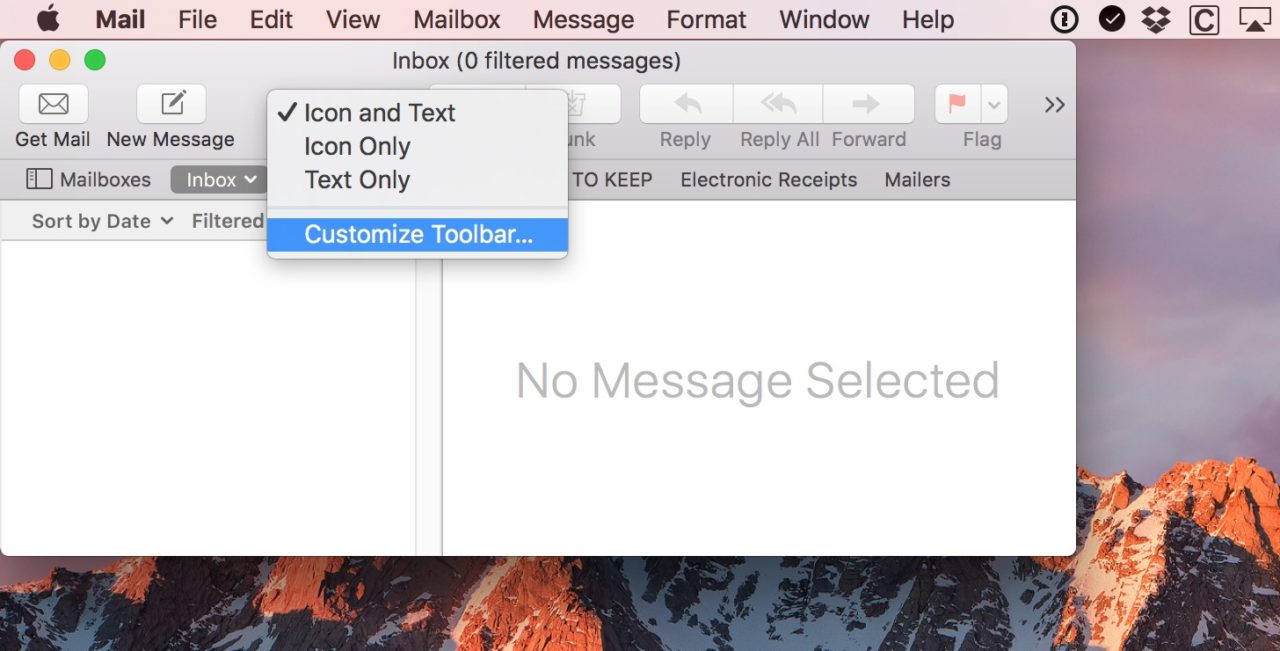
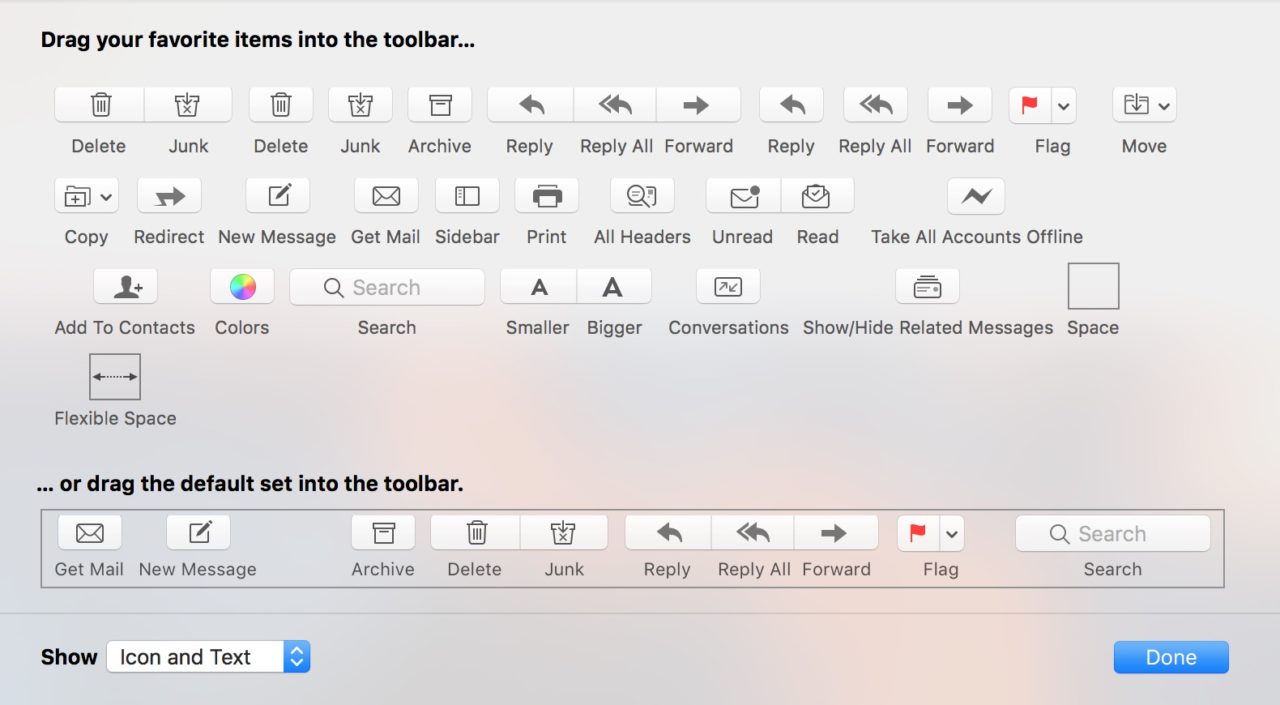
As another example, here’s what Mail looks like:
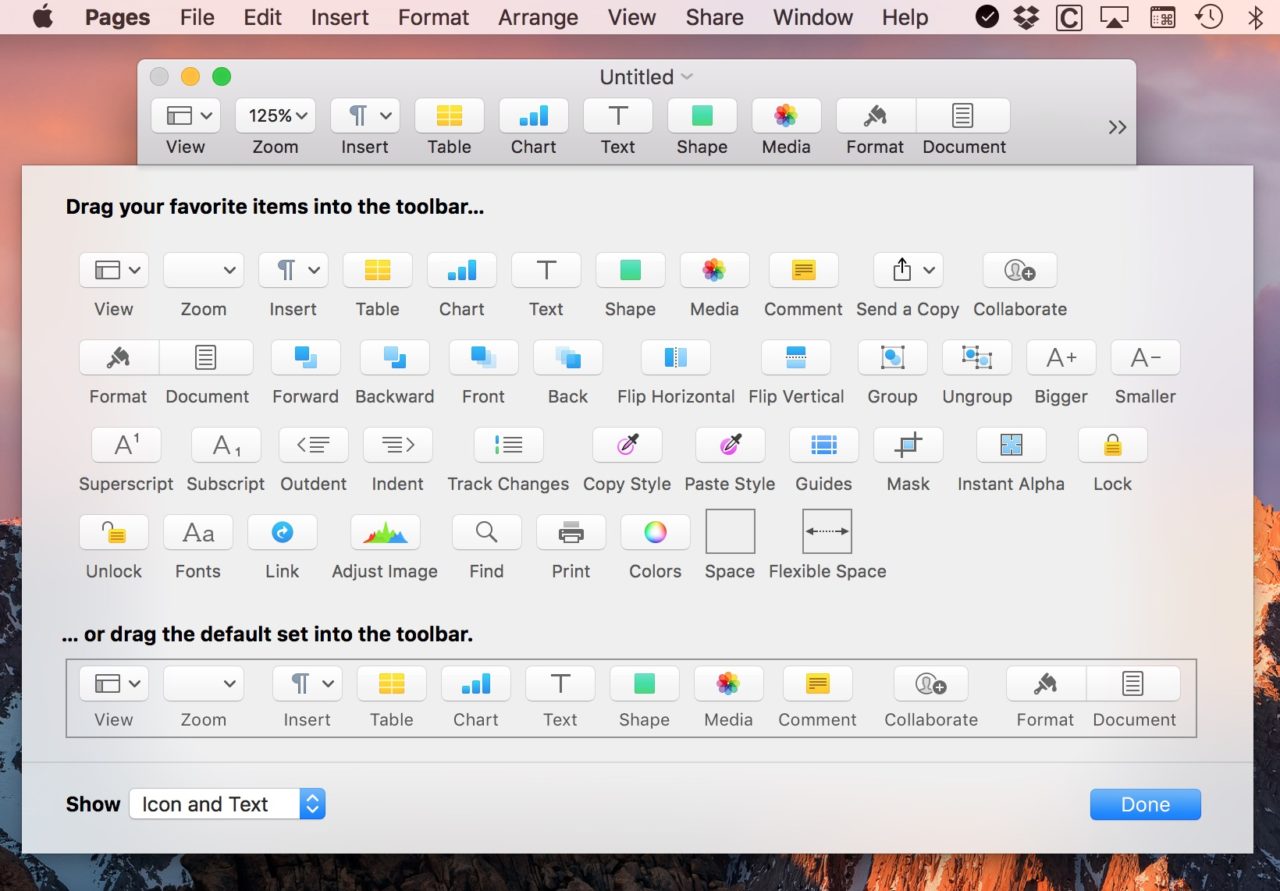
Finally, here’s Pages’ window (whew, that is a LOT of options!):
Adding and Removing Custom Toolbar Buttons
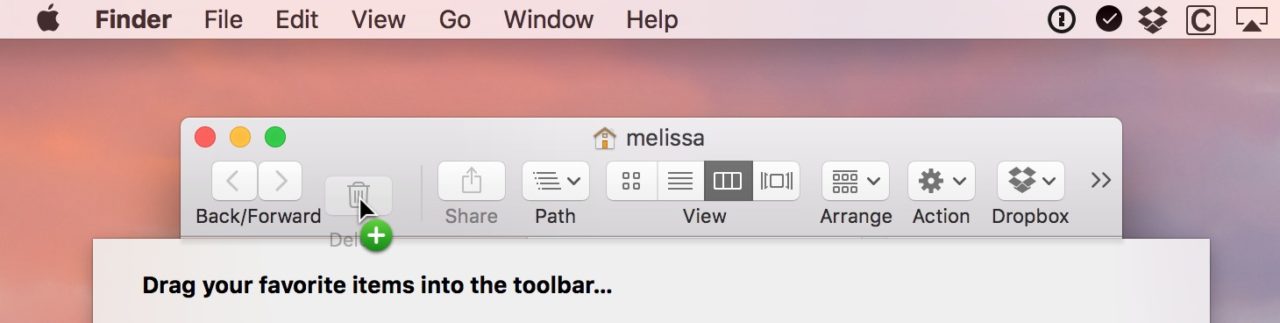
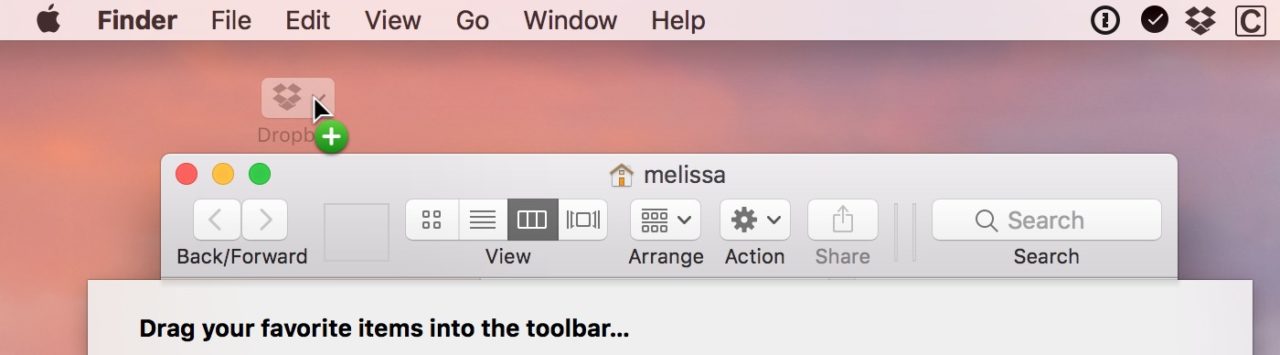
To actually customize the toolbar, find a button you’d like to add and then click and drag it onto the app’s toolbar. You’ll see a green circle with a “plus” appear when you’re hovering over a valid location in which to add your new toolbar button. You can drop the button in you’re desired location on the toolbar and the existing toolbar buttons will reposition themselves to make room.
With the “Customize Toolbar” window open, you can also remove any unwanted buttons, too. Just click on an existing toolbar button, drag it outside of the app’s window, and release your mouse or trackpad button. If you mistakenly remove a button, you can always find it listed in the available options in the Customize Toolbar window, and you can re-add it at any time.
Restoring the Default Toolbar
Finally, if you’ve made a bunch of changes and have decided that you want to revert back to where you started, just drag the entire default set of buttons up into your toolbar and let go.
When you’re satisfied with your changes, click “Done” to save the settings and continue on.
I have to say that the biggest surprise of writing this article was looking at all of the buttons available in Pages! I don’t think I’ve ever tried to customize my toolbar in that app, so holy cow, was I surprised. I mean, I like having easy access to stuff, but WHOA.


