


How to Add Document Location to the Office 2013 Quick Access Toolbar
Thanks to changes introduced in Microsoft Office in recent years, many users no longer actively manage their documents. Services like OneDrive and Office 2013’s built-in file manager let users quickly create, save, and later re-open Word, PowerPoint, and Excel files without ever seeing the saved document on their hard drives. But in some cases a user may need to know the specific location of an open Office document: Is it saved to my OneDrive documents folder? My PC’s local documents folder? My desktop?
You can always use the “Save As” function to see where the current document is located, but a quicker way is to add the Document Location widget to Office’s Quick Access Toolbar. We’re using Word 2013 in our example, but these instructions are nearly identical for other Office apps such as Excel and PowerPoint.
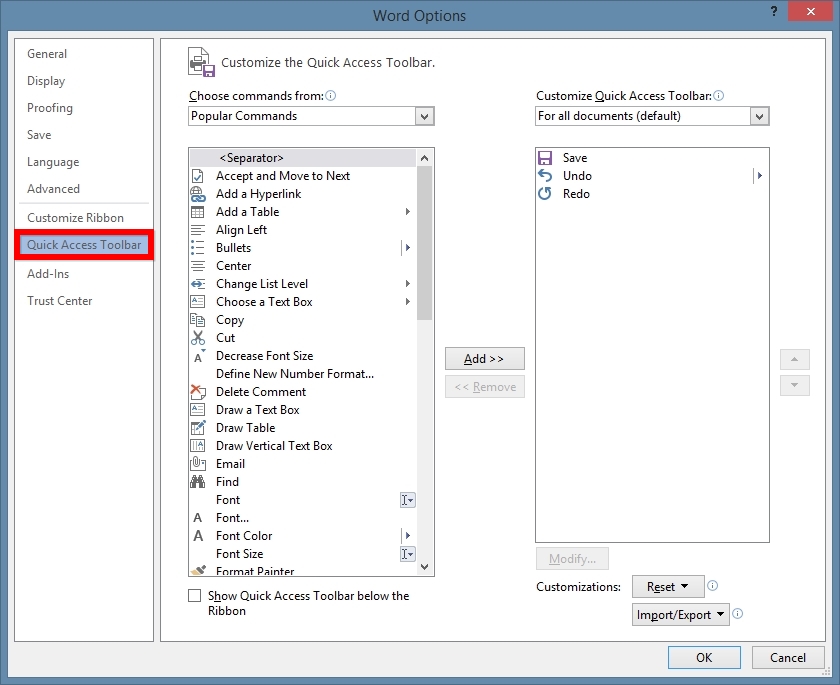
Open your Office app of choice and either open an existing document or create a new one. Then select File > Options to open the Options window and select Quick Access Toolbar from the list on the left.
Microsoft gives users a standard Quick Access Toolbar layout by default, but there are hundreds of additional options and commands that can be added to create a custom experience. One of these options is the ability to display the location of the current document.
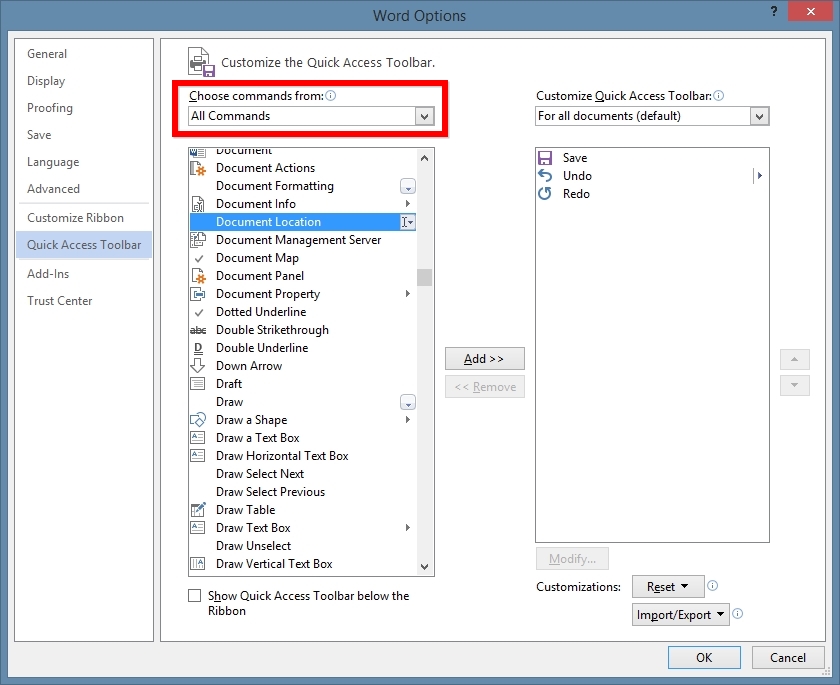
On the right half of the window, open the “Choose commands from” drop-down menu and select All Commands. Then navigate through the list to find the one labeled Document Location (hint: the All Commands menu is a long one, so you can press the “D” key on your keyboard to jump directly to that point in the alphabetical list).
Once you’ve found All Documents, click on it once to select it. Then make sure that the drop-down menu on the right is set to “For all documents (default).” This ensures that your change will apply to all documents in your particular Office application — in our case that means Word — and not just to a specific document. Note, however, that if you want to have the Document Location displayed only for a particular document, you’ll change the drop-down menu on the right to select only your desired document (which must be open at the time of the change).
With Document Location selected, press the Add button in between the two columns to move the command to your custom Toolbar setup. Once added, you can change the order in which commands appear in the Toolbar by highlighting the command in the column on the right and using the up and down arrows to reposition it relative to the other commands. The command at the top of this list will be positioned first in the Quick Access Toolbar (from the left), while the command at the bottom of the list equates to the end (right) of the Toolbar. In our case, we want the Document Location box to stay on the end of the Quick Access Toolbar, so we’ll leave it where it is.

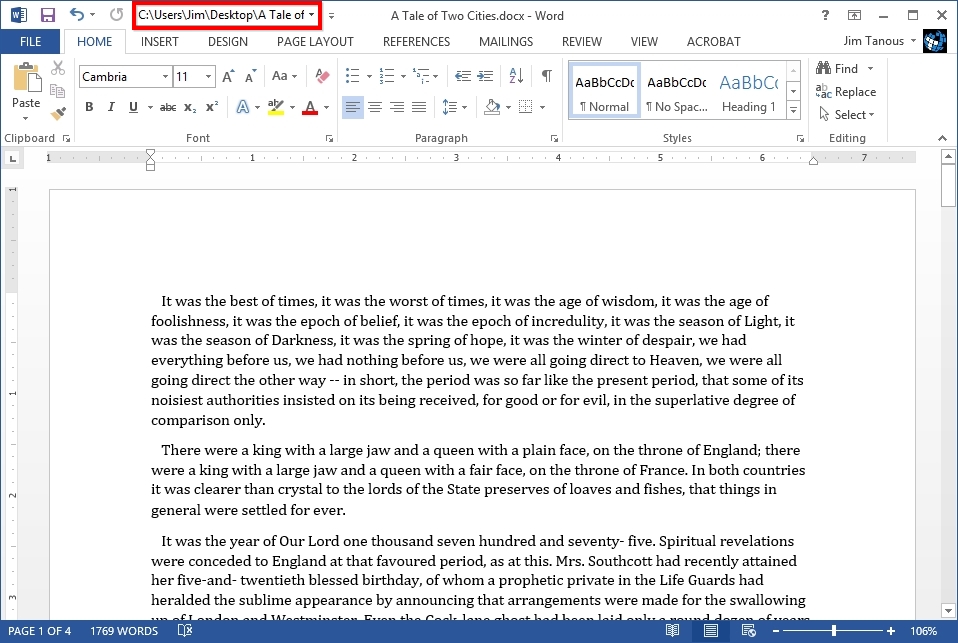
Press OK to save your changes and head back to your Office document. You’ll now see a new box on your Quick Access Toolbar that displays the file location of the current document. In our example, we see that our file is saved to the Desktop.
If your document’s file path is too long for the Document location box, you can click inside the box and use your mouse or keyboard arrow keys to scroll through the entire path. The default size of the box should be enough to meet the needs of most users, but unfortunately there does not seem to be a way to make the box bigger to accommodate longer file paths.
It’s worth experimenting with the other available commands for the Quick Access Toolbar. If you ever want to remove the Document Location box or any other option from the Toolbar, just head back to the Options window referenced. You can either manually remove commands by selecting them from the list on the right and clicking on Remove, or you can reset the Toolbar back to the default commands by selecting the Reset button at the bottom of the window and choosing Reset Only Quick Access Toolbar (selecting Reset All Customizations will reset other elements such as the Ribbon to their default layout, which may not be want you’re looking for).


One thought on “How to Add Document Location to the Office 2013 Quick Access Toolbar”