


How To Enable Built-in Administrator Account on Windows 8

Having access to administrator privileges is important on every personal computer. The same can’t be said about a work computer where some restrictions may be imposed on user accounts.
Windows 8 comes with the Administrator account disabled by default. You won’t see the Administrator icon on the login screen after a fresh installation, but there are three ways to enable it manually. Two of these are offline methods that don’t require internet access or logging in to your user account.
Method 1
The easiest way to enable the built-in Administrator account is to use the Command Prompt.
- Press the Windows key.
- Type “command prompt” or “cmd”.
- Right-click the icon and choose “Run it as administrator”.
- Type in the following command:
net user administrator /active:yes - Press Enter.
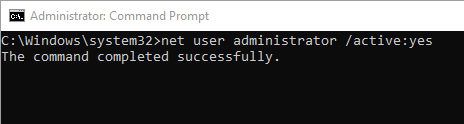
Now you can log out of your account and see the Administrator account appear as an option on the login screen.
Method 2
What happens if you need access to the Administrator account because you’ve forgotten your password or if someone changed your password to play with you? Why, you can enable the Administrator account (if you haven’t already done so) by using the Windows 8 boot media.
- Plug in your Windows 8 bootable USB.
- Restart your computer.
- Wait for the Windows 8 setup page to load.
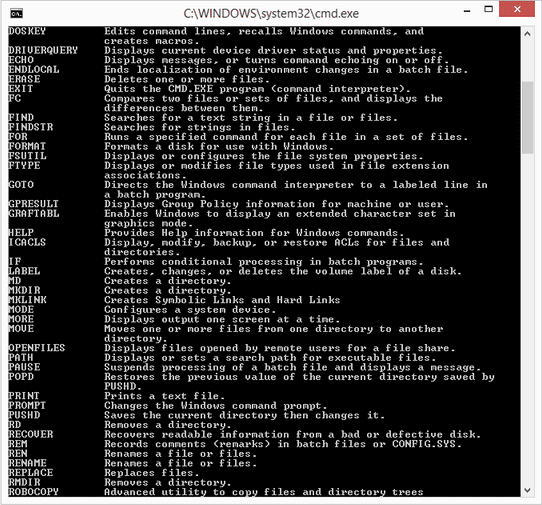
- Press Shift + F10 to open the Command Prompt.

- There are many commands you can use, but you only need to remember one in this case – copy. Type the following line:
copy /y d:\windows\system32\cmd.exe d:\windows\system32\sethc.exe - Remove the USB stick and reboot your computer.
- Press the Shift key five times on the login screen to access the Command Prompt.
- Type
net user administrator /active:yes - Restart your computer again.
- Access the Administrator account by clicking on the icon (no password required).
Method 3
This last method involves some modifications and changes to the registry. Again, you can use this method if you’ve lost access to your user account and the Administrator account hasn’t been already enabled.
Here’s what you should do:
- Boot Windows 8 from your USB stick.
- Press Shift + F10 at the setup screen to open the Command Prompt.
- Type “regedit”.
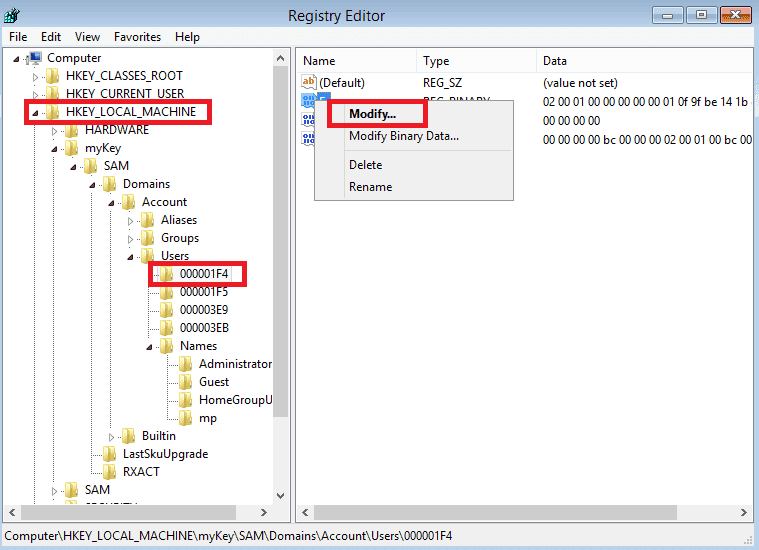
- Click the HKEY_LOCAL_Machine option.
- Click to open the File menu and select Load Hive.
- Load the SAM file found in D:\windows\system32\config.
- Add a key name, e.g. “myKey”, “adminkey”, etc.
- Go to the following path: HKEY_LOCAL_MACHINE\[key name]\SAM\Domains\Users\000001F4.
- Locate the F key
- Right click and choose Modify.

- Go to the 0038 position.
- Press delete and type 10.
- Click OK.
- Select the [key name] hive.
- Click to open the File menu and select Unload Hive.
- Confirm and reboot.
After the restart, you should see the Administrator account icon at the login screen. No password is required to use it to access your system.
Note that the registry method is lengthy and perhaps hard to remember as opposed to memorizing a single line that you can input in the Command Prompt window.
That being said, using the registry editor may come in handy if you have a broken keyboard and not all the keys are working properly. With the registry method, you’ll mostly use your mouse to navigate and make changes.
A Few Extra Tips
The best way to avoid having to do all this work is to just enable your Administrator account after every fresh Windows installation. Use Method 1 to do it the easy way.
Not everyone installs Windows on the D drive. Depending on your drive designations, you may have to change the letter D into C, E, A, or whatever it is that you used.
Don’t forget to click on the HKEY_LOCAL_MACHINE option before trying to enable Load Hive. Some users report that that option is greyed out. It can happen if you haven’t chosen the HKEY option first. It may also happen if you decide to use Method 3 from your user account.
You’ll need to run the regedit tool with Administrator rights by doing the following:
- Press the Windows key.
- Type regedit.
- Right-click and select Run it as administrator.
The Importance of the Administrator Account
If you want to set various restrictions for regular user accounts, you can only do so by using the Administrator account. You can make some changes from user accounts with limited administrative privileges, but they can be easily bypassed or changed by other users.
Another reason to use the Administrator account is to log into your system if you’ve forgotten your user account password. Of course, you can also do this to bypass someone’s password, e.g. on your kid’s personal laptop.
One more important thing to note is that Windows 8 doesn’t have a set password for the Administrator account. If you use the above methods to enable it, you’ll be able to log in with the admin account simply by clicking on the icon.
This is good if you’re in a hurry but can also lead to dangerous security breaches if someone gets access to your computer. Luckily, once you’ve enabled the Administrator account, you can password protect it using the Control Panel, just as you would with any other user account.


