


How to Check and Manage All Gmail Newsletter Subscriptions
In this digital age, there is no way one can escape from spam mail and newsletters. Fortunately, Gmail comes with a powerful spam filter, which does its job well. But that does not solve the problem entirely. There is no easy method to see all the newsletters you are subscribed to.
Your Gmail inbox can get cluttered with newsletters and subscription emails, so much so that, at times, you might miss critical emails. So, in this guide, we will show you how to find and manage all newsletters and mailing lists you have subscribed to. This will help you stay focused on important emails.
How to Automatically Filter and Delete Newsletters in Gmail
Nobody likes their inbox being filled up with newsletters. It can be daunting. You can use filters and labels in Gmail to organize and view all the subscription emails that land in your inbox. Follow the steps below to organize all your newsletters in one place.
- Open your favorite browser and go to Gmail.

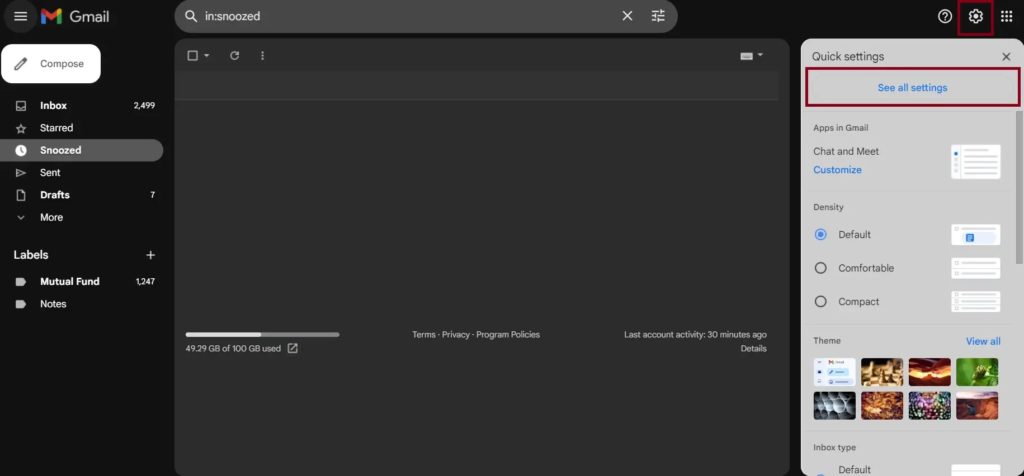
- Click on Settings (gear icon) and then on See all Settings. This will open up all your Gmail settings.

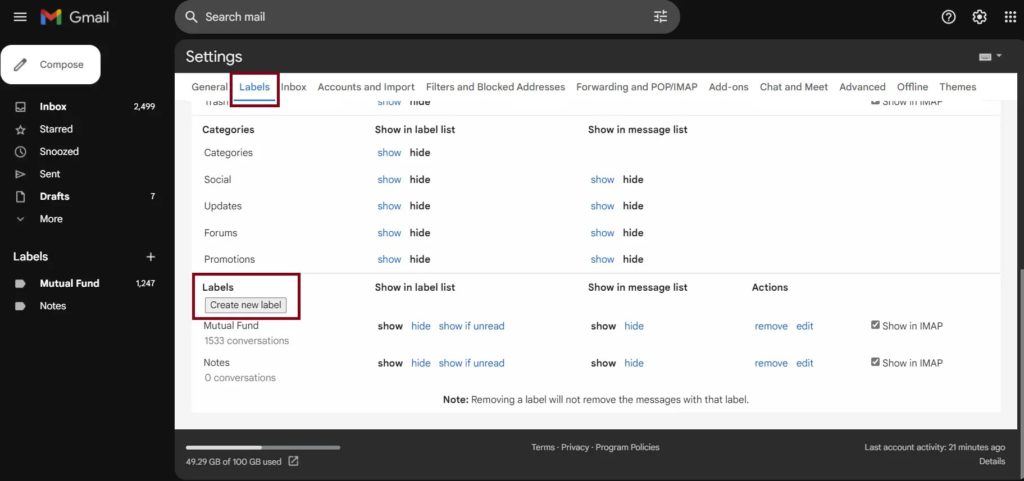
- Go to Labels and scroll down until you find the Create New Label button, then click on it.

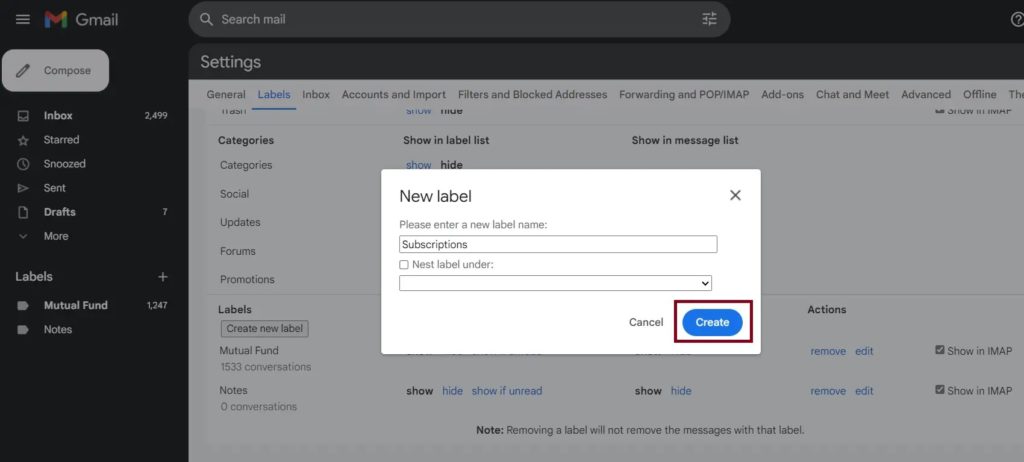
- Give a name to your label; in this case, it’s named Subscriptions.
- Click on Create. Your new label will be created and found in the left-hand pane.
To apply filters to the Label, follow the steps below:
- Click on Settings (gear icon) and then on See all Settings.
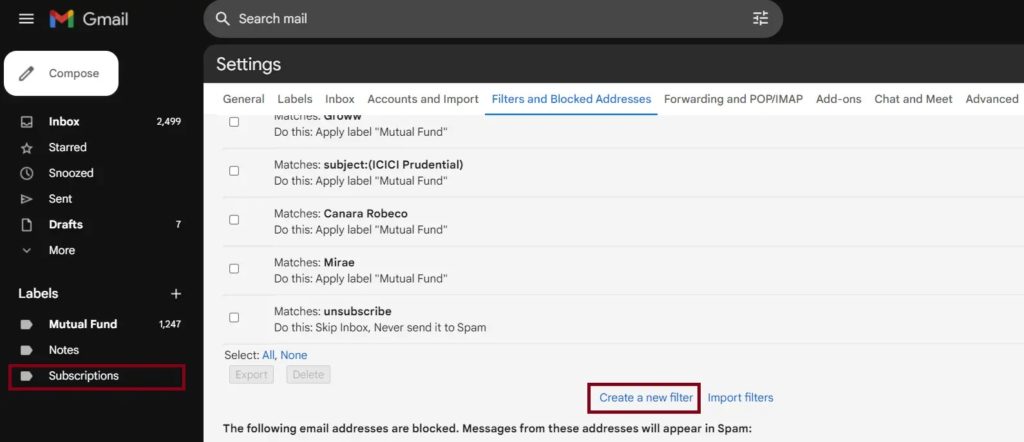
- Select the Filters & Blocked Addresses tab and click on Create new Filter.

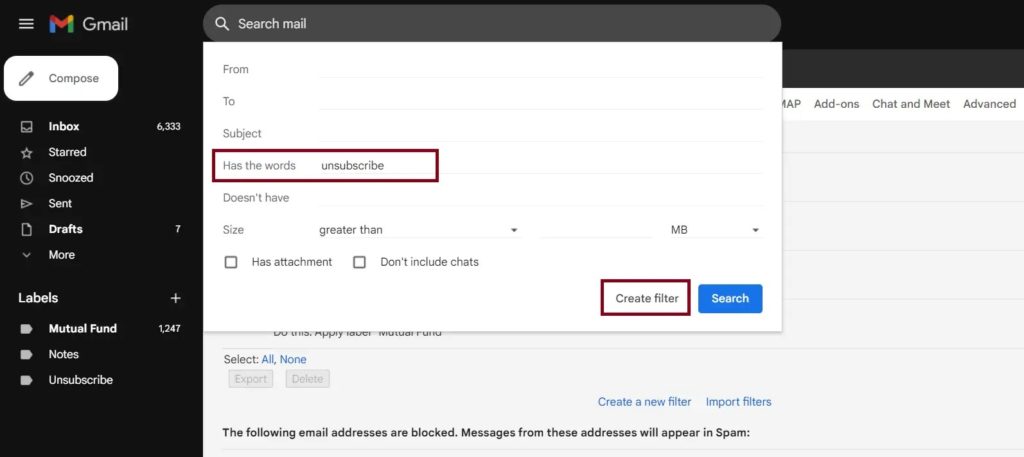
- Leave everything blank, and under Has the words write “unsubscribe” and click Create filter.

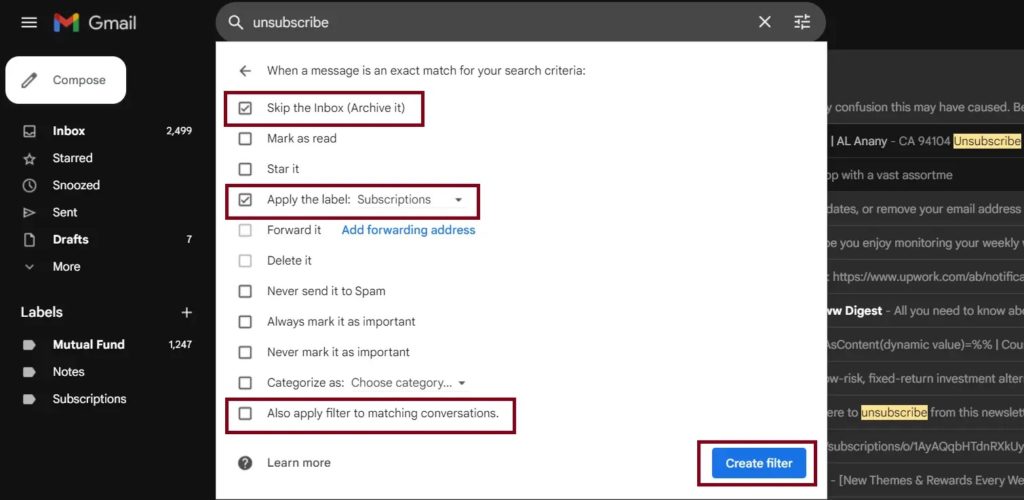
- Now, under Apply the label, select the label created from the drop-down, i.e. Subscriptions.

- You will have two options.
- If you want to ensure the newsletters go directly to your trash, select Delete it.
- However, select Skip the inbox if you want to archive them instead.
- Do not forget to check the Also apply filter to matching conversations option. This ensures that the already existing mails containing the keyword “unsubscribe” also come under this rule.
- Hit the Create Filter button, and you will be done. All your emails containing the word unsubscribe will be moved to this filter.
You can block ads in Gmail as well if you find them annoying.
How to Bulk Unsubscribe from Newsletters in Gmail
There are three ways to unsubscribe from newsletters that land in your Gmail inbox. While there are some traditional methods, we have also recommended third-party services, which will need access to your Gmail account to read and find those emails.
1. Gmail Unsubscribe Button
This is the standard way of unsubscribing from an email, and it remains the same across all email clients. You will be unsubscribed from that particular mailer with just a couple of steps. However, remember that this method is feasible when you have one or two mailers you want to unsubscribe from.
- Go to Gmail on the web or use the app on your phone.
- Open the newsletter that you want to unsubscribe to.

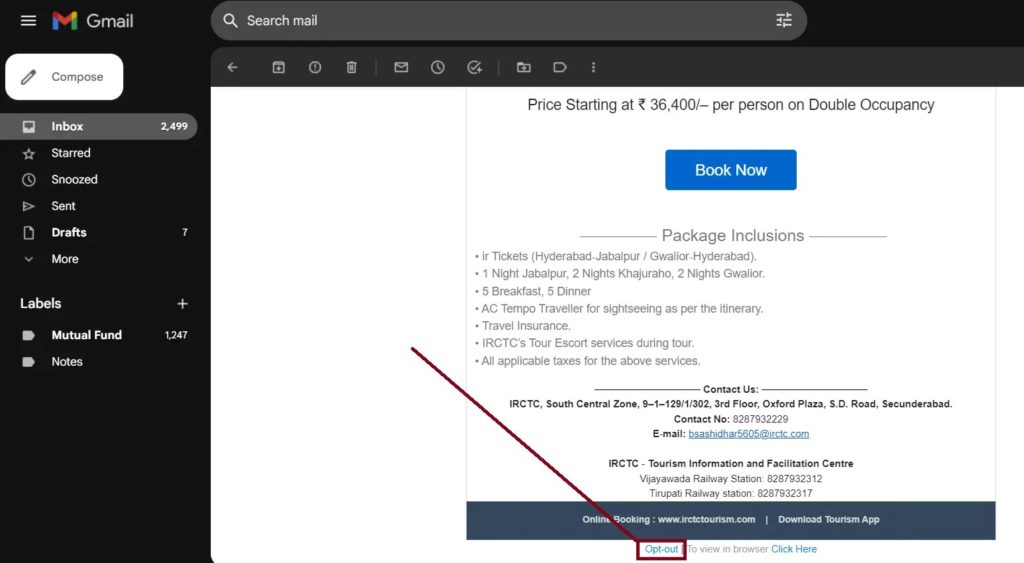
- Scan through that email and look for the Unsubscribe option. It is usually in the footer, with the tiniest font size possible, making it easy to miss.
- Click on the button once you find it. Now, you will not receive any further emails from that particular sender.

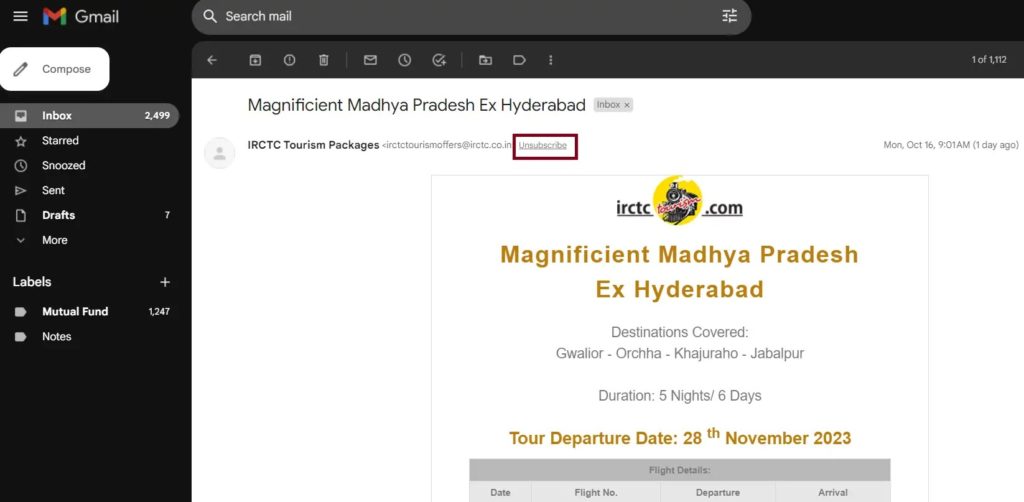
Tip: if you are using Gmail on the web, you will notice the Unsubscribe button right next to the newsletter sender’s email address in most cases, making the job easier!
Do note that these steps won’t work if you are using a delegated Gmail account.
2. Unroll.me
Gmail’s official way of unsubscribing from a newsletter is good, but it is not feasible when you want to unsubscribe or categorize thousands of newsletters. That is where third-party services like unroll.me come into play.
- Open any browser and navigate to the unroll.me website.
- Click on Sign Up for free if you are a first-time user or login if you are an existing user.
- Select the email service provider; in this case, it is Gmail.
- Enter your email address and click Continue.
- Enable 2-step verification for your email if it is not already enabled.
- You will now be asked to create an app password. If you already have one, then click on App Password already created. Otherwise, click on the Create App Password button.
- It will now take a few seconds to pull up a list of all your subscriptions. Post that, you can view all your subscriptions on the dashboard.

- You will now see the option to Unsubscribe from that mailer. Just click on Unsubscribed to do the same.

3. Leave Me Alone
Leave Me Alone is another excellent third-party service that lets you unsubscribe from newsletters. Below is a detailed tutorial on how to use it.
- Navigate to Leave Me Alone in your browser and click Get Started for free.
- You will be asked to create a Leave Me Alone account. Enter your email address and a new password.
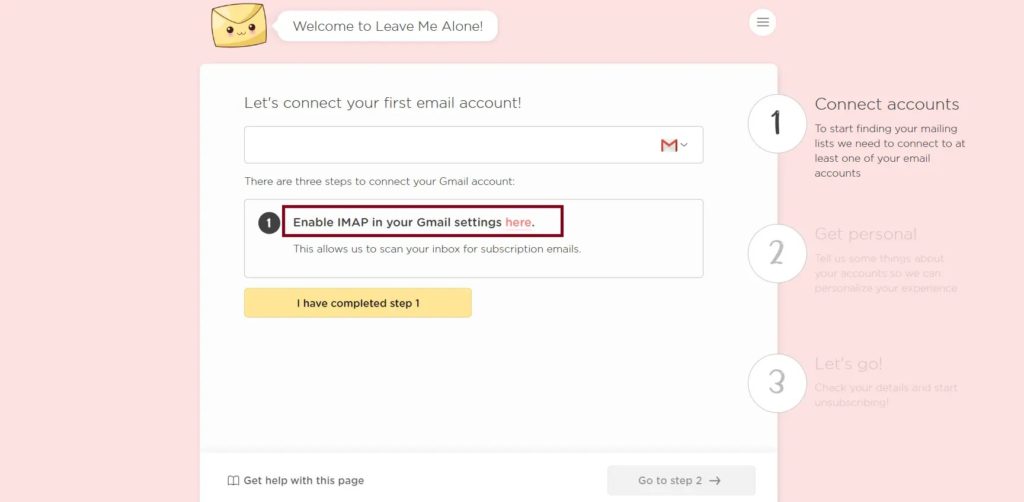
- Once your account is created, you must enable IMAP in Gmail settings. If IMAP is already enabled, click ” I have completed step 1 ” and go to step 2.
- If IMAP is not enabled, click Enable IMAP in your Gmail settings here. This will take you to the Gmail settings, where you can enable it.
- Enable Multi-Factor Authentication and enter an app password. You can refer to the steps in the last method to create an App Password.
- Select your preferred language and what you want to do with the unsubscribed emails.
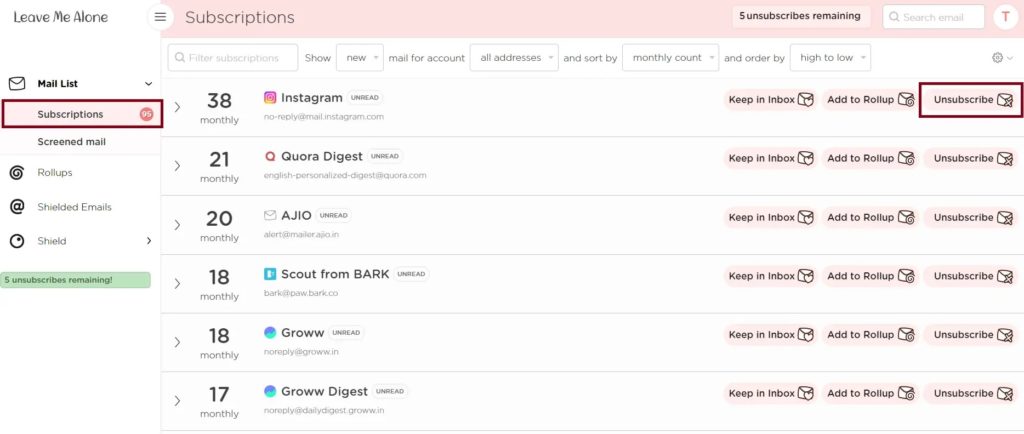
- Now, it will scan through your mailbox and fetch all the newsletters.

- Click the Unsubscribe button next to the mailer/service provider from whom you do not want to receive newsletters.
Keep Your Inbox Clean
We have shown you multiple ways to organize, manage, or delete newsletters that land in your Gmail inbox. This extra effort will help ensure that your mailbox remains clean and you only receive mail from important sources. However, if you do not want to organize but delete unwanted newsletters or emails, follow our guide to delete all promotional emails in Gmail.
FAQs
A: This depends on the mailer company, but this happens instantly in most cases. You will not receive any further emails when you click on Unsubscribe.
A: We would not recommend you click on any links you might see in spam emails. It could very well be a phishing attack disguised under the Unsubscribe hyperlink. Hence, it is always a good idea to delete the spam emails.


One thought on “How to Check and Manage All Gmail Newsletter Subscriptions”