How to Turn Off Force Touch in OS X El Capitan

Force Touch is a new feature in Apple’s latest MacBooks and the Magic Trackpad 2 that allows users to interact with apps and data in OS X based on the pressure of their click, something Apple refers to as a “Force Click.” (Note: the different terms of “Force Touch” and “Force Click” can be confusing. To clarify, Force Touch is the feature or technology itself, while Force Click is the actual action of pressing firmly on a Force Touch-compatible trackpad).
With Force Touch hardware and a Force Click action, users can access pop-up windows (Apple calls them “popovers”) that display quick tidbits of information such as dictionary definitions, map locations, or package tracking numbers, change the browsing speed while viewing photos, or even increase or decrease the fast forward and rewind speed while watching a QuickTime movie, in addition to many more interactions.
But Force Touch and Force Clicks can also be distracting for longtime trackpad users, as they introduce a secondary click point based on the pressure of your finger on the Trackpad, and generate haptic feedback based on certain events, such as when a rotating photo hits zero degrees, or an audio track levels out at 0 dB. These are key selling points for the Force Touch feature, but some users may prefer a more traditional experience without the extra clicks and feedback. If you’re one of those users, here’s how to turn off Force Touch in OS X.
Disable Force Touch in OS X
First, here’s a reminder that Force Touch-compatible hardware is only available on the latest models of MacBooks (Mid-2015 MacBook Pro, Early 2015 Retina MacBook, and later) or for Macs connected to a Magic Trackpad 2. If your Apple hardware doesn’t meet the minimum requirements (as of the date of this tip), you won’t see the Force Click options in System Preferences that we reference below.
When you first boot a Mac with a Force Touch-compatible trackpad, or pair a Magic Trackpad 2 to your Mac, Force Touch will be enabled by default. To turn off Force Touch and prevent Force Clicks from registering, navigate to System Preferences > Trackpad > Point & Click.
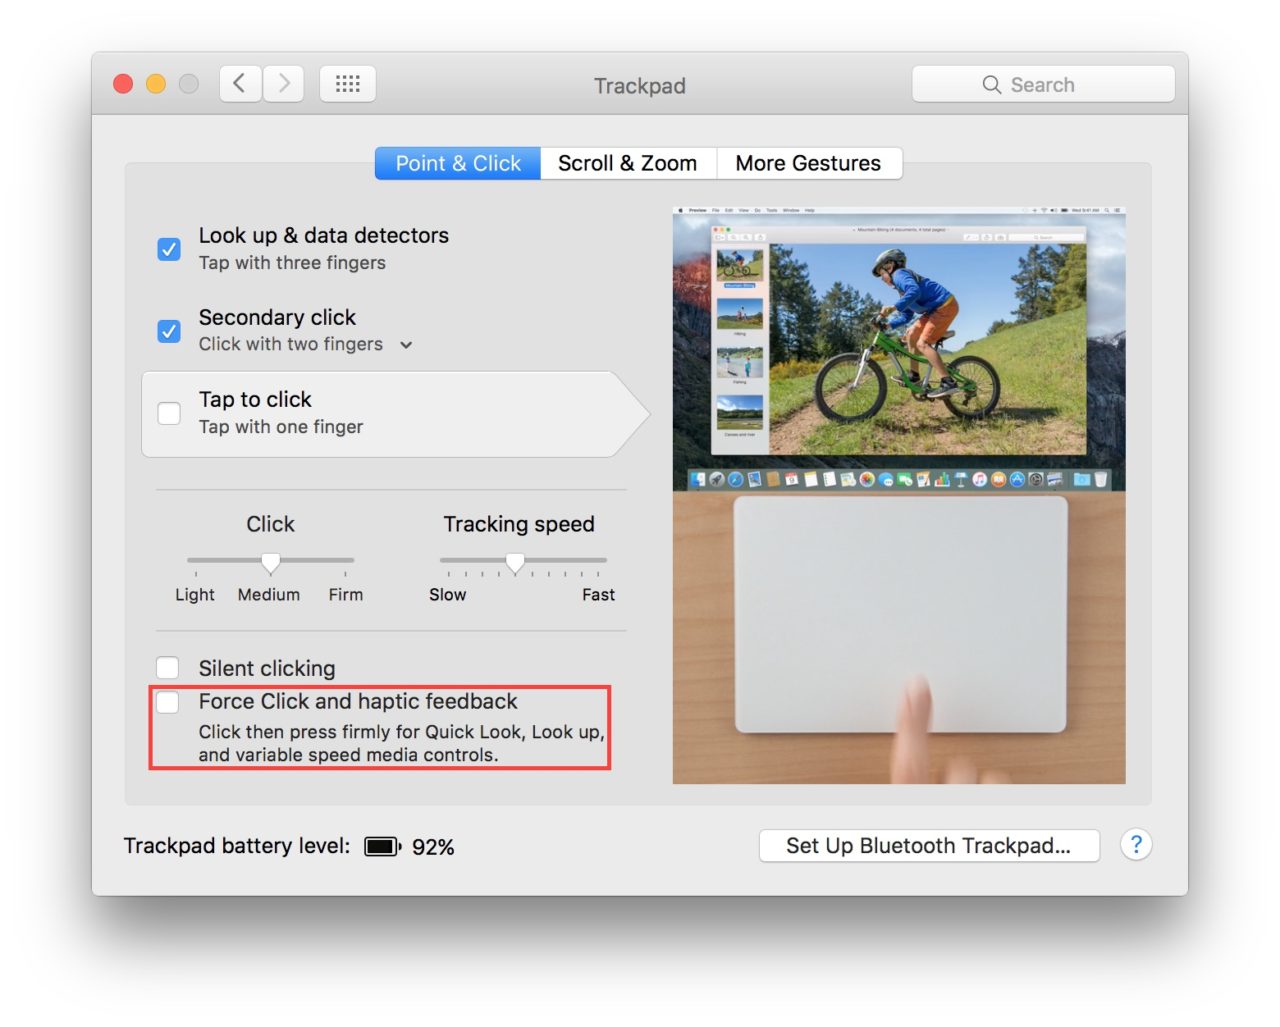
Find the checkbox labeled Force Click and haptic feedback and uncheck it to disable Force Clicks. There’s no need to log off or reboot your Mac; the change will take effect immediately. To test it out, minimize or close System Preferences and head to Safari, a Pages document, or any other app that makes use of Force Touch, and start clicking normally with your trackpad. If you had some experience with Force Touch prior to disabling it, you’ll notice a very different feel to your trackpad clicks. If you’re happy with this more traditional form of trackpad usage, you’re all set. If, however, you discover in hindsight that you prefer Force Touch, just head back to System Preferences > Trackpad > Point & Click and re-enable the feature at any time.
Adjust Force Click Pressure
If you didn’t like the Force Touch feature at first, but find that disabling Force Touch perhaps takes things too far, you can try adjusting Force Click sensitivity. Just like 3D Touch in iOS 9, Apple gives the user a choice of three sensitivity levels for Force Clicks in OS X El Capitan.
To adjust Force Click sensitivity, head back to System Preferences > Trackpad > Point & Click and adjust the “Click” slider to one of the three pressure options: light, medium, or firm.
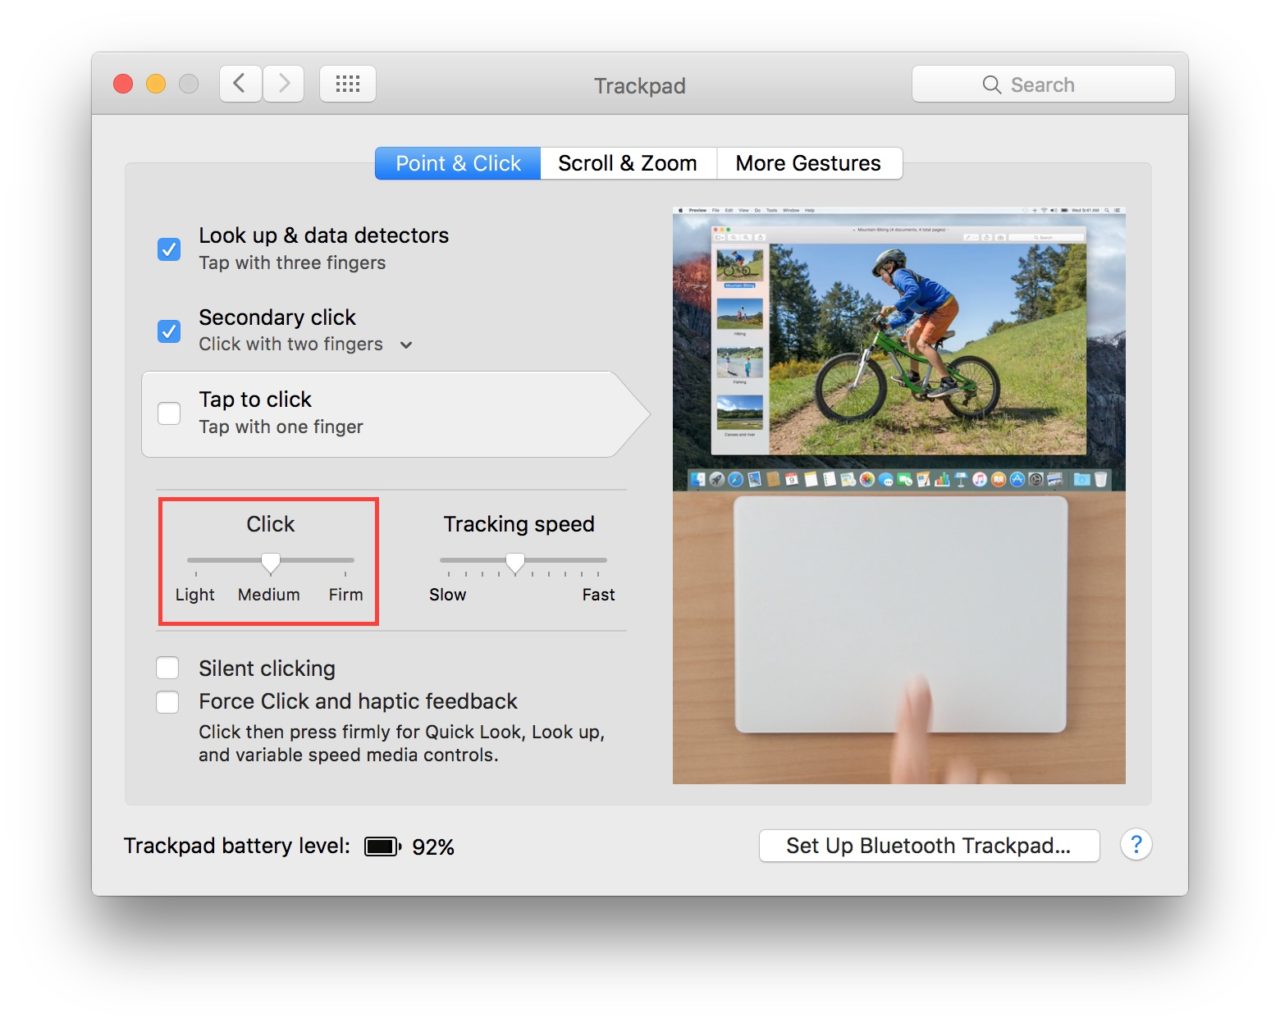
Medium sensitivity is the default for a Force Click, while “light” and “firm” mean that it takes less and more pressure, respectively, to trigger a Force Click. Just as when you disabled Force Touch in the steps above, your changes to Force Click sensitivity will take effect immediately, allowing you to easily experiment with the three pressure options to find the one that feels best.