How To See And Watch GPU Usage In Windows 10
We can’t stress enough how important watching your GPU usage can be. Being able to watch it for troubleshooting reasons might be one of the most important reasons out of all of them; however, you can also monitor GPU usage to see how much power your video games are consuming. This would make it easier to see if it’s time for a video card upgrade or to even monitor overclocking.
In most cases, users usually download a third-party app for monitoring GPU usage. But now, Microsoft has included a way to monitor GPU usage with Task Manager more accurately than third-party software.
How Does It Work?
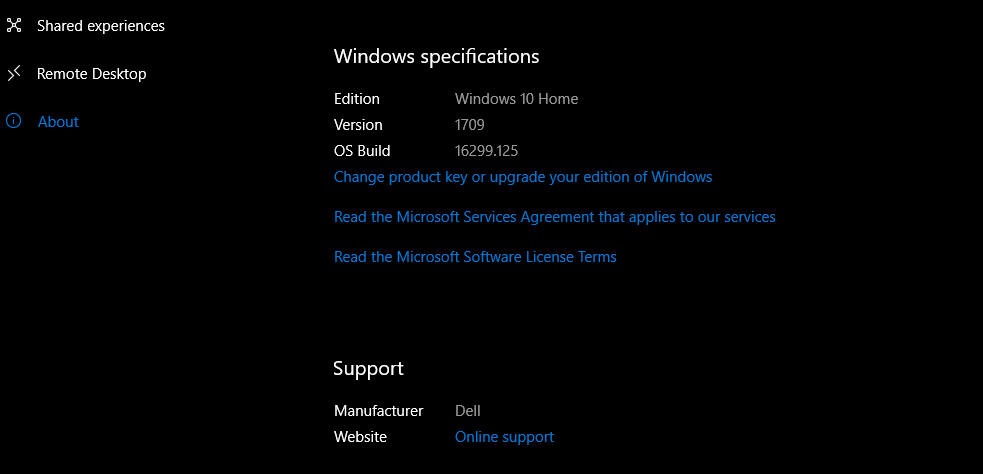
First off, to even use the internal GPU monitoring function, you’ll need to be upgraded to the Windows 10 Fall Creators Update. This would be Windows 10 version 1709. To check which version of Windows 10 you’re on, open Settings > System and then click on “About” on the left navigation bar. This will show you information about your system, including what versions of Windows your on. You can also just make sure you’re on the latest Windows update by heading into Settings > Update & Security > Windows Update.
Being on the latest version of Windows 10, you should be able to monitor your GPU usage in Task Manager without a problem now; that is, if you have a new enough graphics card. Your system’s GPU has to be able to support WDDM 2.0, which many older cards do not. You can see if your card does support it by opening up the DirectX Diagnostic Tool — under the “Display” tab, you should see a section that says Driver Model. If it isn’t WWDM 2.0 or newer, you won’t be able to monitor GPU usage within Task Manager.
If you meet all of those requirements, you should be able to The way Windows is able to get an accurate reading is by using new models and features found in the Windows Display Driver Model. It’s able to see information in the GPU Scheduler and the video memory manager, both of which actually allocate GPU resources themselves. Since Windows is able to see this kernel-level information, you get the most accurate GPU usage reading.
How To Watch GPU Usage
Now, watching GPU usage is (almost) as simple as opening Task Manager. To open Task Manager, right click on your task bar and select Task Manager. Once it’s open, you’ll see that Task Manager doesn’t show GPU usage by default — you’ll need to enable it manually.
With Task Manager open under the “Processes” tab, right-click around the column headers (i.e. the CPU, Memory, and Disk headers) and make sure “GPU” is selected on the drop down.
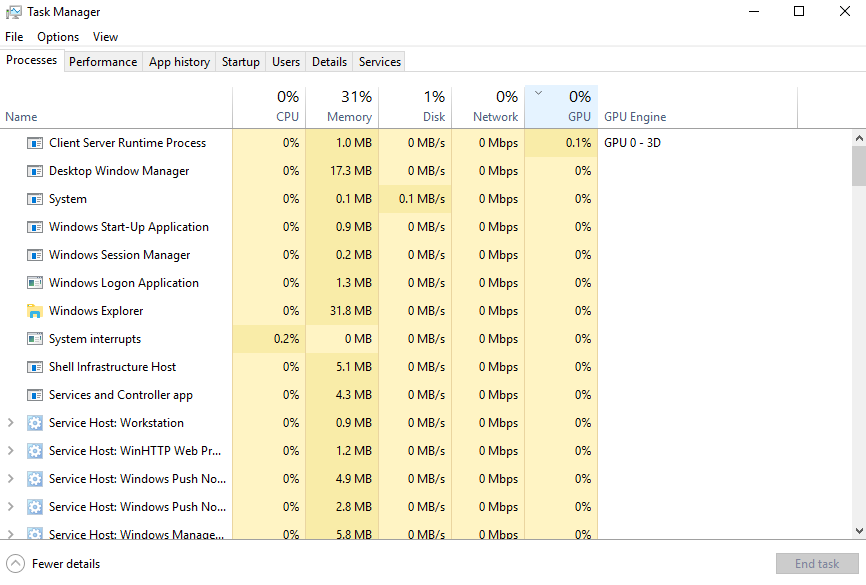
Now, you’ll be able to see what is taking up GPU resources as well as how many resources they’re consuming. The column itself will tell you how much total GPU resources are being consumed. You can sort the column by applications using the most GPU resources by simply clicking on the GPU column.
For more statistics, you can even right-click near the columns and enable GPU Engine viewing, which shows you if your application or process is using the 3D engine or if it’s using the video codec. GPU Engine is really just interesting data, not necessarily showing us something as important as how much of the total GPU resources are being used.
Real-Time Statistics
Task Manager also allows you to watch GPU performance and demand in real-time. To monitor this usage, you’ll have to move over to the “Performance” tab in Task Manager. You’ll just need to click on the “GPU” column on the left sidebar to watch GPU performance specifically.
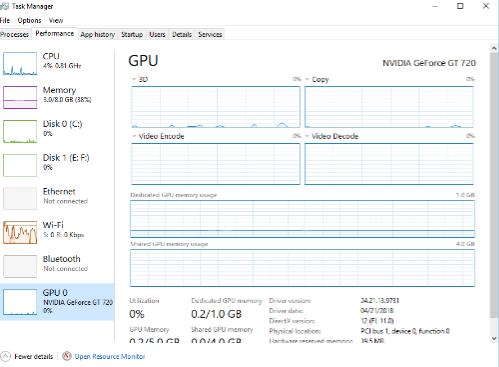
Windows will try to show you the most interesting and useful graphs first. So, if you’re playing a video game, it’ll show you the 3D Engine graph in real-time over a graph that isn’t generating any information. You’ll also be able to see graphs on dedicated and shared video memory, the video codec, and more.
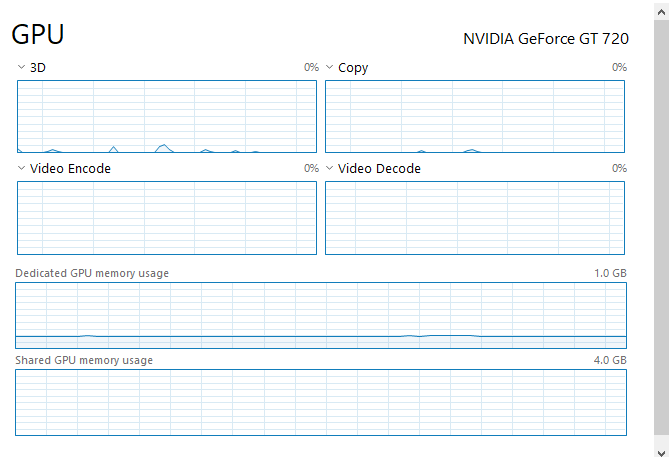
You might find it useful to have a graph-only view when troubleshooting or for watching utilization rates. This makes it easy to monitor while playing a game in windowed mode, or even for moving over to another screen. Switching it to graph-only view is as simple as right-clicking on anywhere inside the GPU column and selecting the “Graph Summary” view.
You might also want to keep the window open at all times just so it doesn’t minimize when you open a game for testing. To do this, click on the Options tab at the top of Task Manager and select Always on top. To reverse either of these options, you can just repeat the steps and de-select those changes.
Checking Video Memory
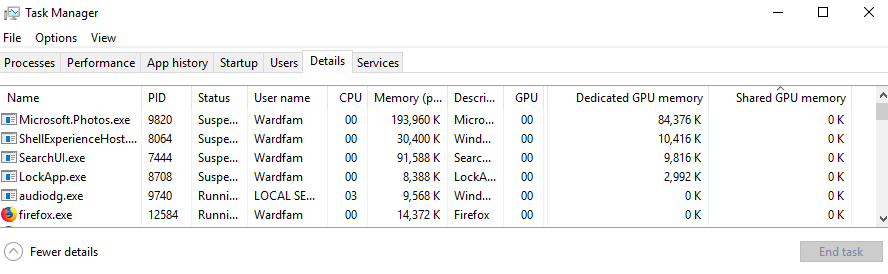
You might also want to check out what applications are using the most video memory. It’s fast and simple to do this, too. Only, this information isn’t available under the Processes tab nor the Performance tab. You’ll need to go into the Details tab, right-click a tab, and click on Select Columns. Here, just check the boxes that say, Dedicated GPU Memory and Shared GPU Memory. The former shows you how much video memory an application is consuming, while the latter shows you how much system RAM (not your GPU RAM) an application is using for graphic/video usage. You should see something like the picture above.
Closing
As you can see, setting up Task Manager for monitoring GPU usage is quick and straightforward. This type of information can be so useful for tracking down sluggish video features, general troubleshooting, and even for deciding if it’s time to upgrade the video card (e.g. in the event that a new game is taking up too many resources).