How to Change Captions in Adobe Premiere Pro
Adobe Premiere Pro is one of the leading video editing software apps around. While it provides almost unlimited possibilities, finding the right function can be challenging for inexperienced users.
In this article, we’ll help you to change captions in Premiere. Plus, you’ll learn more about the types of captions you should use.
Choosing the Right Caption Type
Creating a standout video isn’t only about covering the right subject and having excellent production values. It’s also essential to work on accessibility, which includes captions and subtitles. While they may sound similar, there is a difference. The transcriptions of the conversations are captions, while translated dialogues are subtitles.
Before you start working with them, you need to choose between open and closed captions. Closed captions are flexible as the users can turn them off or on. Open captions are a part of the video, meaning you can’t interact with them.
Open and Closed Captions: When to Use Them
After editing captions, you need to decide if you want to embed them in a video or make them available as separate files.
You should use open captions if a website doesn’t support a closed caption service. Even if closed captions are available, open captions still have a purpose. They can be seen frequently in movies when someone speaks in a foreign language. You can often see them in YouTube videos in the form of pop-ups that usually point to something on the screen. The main advantage of open subtitles is that they don’t require user input. However, that also means that you can’t turn them off.
You should use closed captions for platforms that support it, which includes Facebook and YouTube. Closed captions let the viewers customize their experience. For example, YouTube gives you the option to turn them on or off. Streaming services or media plays may provide more options, allowing you to change the size, font, or color of closed captions.
Why Is It Essential to Have Captions in Your Videos?
Creating, editing, and syncing captures is time-consuming, but you will be rewarded for your effort. Here are the top three reasons why you should implement captions in your video:
Accessibility
Having captions or subtitles will help reach an audience with hearing problems or those that don’t understand English. But even the viewers that speak perfect English and hear perfectly well prefer videos with captions. That way, they can watch them in silent mode on their smartphones.
More Views
If you post a video with captions on YouTube, both YouTube and Google will boost its position. You can put the transcription in the description box on YouTube, which also helps the search algorithm. However, do that only if your video transcript is short.
Higher View Time
Over 80% of people will watch the entire video if it’s captioned. That makes them marked as relevant by search engine bots and helps increase your position during a user search.
How to Create Captions
Creating captions may take hours, so instead of doing this manually, we suggest two alternatives, based on your budget:
- The transcription service is the best way to convert audio or video to text. Expect to pay $1 or more for every minute of video.
- Use automatic caption services provided by YouTube. Upload a video and enable the machine learning algorithm. While this solution isn’t perfect, it works surprisingly well for recognizing spoken words in English. You’ll need to edit captions manually, but you’ll still save hours. This service is free and available to every YouTube user.
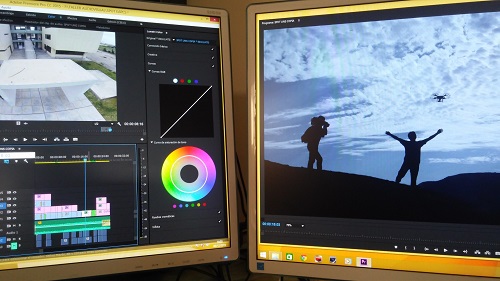
How to Edit Captions in Adobe Premiere Pro – Step by Step
Adobe Premiere Pro gives you the freedom to create captions from scratch. You can also import them, as the app supports popular formats such as .srt, .scc, or sub. But what you may discover is that you need to make corrections. Luckily, the process is intuitive:

- When in the Timeline panel, select the caption file that you want to modify.
- The Caption panel should open automatically, but maybe you’ll need to do it manually. If nothing happens, go to Windows > Captions, and the Caption panel will be displayed.

- Choose the options to modify. You can edit the words or make corrections to timing and the duration. You can also change the captions visually, including color or text alignment.
- You can access text clips from the Timeline. In that panel, you can rearrange segments, do ripple deletes or adjust the captions for proper syncing.

NOTE: The changes you have made to captions might not be reflected in the preview panel. To fix this problem, you need to clear the cache.
- Save and close your project.
- Go to Edit>Preferences>Media Cash.
- In the menu, press delete.
- In the following window, select Delete All Media Cache Files from the system and press OK.
Now you open your project, and the changes you’ve made should be displayed.
Capture the Captions
As you hopefully learned, editing captions in Adobe Premiere is a straightforward process. You can easily adjust the dialogue, sync it, and change its visual identity. While creating captions takes time for some videos, always remind yourself that it will significantly boost your video account while making it more accessible for everyone.
Have you ever changed captions in Adobe Premiere? Did you encounter any problems? Let us know in the comments section below.