Google Docs: How to Edit and Customize Margins

Margins play a vital role in a document’s formatting. It lets you choose the space between the content and the edges of the page, thereby letting you control the document’s layout while ensuring readability. By default, Google Docs gives an inch of margin on each side of a document. However, you might sometimes want to change the margins based on specific requirements. The good news is that you can customize margins in Google Docs easily.
This guide will show you how to add, edit, and customize margins in Google Docs.
Why You Might Want to Change Margins in Google Docs
Changing margins in Google Docs can be helpful for various reasons. You might have certain requirements for the document you are working on. For example, when working on a client proposal, you have received a set of guidelines or formatting requirements that you must adhere to.
You might also want to change margins for various reasons, such as aesthetic preferences, printing considerations, etc. Consider inserting a table of contents in your Google Docs file for easy navigation.
Now, let us cover how you can change margins in Google Docs.
How to Edit and Customize Margins in Google Docs
1. Using Page Setup
You can customize margins in Google Docs using the Page Setup option. Have a look at the detailed tutorial below.
- Open your preferred browser and go to Google Docs.
- Start with a new document or open an existing one.

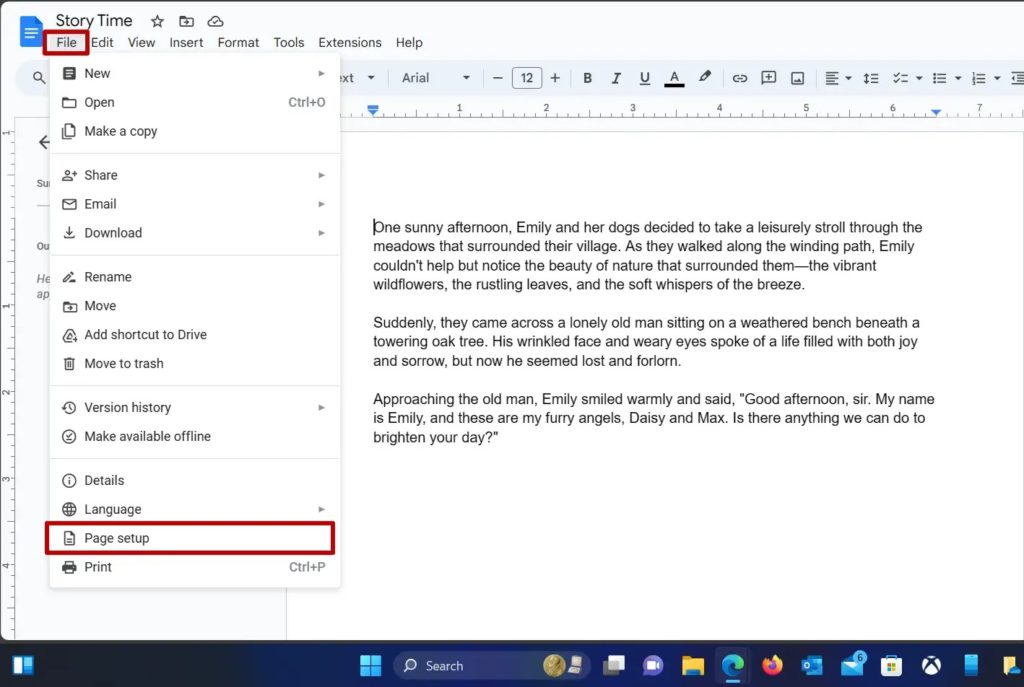
- Navigate to File in the toolbar menu on the top left corner and click on Page Setup.

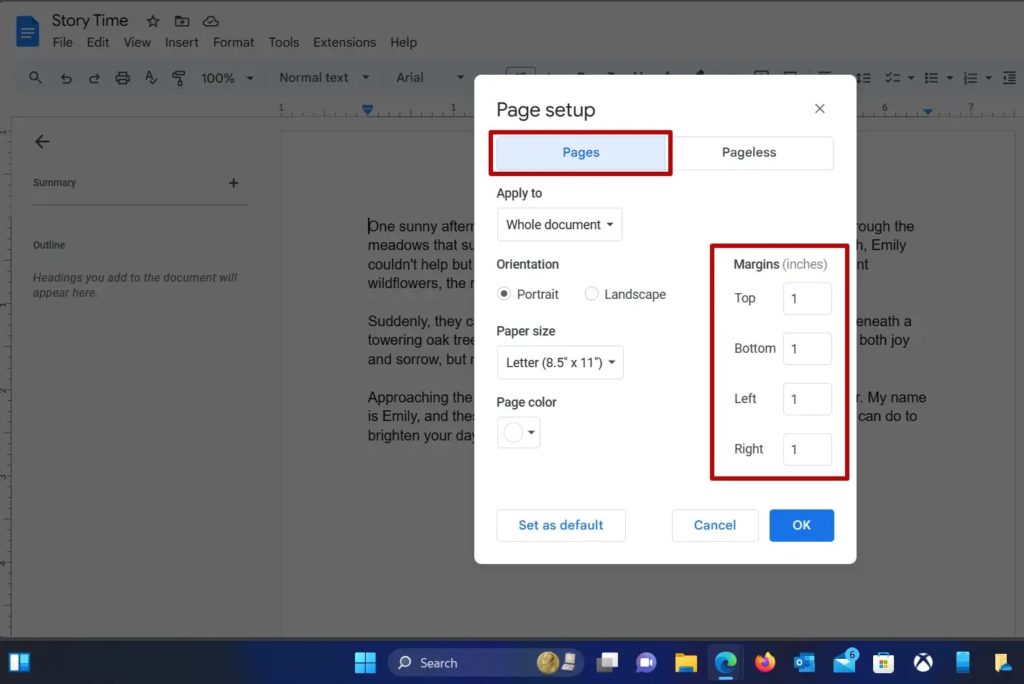
- A new window will appear with the Page Setup menu. Make sure that Pages is selected at the top. Now, you can adjust the margins on all sides of the document.

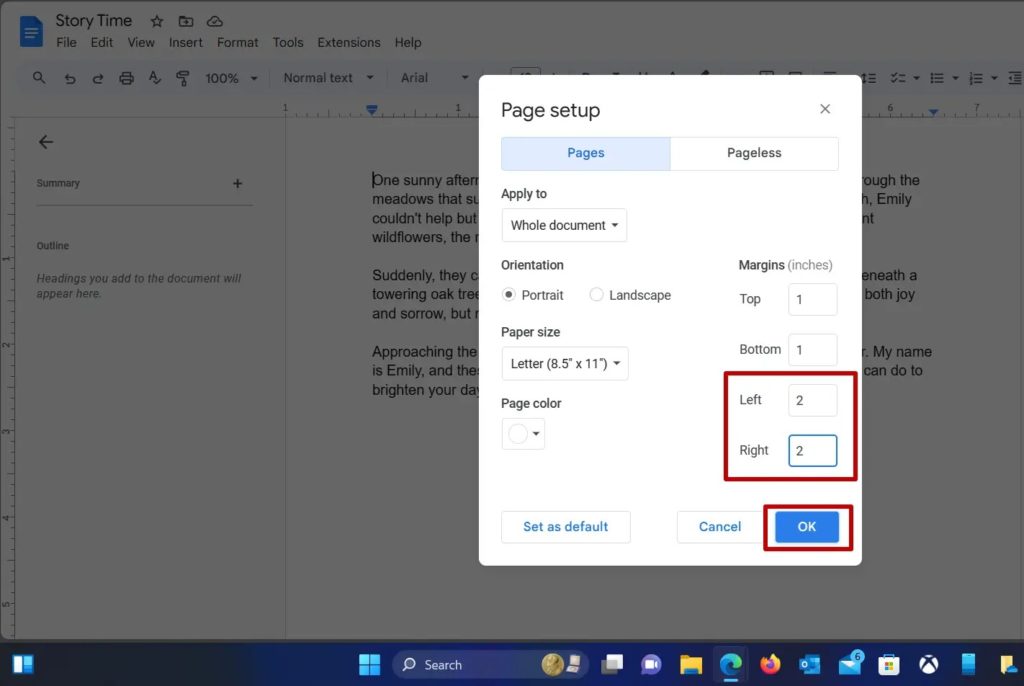
- Enter your desired margins (in inches) for the Top, Bottom, Left, and Right, and click on OK. Your custom margins will now be reflected in the document.
- You can also set your custom margins as default by clicking on Set as default to ensure that future documents adhere to your custom margins.
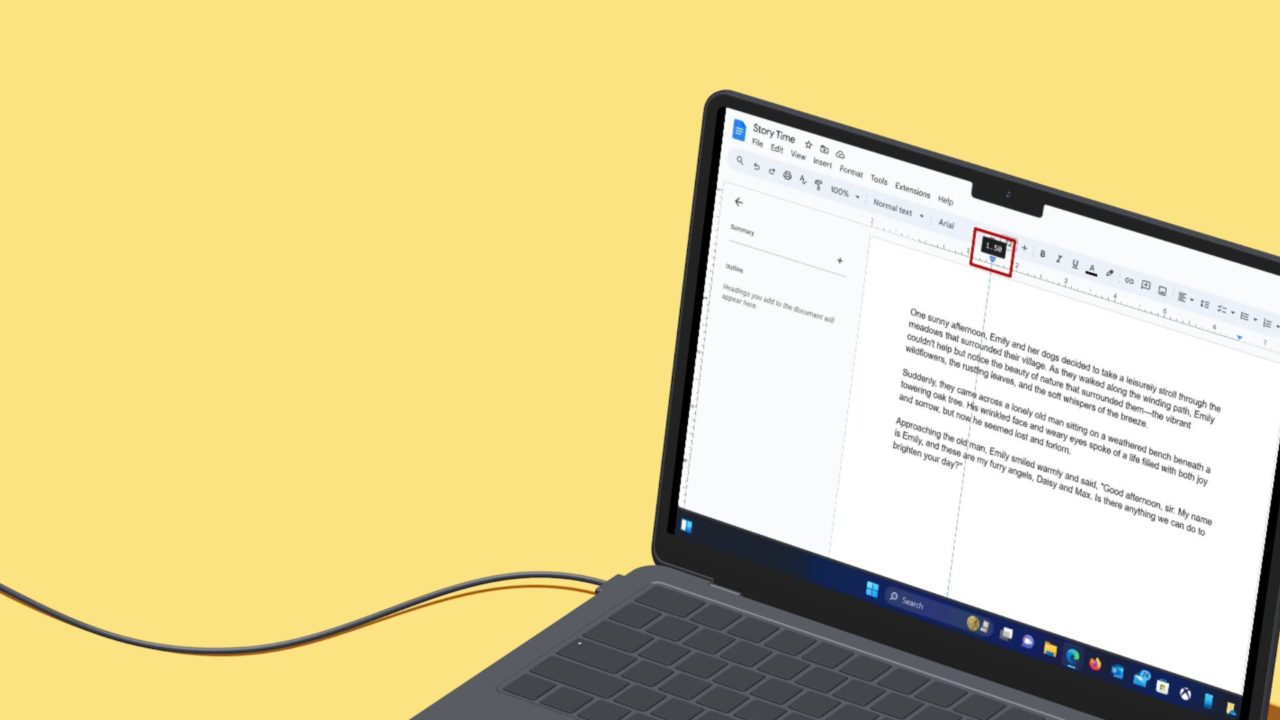
2. Using the Ruler
This method is straightforward, easy to use, and works on a trial-and-error basis. If you want to follow this method, we recommend that the document has at least some content populated to make it easier to adjust the ruler and see the results. You would not be able to see the outcome on a blank document.
- Open the Google Docs file in which you want to change the margins.
- If the document is blank, add some random content to see how it appears when you adjust margins.
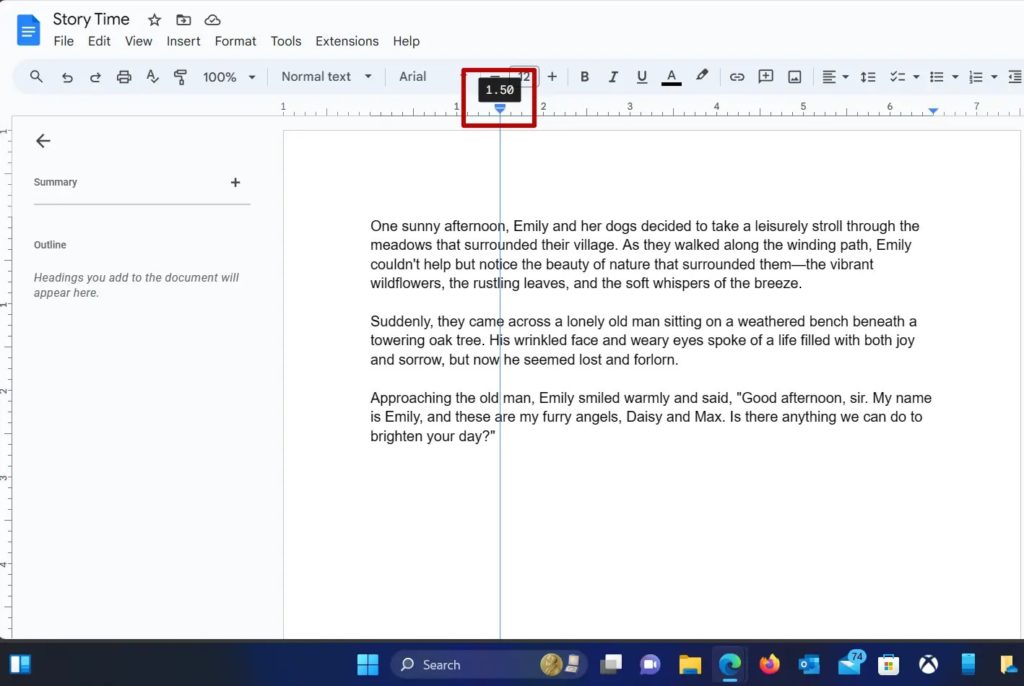
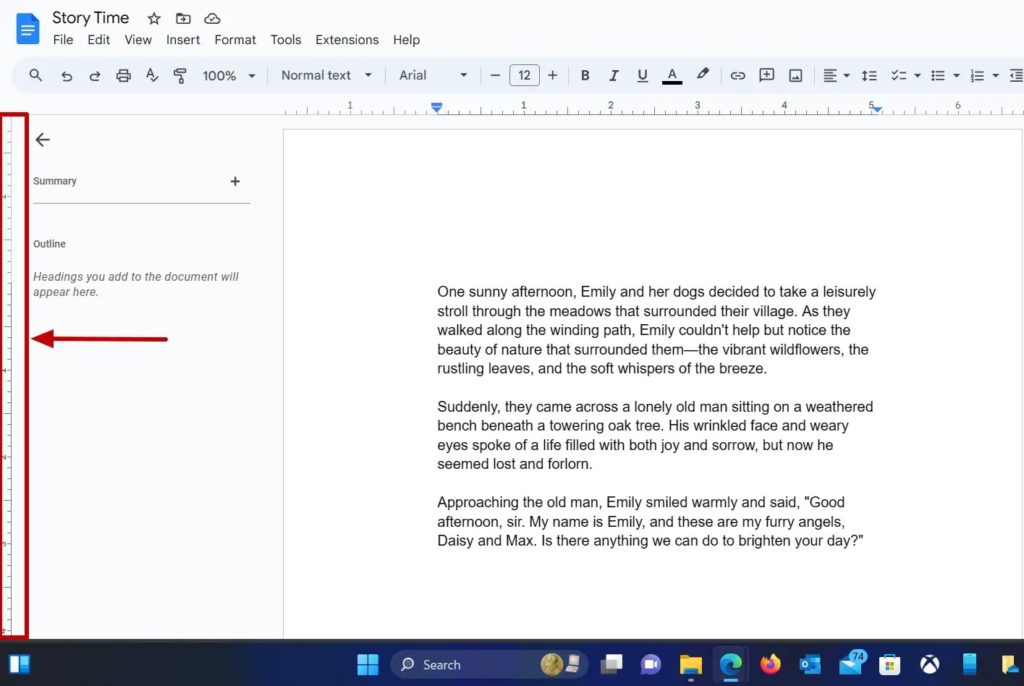
- Now, locate the ruler right below the Settings pane with measurements and a small size blue color inverted triangles on either side.
- Click on the triangle on the left and slide it towards the left or right based on the requirements. This will adjust the margins on the left side. Repeat the same with the triangle on the right to adjust the margins on the right side.
- You can also adjust the top and bottom margins. A black ruler indicates this. Hover your cursor on the ruler and slide up or down to adjust the top margin. Repeat the same for the bottom margins.
- Voila! Now, you have set the desired margins using the ruler in Google Docs.
You can adjust the margin even after changing the orientation of the Google Docs file to landscape mode.
How to Change Margins in Google Docs From Android or iPhone
You can easily change margins on a Google Docs file from your Android or iPhone using the Page Setup menu.
- Open the Google Docs file you want to edit or create a new one.
- Tap on Edit, which is indicated by a pencil icon in the bottom right corner of the screen.

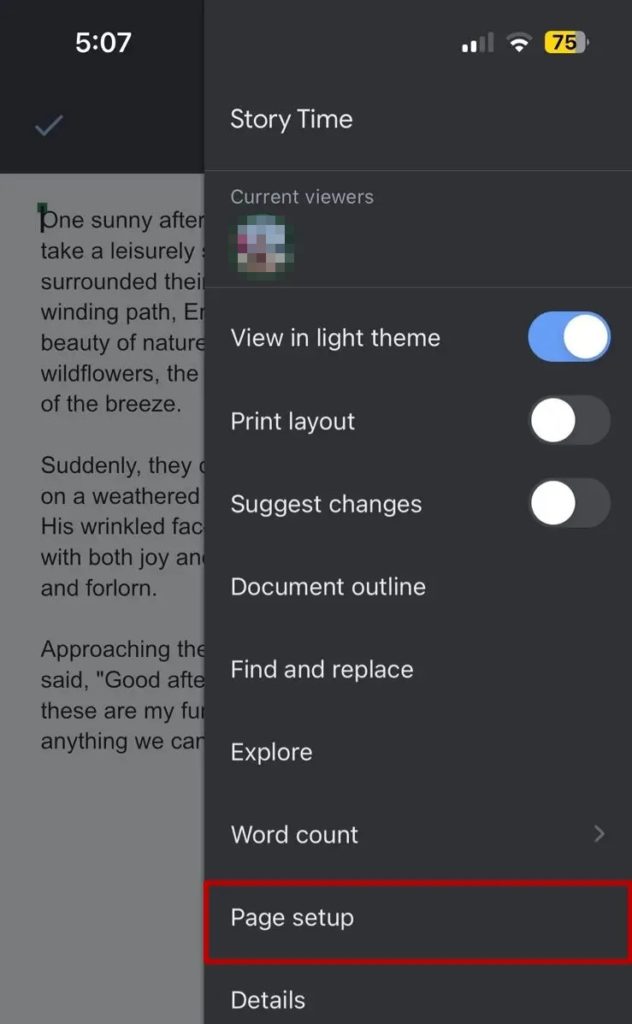
- Tap the three dots in the top right corner.

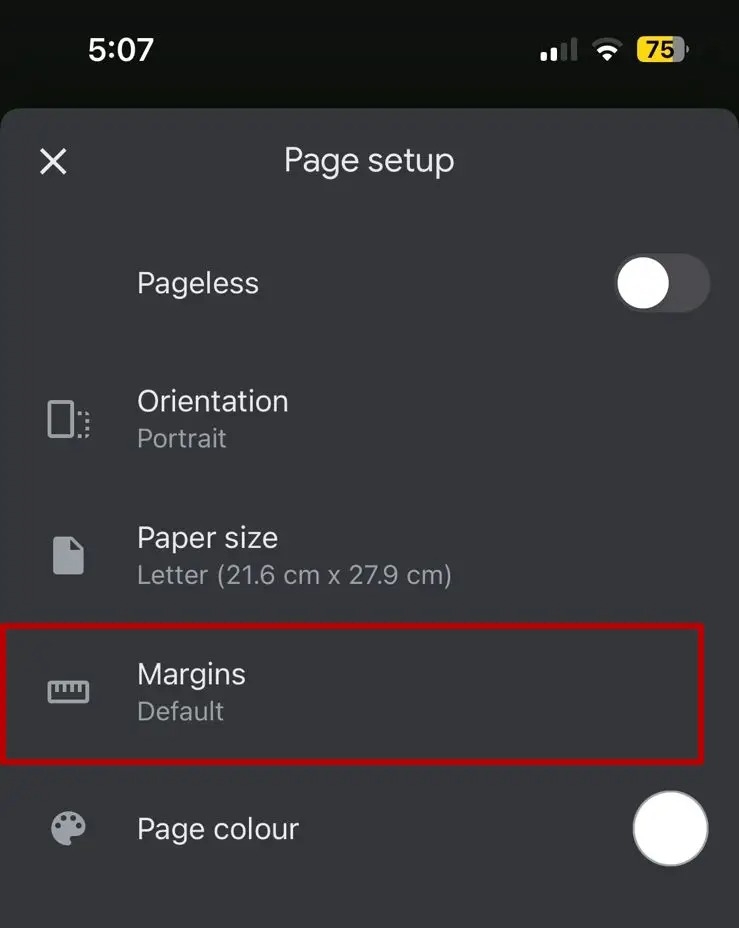
- Tap on the Page Setup option and then on Margins.

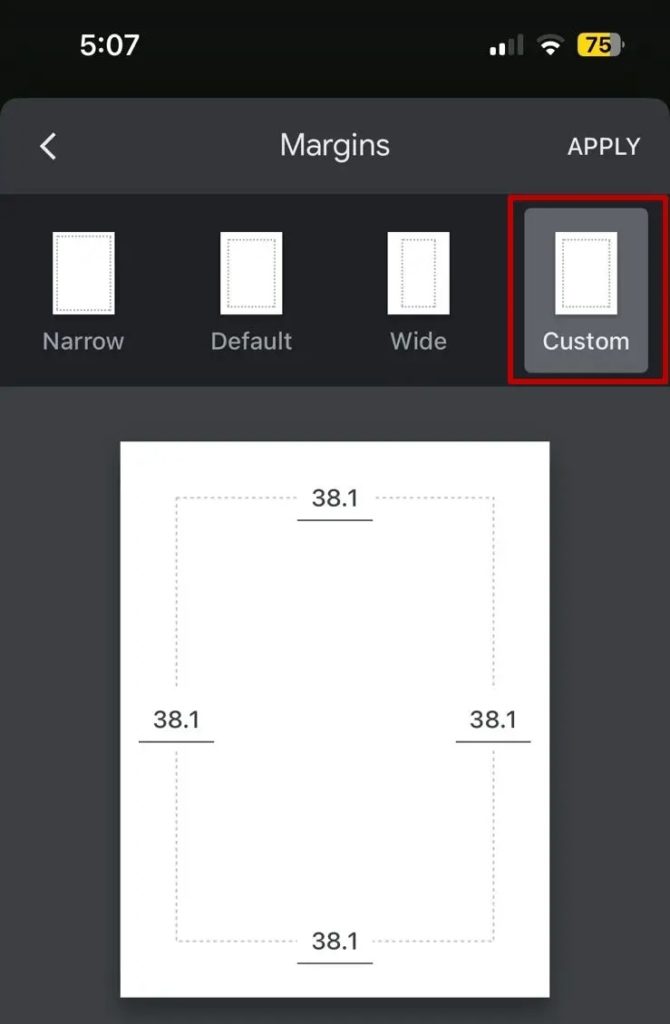
- You will be presented with four options: Narrow, Default, Wide, and Custom.

- Tap Custom and enter the desired margin value for all the sides.
- Tap Apply for the changes to reflect in your current document.
Set The Margins
Google Docs makes it easy to adjust the margins in a document. By tweaking the margin in a Google Docs file, you can tweak its appearance to make it stand out. While margin adjustments may seem small to focus on, they play a significant role in how your document is perceived. We also recommend using hanging indent in Google Docs, as only tweaking the margins won’t work in some cases.
FAQs
A: Use workarounds like text boxes or a single-column table to add text to margins in Google Docs. You can also adjust the page layout by increasing the margin size. Note that these methods may not be as precise as desktop publishing software.
A: If your text exceeds the margins in Google Docs, it could be due to narrow margins, text formatting, objects like images or tables not placed correctly, page breaks, paragraph alignment, multi-column layouts, or printer settings. Adjusting these should solve the problem.