How to Make a Hanging Indent in Google Docs
In hanging indentation, you indent all paragraph lines except the first. This type of indentation is mainly used in academic writing, research papers, and list articles. Are you working on a document in Google Docs and need to use hanging indent for better readability? Wondering where the option is? Follow this guide to learn about making a hanging indent in Google Docs.
What Is a Hanging Indent?
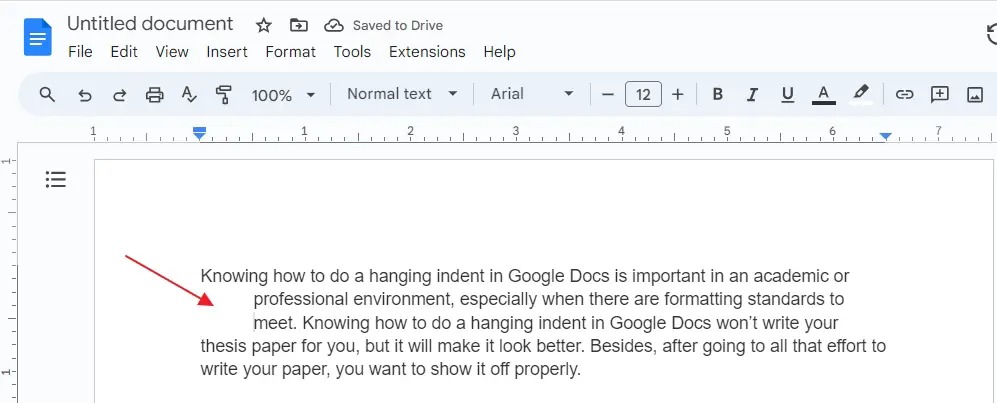
In hanging indent, every line in a paragraph is indented except for the first line, which starts at the margin. This makes it easier for others to read because the first sentence stands out. Another name for a hanging indent is a negative indent or a second-line indent.
This text formatting style is frequently employed by works cited, references, and bibliography pages. Additionally, styles like CMS (Chicago Manual of Style), MLA (Modern Language Association), and APA (American Psychological Association) demand hanging indents.
You can remove all formatting in Google Docs to remove a hanging indent if you don’t like the style.
How to Make a Hanging Indent in Google Docs
You can employ various techniques to format a document with a hanging indent in Google Docs. Below are three methods worth checking.
1. Using the Ruler
Like most word processors, Google Docs offers a built-in ruler that you can use to change the margins and indentations in your documents. By default, it is displayed below the toolbar and holds the fundamental formatting choices you use with the program.
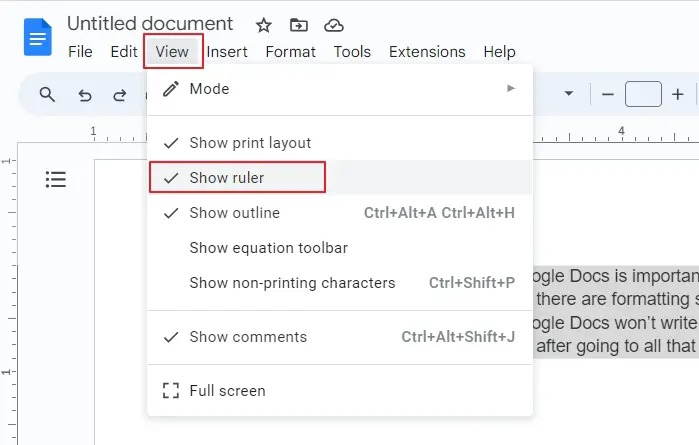
However, if it is not visible, click the View option and choose Show ruler from the context menu.
Once everything is ready, follow the steps below to use the ruler to create a hanging indent in Google Docs.
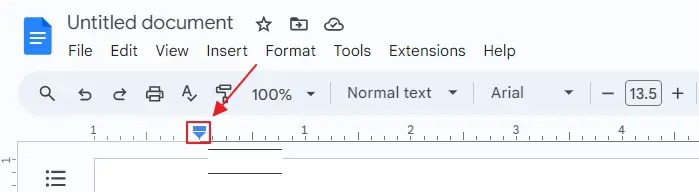
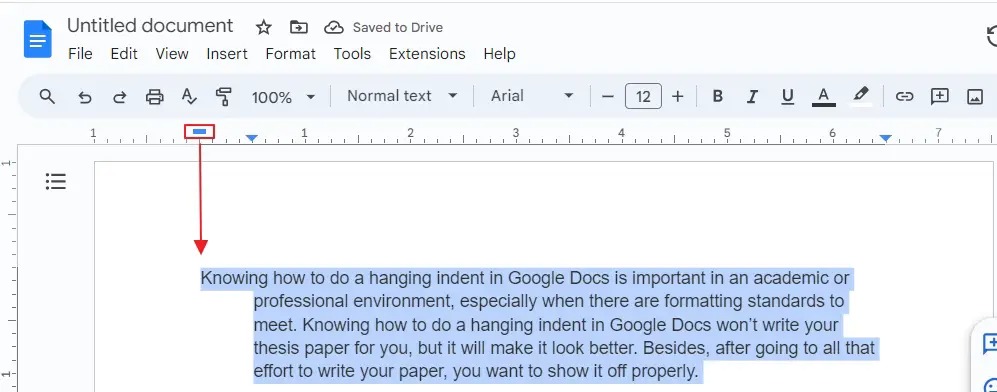
See the blue rectangle on top of a triangle on the ruler in the left margin in the screenshot? Both of these tools will help to make a hanging indent. The blue rectangle indicates the First Line Indent and the blue triangle is for the Left Indent.
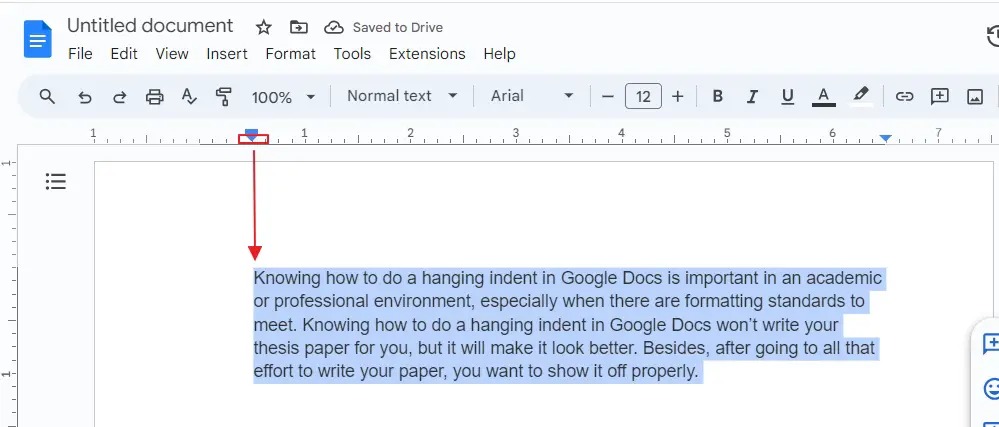
- Select the text that needs to be indented. This could be one paragraph, several paragraphs, or even a whole essay.
- Drag the blue inverted triangle representing the Left Indent marker to the right. The marker can be positioned anywhere you want the hanging indent to start. A typical indent is approximately half an inch (0.50). The rectangle moves along as you do this, and the highlighted text is all indented.

- Drag the blue rectangle-shaped First Line Indent marker back to the left margin where it was before (0.00). Your highlighted text now has a hanging indent.

You must highlight all the content and repeat the previous steps to add a hanging indent to the Google Docs file. You can also follow these steps to apply hanging indent to only specific sections or paragraphs.
Make sure the indentations follow the margins correctly in the Google Docs file; otherwise, it can be a problem if you plan to print the document.
2. Using the Indentation Options on Google Docs
Besides the manual approach as explained in the first method, you can use Google Docs’ built-in indentation options to create hanging indents.
- Open the Google Docs document and select the text you want to indent.
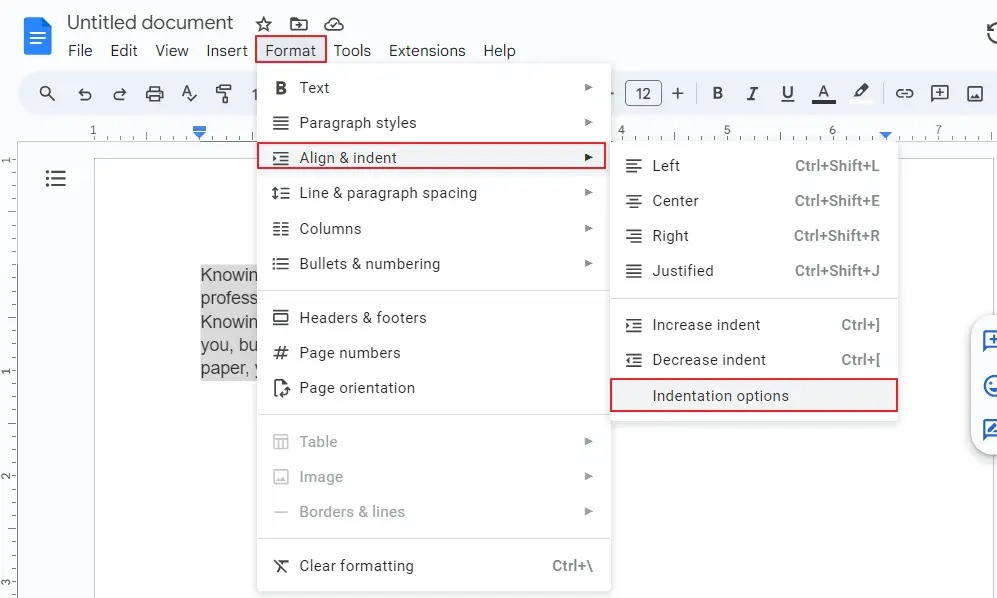
- Click the Format tab on top of the document.
- Click the Align & indent option. Next, click Indentation options.

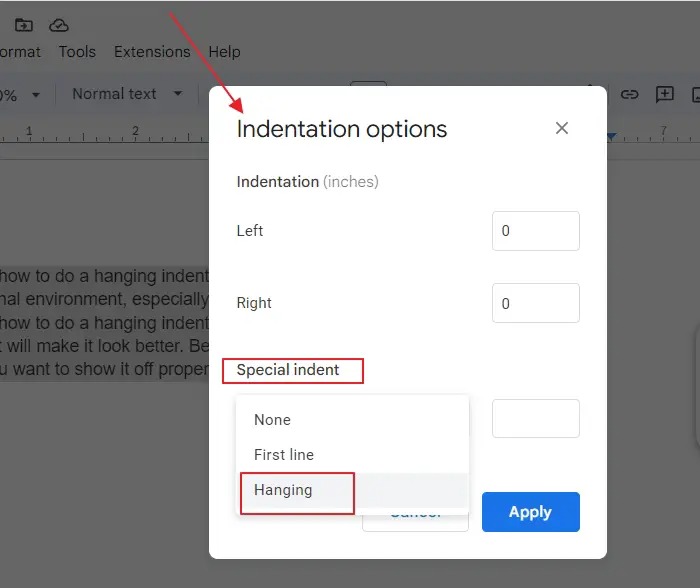
- From the pop-up window, click the drop-down box under Special indent and select the Hanging option.

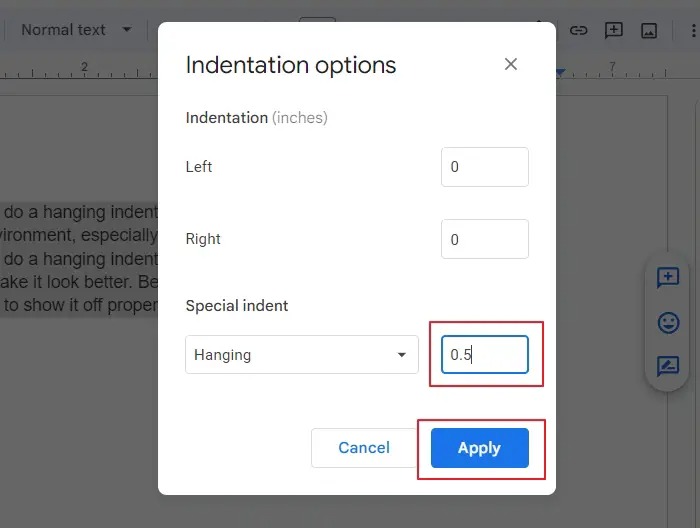
- Type the amount of indentation (in inches) into the box next to it and click Apply to use hanging indent on the selected text.

Using a hanging indent won’t affect the page numbers you have added to the Google Docs file.
3. Using Keyboard Shortcuts
In this method, you can utilize keyboard shortcuts if you prefer to view your hanging indents as you type your text in Google Docs.
- After you are done typing the paragraph, which requires a hanging indent on your Google document, place the typing cursor at the beginning of the second line of the paragraph.
- Press the Shift key on your keyboard, followed by the Enter key. Next, press the Tab key to create an indent for the line.
- To indent the rest of the lines, repeat the same steps above.
Hanging Indent Makes Reading Easy
The ability to read information more efficiently is one of the most common explanations for using hanging indent. Additionally, this indentation gives you more room near the margins, which can be useful if you plan to print the document later on and take notes. The third approach is undoubtedly far more time-consuming than the other two strategies we have looked at. You can choose what works best for you. When working with large documents, consider adding a table of contents to the Google Docs file for easier navigability.
FAQs
A: Select the entire text and choose Format > Align and indent > Indentation options. Next, select the Hanging option from the drop-down menu under the Special indent heading. Finally, type 0.5 in the text box next to the Hanging option, and click Apply to make a 0.5 hanging indent for the chosen text.
A: There are three types of indents on Google Docs. First Line Indent Marker modifies a paragraph’s first line indent. The Left Indent Marker moves in unison with the First Line Indent marker to indent each line in the paragraph. The third is the Right Indent Marker, which changes the right indent by repositioning the paragraph’s lines from the right margin.