How to Blur an Image in Adobe Lightroom

Adobe Lightroom is a convenient photo managing tool that can also act as a photo editor. Since it has some features implemented from Photoshop and some editors use it to adjust and improve their images.
Lightroom is especially suitable for those who need to modify many images at once and sort them. However, there seems to be an important editing feature that’s lacking – an option to blur an image.
There’s nothing to worry about, however, as you can still blur an image with Lightroom. You’ll just need to modify your approach a bit. This article will show you how to do it.
Step One: Prepare the Image
The blurring method is quite different in Lightroom compared to other image editing tools. Although you can use this tool to edit and manage multiple images at once, you can only blur one image at a time. So, first, you got to import the image that you’re going to use.
- Click the ‘Import’ button on the bottom left of the screen.
- Drag and drop an image from your file manager to the library window.
- Alternatively, you can click the ‘Import’ button again and manually navigate to the image folder before you select it.

- Move your mouse to the top of the screen for the menu to appear.
- Select the ‘Develop’ tab. This will open the toolbars that will help you modify your image.

Now that you’ve imported and prepared the image, it’s time to blur it.
Step Two: Select the Blurring Area
To apply blurred background in Lightroom, you essentially need to make a layer mask around the focal point of your image. When you’ve done it, you can apply the blurred mask to the marked area which will achieve the desired effect.
However, the process requires a few steps. Do the following:
- Select the ‘Adjustment Brush’ button on the pane to the right. This will open a menu with a bunch of effects.

- Click the ‘New’ button underneath so you can start creating a layer mask.
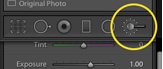
- Select ‘Show Selected Mask Overlay’ below the picture so the tool automatically marks the path of your layer mask.

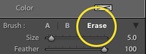
- Choose the desired brush effect. You can pick between a preset one or creating your own custom brush. When you want to blur background with a sensitive focal point (rough edges, tiny details, etc.) it’s best to customize a small brush. If you need to blur a huge area, a large brush may be a better choice. Brush ‘Flow’ determines the stroke intensity, while the ‘Feather’ option determines the softness of the brush.
- Use the brush to paint the background area as precise as you can. Make sure to be patient and detailed around the edges of your focus object.
- You can undo any mistakes by clicking the ‘Erase’ button in the menu to the right.


Step 3: Add the Blurring Effect
Once you’re satisfied with the layer mask on your background, it’s time to add the blurring effect. The two customization options you should use are clarity and sharpness. They are both in the Customizations menu to the right.
Make sure you’re following these steps if you want to do everything properly:
- Uncheck the ‘Show Selected Mask Overlay’ button. The mask will disappear, however, the marked area will remain. You need to remove the layer mask so you can make your adjustments.
- Move the values of the ‘Clarity’ and ‘Sharpness’ options to -100 (the lowest possible).
- This will blur the image.
If you’re still unsatisfied with the blur effect, you can repeat the whole process again, adding another layer mask and reducing clarity and sharpness. This will add an even better blurring effect. You can repeat it as many times as you want until you are satisfied with your image.
Step 4: Save the Image
When you’re done with the image, Lightroom will store it in its library. Since it is non-destructive software, it won’t modify the original image file by default. If you want to store your new work, you’ll need to do it manually.
- Click the ‘Done’ button on the bottom right, below the edited image.

- Select the ‘Library’ tab on the top-right of the screen.
- Choose your photo.
- Click the ‘Export’ button on the bottom-left, next to the ‘Import’ button that you’ve used in the first step.

- Name the new image and choose the destination folder.
Blurring Is a Piece of Cake
As you can see, Lightroom offers a non-conventional burring effect. In popular quick image editing tools such as the one for Instagram, you can blur a picture in a matter of seconds.
However, with this kind of blurring, you have a much better control of the blurring area and the intensity. You can also apply other effects to the layer mask and experiment with your image. That’s why blurring in Lightroom can provide stunning results, unlike the default effects and filters of simple apps.
Now that you know how to blur images in Adobe Lightroom, would you recommend it? Or do you prefer blurring them with simpler tools? Share your opinions in the comments below.