


How to Save Google Photos to a Gallery


With near everybody taking so many photos on a daily basis, it’s great to be able to keep them all safe in the cloud. If you automatically back up all your photos to your online storage, you can even delete them from your phone to save space.
Thanks to Google Photos’ user-friendly interface, updating your online photo library is so simple today. But, what if you want to transfer your photos from the cloud to your phone? Worry not, as you can do that as well.
From Google to Your Phone
By default, online storage services are intended to keep your files in the cloud and safely at that. Of course, they also allow you to download any of the stored content to your device. Depending on your needs, you can do that in one of two ways.
The most obvious is to simply select the photos that you want to transfer to your phone and download them. That’d include the entire Google Photos library, for which there are a few options you’ll need to set first.

Select Photos to Save
As a basic feature of Google Photos, this is quite simple.
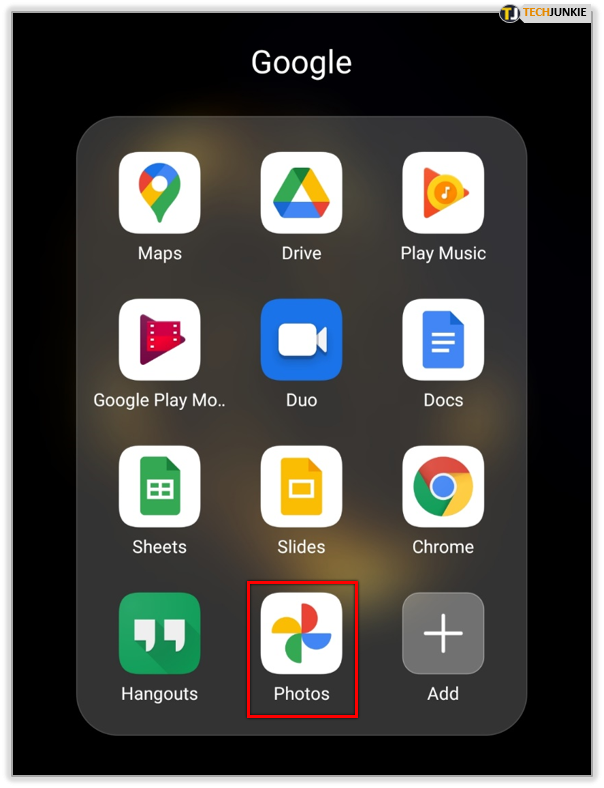
- Open the Google Photos app on your smartphone.

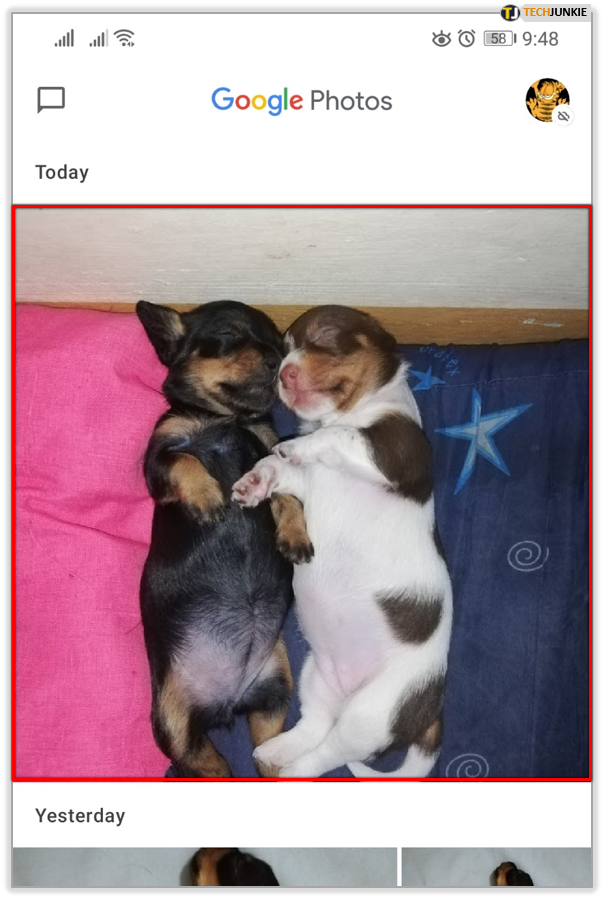
- Tap the desired photo.

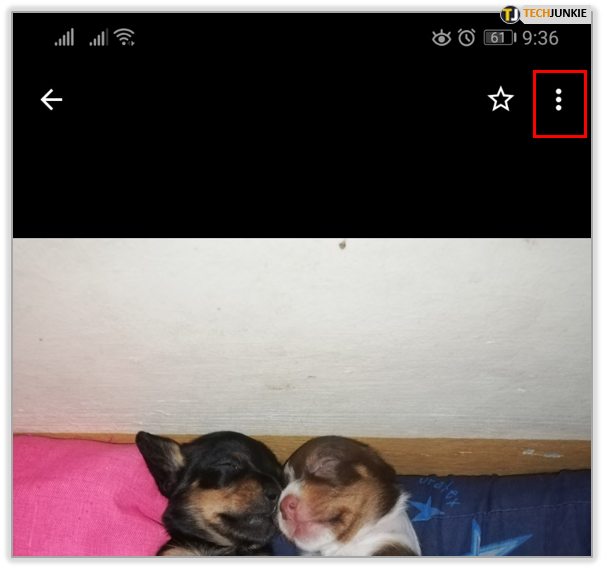
- Now tap the three dots icon in the top-right corner of the screen.

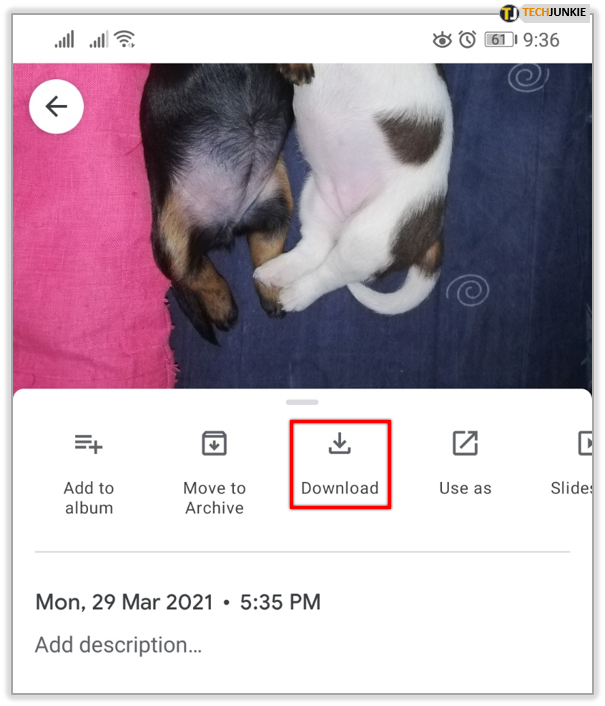
- Tap “Download.”

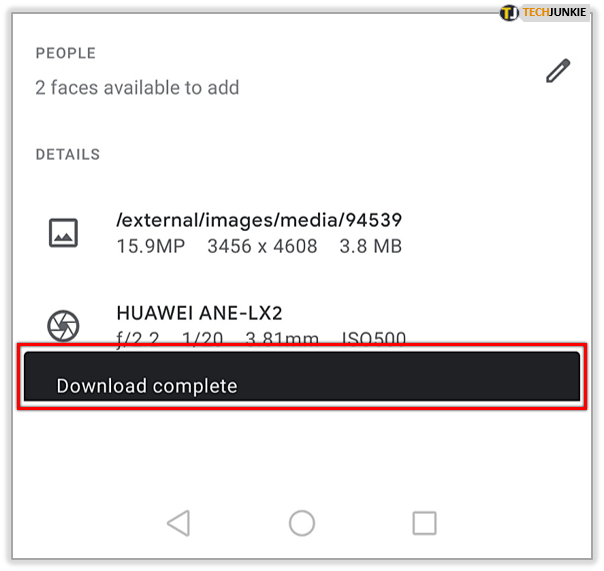
- The photos should now download from Google Photos to your phone’s default gallery.


If you’ve selected a photo that’s already on your phone, the option “Download” won’t appear.
Save All Photos
If you’ve decided to download all your Google Photos to your phone, you have a few options.
- Open Google Photos on your phone.
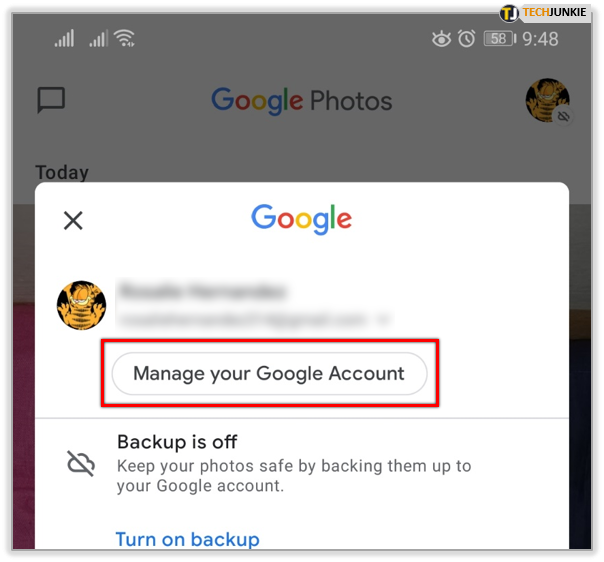
- Tap your account image in the top-right corner of the screen.

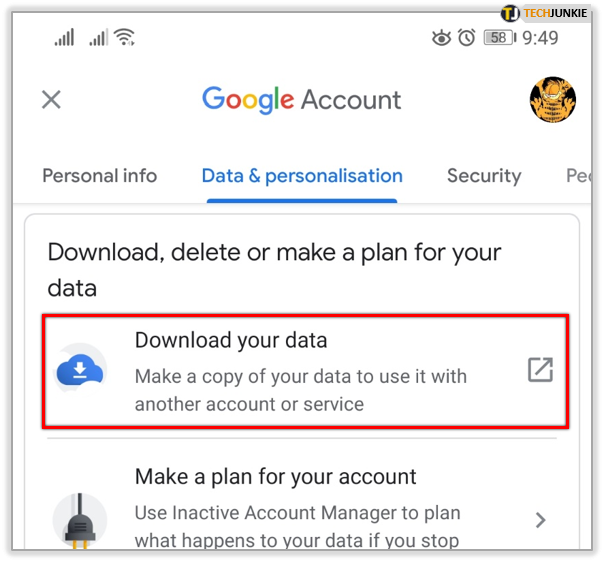
- Tap “Manage your Google Account.”

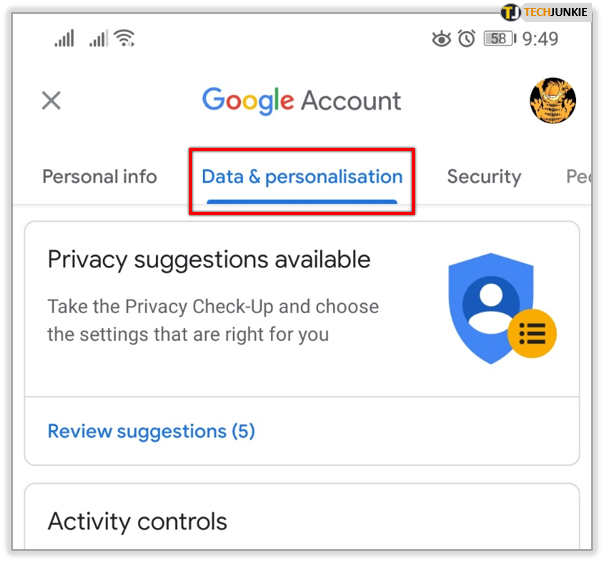
- Tap the “Data & personalization” tab.
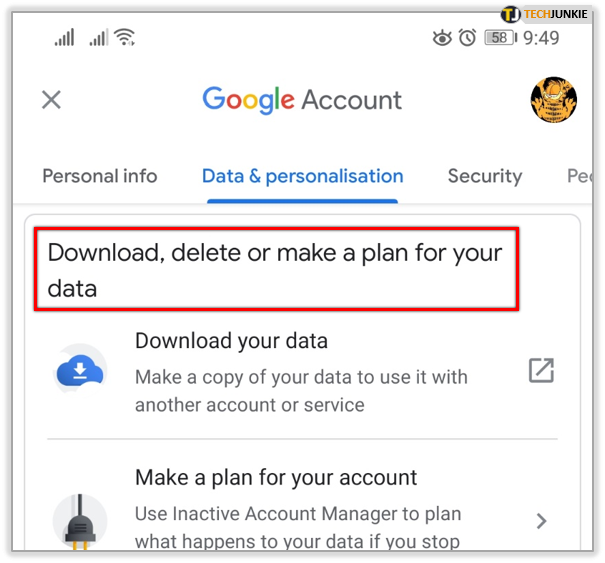
- Scroll down to “Download, delete or make a plan for your data.”

- Tap “Download your data.”
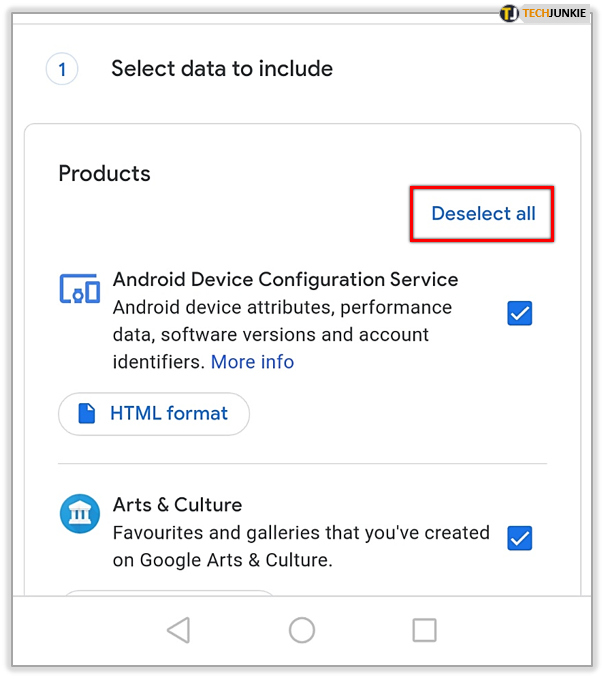
- When Google Takeout opens, tap “Deselect all.”

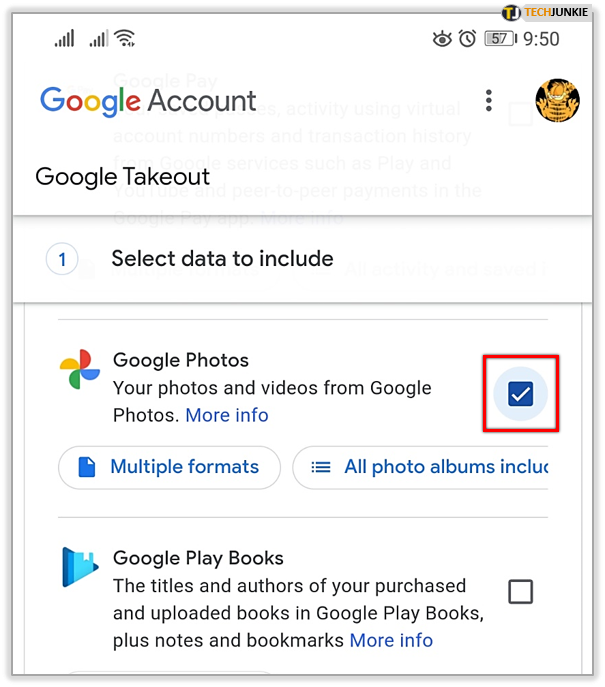
- Scroll down to the “Google Photos” entry and tap the checkbox to the right.

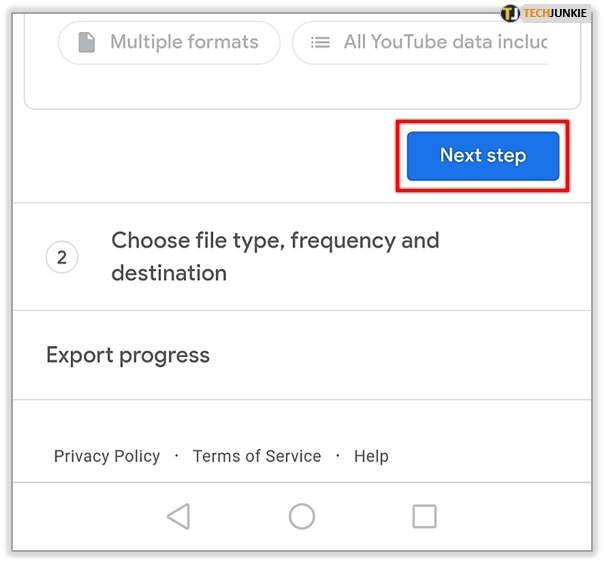
- Scroll down to the bottom of the page and click “Next step.”

- In the next screen, the delivery method should be set to “Send download link via email.”

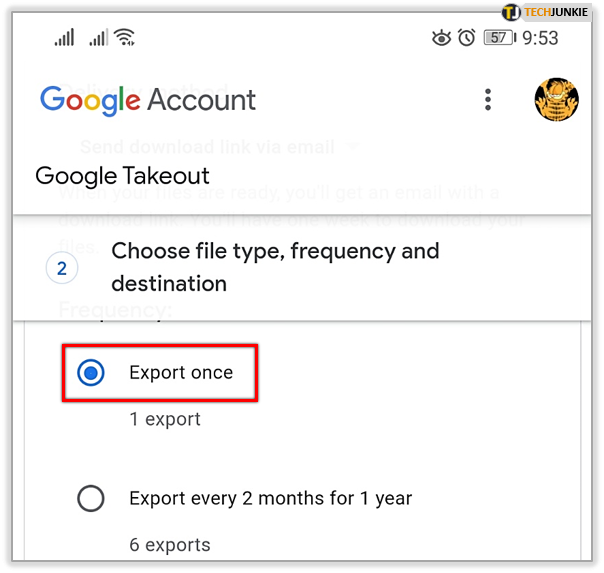
- Set “Frequency” to “Export once.”

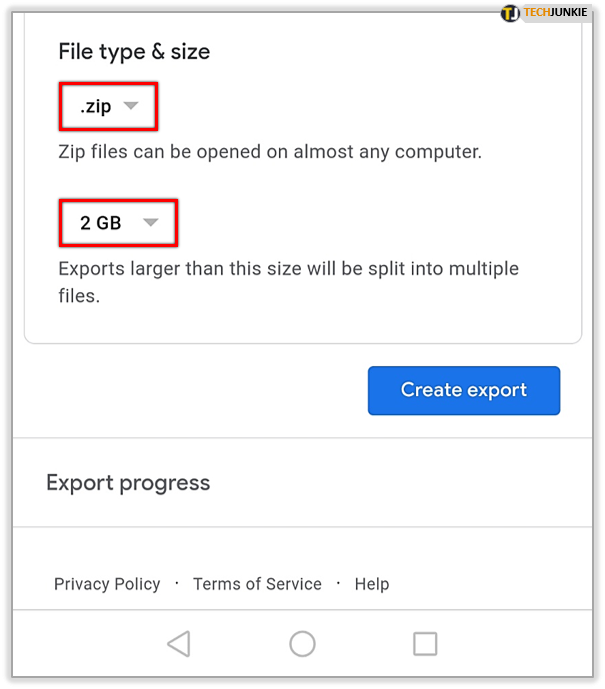
- “File type & size” should be set to “.zip” and “2 GB.”

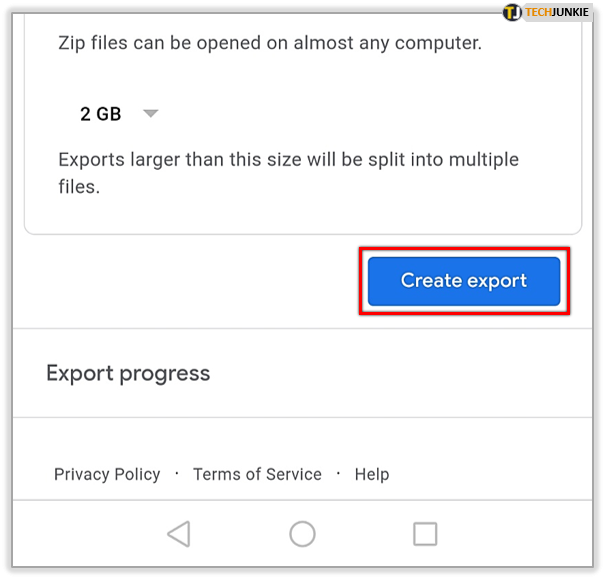
- Now tap “Create export.”


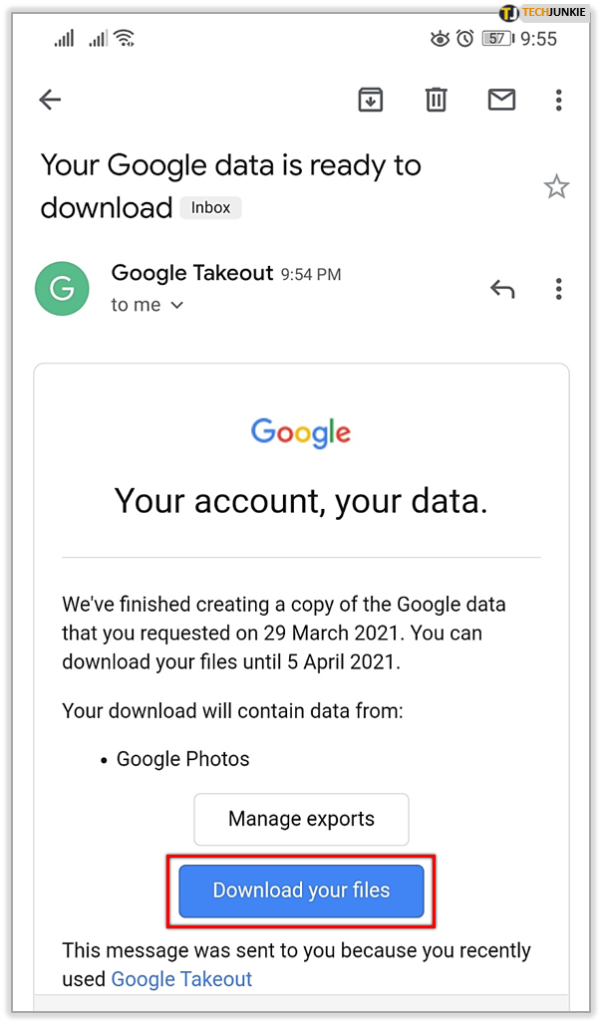
When Google is finished preparing your download, you’ll receive a link to your email. Use it to download the .zip file that contains your photos. After it’s downloaded, the next step is to unzip that archive to your phone. After that’s done, the photos will appear in your phone’s gallery. When unzipping, you can also choose to create a folder for all these photos or use an existing one.
If your Google Photos library’s count is in the thousands, perhaps it’d be best to do this on your computer first. After the download is over, you can unzip the archive to your computer and then transfer it to your phone using a USB cable. You wouldn’t have to stress if your phone has enough space to download and unzip the archive.
Photos Transferred Successfully
Best of luck to your attempt to download any photos to your phone’s gallery. Just to be sure you don’t lose your photos, it’s best to leave a copy in Google Photos as well. You can save some space on your phone and have access to your photos across all devices.
Have you managed to transfer the photos to your phone? Will you consider keeping a copy on Google Photos? Don’t forget to share your thoughts in the comments section below.


One thought on “How to Save Google Photos to a Gallery”
Or play my Google Albums on the Show